What is PHP?


Cheap reseller Hosting


What is PHP? 

PHP

 PHP (recursive acronym for PHP: Hypertext Preprocessor) is a widely-used open source general-purpose scripting language that is especially suited for web development and can be embedded into HTML. In an HTML document, PHP script (similar syntax to that of Perl or C ) is enclosed within special PHP tags. Because PHP is embedded within tags, the author can jump between HTML and PHP (similar to ASP and Cold Fusion) instead of having to rely on heavy amounts of code to output HTML. And, because PHP is executed on the server, the clientcannot view the PHP code.

PHP can perform any task that any CGI program can do, but its strength lies in its compatibility with many types of databases. Also, PHP can talk across networks using IMAP, SNMP, NNTP, POP3, or HTTP.

How to update  PHP version? 

1) To update Apache’s instance of PHP, run the /usr/local/cpanel/scripts/phpup script from the command line.
2) To change the version of Apache’s instance of PHP, run EasyApache in WHM (Home >> Software >> EasyApache (Apache Update)) or run the /usr/local/cpanel/scripts/easyapache script on the command line.
How do I update the instance of PHP that cPanel uses?

1) The system uses RPM to update PHP. For more information, read the rpm.versions documentation.

If I install a custom instance of PHP, will it work with cPanel & WHM?

The system uses RPM to update PHP. For more information, read the rpm.versions documentation.


Cheap web Hosting


What is suPHP ?


Cheap reseller Hosting


What is suPHP ?

suphp_logo

suPHP is a tool for executing PHP scripts with the permissions of their owners or a program that controls who can access certain files. All scripts executed on the server need to be authorized to run on the server. This enhances security by not running scripts as the web server user (nobody) or as root. So even if there is a vulnerable php script installed, it can at most execute with the permissions of the non-privileged user you choose for it to use.

PHP scripts are interpreted by suPHP and suPHP then calls the php interpreter as the specified user and interprets the scripts as that user.

1) Log into the WHM

2) Go to Main » Software » EasyApache (Apache Update).

3) Leave Previously Saved Config checked and select Start Customizing Based on Profile.

4) For security reason we recommend selecting the latest versions of Apache and PHP on the next three steps unless you have good reason to stick with an older version.

5) will have a screen with quite a few options on it, the one we are concerned about is the second option SuPHP. Tick the checkbox here, scroll down

6) click Save and Build.

Why use suPHP?

 suPHP is of great importance to ensure a safe environment for running applications and to make PHP-based applications such as Drupal more user-friendly. To be specific, users install or upload any template via Drupal without suPHP, their template files can be edited or deleted by any user at random. But for scripts equipped with a suPHP server, their template files are owned by the account holder and admin user.

Moreover, as most of the third party applications ask for some certain folders to have the permissions of 777, hackers with the 777 permission are able to upload malicious files into user’s account which probably affects the security of the files. As to suPHP users, there is no need to have the 777 permissions and an automated error message will appear when somebody tries to approach the file through 777 permissions.


Cheap web Hosting


How to Change your Default Timezone in htaccess


Cheap reseller Hosting


Changing your Default Timezone:


The default time zone setting that is displayed in the Preferences>Global folder is used to localize the time for received messages and calendar activities in the standard web client.

1) Log in to yor cpanel

2) Click on the file Manager icon

3) Click on web Root Radio button

4) Click on the dropdown and find your desired addon domain name.

5) Set the Show Hidden Files

6) Click the Go button

7) Look for the .htaccess file and right click on it

8) Click on the Edit option

9) Find and click the Edit button in the lower right corner to continue to the editor.

10) Now In this example, we are setting the timezone to Eastern Standard Time.

#Adjust default time zone
SetEnv TZ America/Washington

11) Click Save Changes button to save your new htaccess configuration.


                                                Or


If htaccess can’t solve your problem, add this code to your php

<?php
putenv(“TZ=Europe/Istanbul”);
?>

Full List of Time Zone

AD Europe/Andorra

AE Asia/Dubai

AF Asia/Kabul

AG America/Antigua

AI America/Anguilla

AL Europe/Tirane

AM Asia/Yerevan

AN America/Curacao

AO Africa/Luanda

AQ Antarctica/McMurdo

AQ Antarctica/South_Pole

AQ Antarctica/Palmer

AQ Antarctica/Mawson

AQ Antarctica/Davis

AQ Antarctica/Casey

AQ Antarctica/DumontDUrville

AR America/Buenos_Aires

AR America/Rosario

AR America/Cordoba

AR America/Jujuy

AR America/Catamarca

AR America/Mendoza

AS Pacific/Pago_Pago

AT Europe/Vienna

AU Australia/Lord_Howe

AU Australia/Hobart

AU Australia/Melbourne

AU Australia/Sydney

AU Australia/Broken_Hill

AU Australia/Brisbane

AU Australia/Lindeman

AU Australia/Adelaide

AU Australia/Darwin

AU Australia/Perth

AW America/Aruba

AZ Asia/Baku

BA Europe/Sarajevo

BB America/Barbados

BD Asia/Dacca

BE Europe/Brussels

BF Africa/Ouagadougou

BG Europe/Sofia

BH Asia/Bahrain

BI Africa/Bujumbura

BJ Africa/Porto-Novo

BM Atlantic/Bermuda

BN Asia/Brunei

BO America/La_Paz

BR America/Noronha

BR America/Belem

BR America/Fortaleza

BR America/Araguaina

BR America/Maceio

BR America/Sao_Paulo

BR America/Cuiaba

BR America/Porto_Velho

BR America/Manaus

BR America/Porto_Acre

BS America/Nassau

BT Asia/Thimbu

BW Africa/Gaborone

BY Europe/Minsk

BZ America/Belize

CA America/St_Johns

CA America/Halifax

CA America/Glace_Bay

CA America/Goose_Bay

CA America/Pangnirtung

CA America/Montreal

CA America/Nipigon

CA America/Thunder_Bay

CA America/Iqaluit

CA America/Winnipeg

CA America/Rainy_River

CA America/Rankin_Inlet

CA America/Regina

CA America/Swift_Current

CA America/Edmonton

CA America/Yellowknife

CA America/Inuvik

CA America/Dawson_Creek

CA America/Vancouver

CA America/Whitehorse

CA America/Dawson

CC Indian/Cocos

CD Africa/Kinshasa

CD Africa/Lubumbashi

CF Africa/Bangui

CG Africa/Brazzaville

CH Europe/Zurich

CI Africa/Abidjan

CK Pacific/Rarotonga

CL America/Santiago

CL Pacific/Easter

CM Africa/Douala

CN Asia/Harbin

CN Asia/Shanghai

CN Asia/Hong_Kong

CN Asia/Chungking

CN Asia/Urumqi

CN Asia/Kashgar

CO America/Bogota

CR America/Costa_Rica

CU America/Havana

CV Atlantic/Cape_Verde

CX Indian/Christmas

CY Asia/Nicosia

CZ Europe/Prague

DE Europe/Berlin

DJ Africa/Djibouti

DK Europe/Copenhagen

DM America/Dominica

DO America/Santo_Domingo

DZ Africa/Algiers

EC America/Guayaquil

EC Pacific/Galapagos

EE Europe/Tallinn

EG Africa/Cairo

EH Africa/El_Aaiun

ER Africa/Asmera

ES Europe/Madrid

ES Africa/Ceuta

ES Atlantic/Canary

ET Africa/Addis_Ababa

FI Europe/Helsinki

FJ Pacific/Fiji

FK Atlantic/Stanley

FM Pacific/Yap

FM Pacific/Truk

FM Pacific/Ponape

FM Pacific/Kosrae

FO Atlantic/Faeroe

FR Europe/Paris

GA Africa/Libreville

GB Europe/London

GB Europe/Belfast

GD America/Grenada

GE Asia/Tbilisi

GF America/Cayenne

GH Africa/Accra

GI Europe/Gibraltar

GL America/Scoresbysund

GL America/Godthab

GL America/Thule

GM Africa/Banjul

GN Africa/Conakry

GP America/Guadeloupe

GQ Africa/Malabo

GR Europe/Athens

GS Atlantic/South_Georgia

GT America/Guatemala

GU Pacific/Guam

GW Africa/Bissau

GY America/Guyana

HN America/Tegucigalpa

HR Europe/Zagreb

HT America/Port-au-Prince

HU Europe/Budapest

ID Asia/Jakarta

ID Asia/Ujung_Pandang

ID Asia/Jayapura

IE Europe/Dublin

IL Asia/Jerusalem

IN Asia/Calcutta

IO Indian/Chagos

IQ Asia/Baghdad

IR Asia/Tehran

IS Atlantic/Reykjavik

IT Europe/Rome

JM America/Jamaica

JO Asia/Amman

JP Asia/Tokyo

KE Africa/Nairobi

KG Asia/Bishkek

KH Asia/Phnom_Penh

KI Pacific/Tarawa

KI Pacific/Enderbury

KI Pacific/Kiritimati

KM Indian/Comoro

KN America/St_Kitts

KP Asia/Pyongyang

KR Asia/Seoul

KW Asia/Kuwait

KY America/Cayman

KZ Asia/Almaty

KZ Asia/Aqtobe

KZ Asia/Aqtau

LA Asia/Vientiane

LB Asia/Beirut

LC America/St_Lucia

LI Europe/Vaduz

LK Asia/Colombo

LR Africa/Monrovia

LS Africa/Maseru

LT Europe/Vilnius

LU Europe/Luxembourg

LV Europe/Riga

LY Africa/Tripoli

MA Africa/Casablanca

MC Europe/Monaco

MD Europe/Chisinau

MG Indian/Antananarivo

MH Pacific/Majuro

MH Pacific/Kwajalein

MK Europe/Skopje

ML Africa/Bamako

ML Africa/Timbuktu

MM Asia/Rangoon

MN Asia/Ulan_Bator

MO Asia/Macao

MP Pacific/Saipan

MQ America/Martinique

MR Africa/Nouakchott

MS America/Montserrat

MT Europe/Malta

MU Indian/Mauritius

MV Indian/Maldives

MW Africa/Blantyre

MX America/Cancun

MX America/Mexico_City

MX America/Mazatlan

MX America/Chihuahua

MX America/Ensenada

MX America/Tijuana

MY Asia/Kuala_Lumpur

MY Asia/Kuching

MZ Africa/Maputo

NA Africa/Windhoek

NC Pacific/Noumea

NE Africa/Niamey

NF Pacific/Norfolk

NG Africa/Lagos

NI America/Managua

NL Europe/Amsterdam

NO Europe/Oslo

NP Asia/Katmandu

NR Pacific/Nauru

NU Pacific/Niue

NZ Pacific/Auckland

NZ Pacific/Chatham

OM Asia/Muscat

PA America/Panama

PE America/Lima

PF Pacific/Tahiti

PF Pacific/Marquesas

PF Pacific/Gambier

PG Pacific/Port_Moresby

PH Asia/Manila

PK Asia/Karachi

PL Europe/Warsaw

PM America/Miquelon

PN Pacific/Pitcairn

PR America/Puerto_Rico

PS Asia/Gaza

PT Europe/Lisbon

PT Atlantic/Madeira

PT Atlantic/Azores

PW Pacific/Palau

PY America/Asuncion

QA Asia/Qatar

RE Indian/Reunion

RO Europe/Bucharest

RU Europe/Kaliningrad

RU Europe/Moscow

RU Europe/Samara

RU Asia/Yekaterinburg

RU Asia/Omsk

RU Asia/Novosibirsk

RU Asia/Krasnoyarsk

RU Asia/Irkutsk

RU Asia/Yakutsk

RU Asia/Vladivostok

RU Asia/Magadan

RU Asia/Kamchatka

RU Asia/Anadyr

RW Africa/Kigali

SA Asia/Riyadh

SB Pacific/Guadalcanal

SC Indian/Mahe

SD Africa/Khartoum

SE Europe/Stockholm

SG Asia/Singapore

SH Atlantic/St_Helena

SI Europe/Ljubljana

SJ Arctic/Longyearbyen

SJ Atlantic/Jan_Mayen

SK Europe/Bratislava

SL Africa/Freetown

SM Europe/San_Marino

SN Africa/Dakar

SO Africa/Mogadishu

SR America/Paramaribo

ST Africa/Sao_Tome

SV America/El_Salvador

SY Asia/Damascus

SZ Africa/Mbabane

TC America/Grand_Turk

TD Africa/Ndjamena

TF Indian/Kerguelen

TG Africa/Lome

TH Asia/Bangkok

TJ Asia/Dushanbe

TK Pacific/Fakaofo

TM Asia/Ashkhabad

TN Africa/Tunis

TO Pacific/Tongatapu

TR Europe/Istanbul

TT America/Port_of_Spain

TV Pacific/Funafuti

TW Asia/Taipei

TZ Africa/Dar_es_Salaam

UA Europe/Kiev

UA Europe/Simferopol

UG Africa/Kampala

UM Pacific/Johnston

UM Pacific/Midway

UM Pacific/Wake

US America/New_York

US America/Detroit

US America/Louisville

US America/Indianapolis

US America/Indiana/Marengo

US America/Indiana/Knox

US America/Indiana/Vevay

US America/Chicago

US America/Menominee

US America/Denver

US America/Boise

US America/Shiprock

US America/Phoenix

US America/Los_Angeles

US America/Anchorage

US America/Juneau

US America/Yakutat

US America/Nome

US America/Adak

US Pacific/Honolulu

UY America/Montevideo

UZ Asia/Samarkand

UZ Asia/Tashkent

VA Europe/Vatican

VC America/St_Vincent

VE America/Caracas

VG America/Tortola

VI America/St_Thomas

VN Asia/Saigon

VU Pacific/Efate

WF Pacific/Wallis

WS Pacific/Apia

YE Asia/Aden

YT Indian/Mayotte

YU Europe/Belgrade

ZA Africa/Johannesburg

ZM Africa/Lusaka

ZW Africa/Harare


Cheap web Hosting


How to Install WXAMPP in Windows?


Cheap reseller Hosting


What is WXAMPP ?

 WXAMPP stand for cross-platform, Apache, MySQL, PHP and Perl. It’s a simple and lightweight solution that allows you to create a local web server for testing purposes. XAMPP is a reliable and fast way to set up environment for PHP programming. It provides all the components required for developing, running, debugging, and unit testing of PHP applications. XAMPP is a good alternative to installing and configuring a Web server, a PHP engine, a database server, and a debug engine separately. All you need to do to start developing is download XAMPP, run XAMPP installer.exe, and start the components using the XAMPP control panel.


WXAMPP

How to Install WXAMPP?

1 ) Go to the Apache Friends website and download XAMPP.

2) Click on the download link for XAMPP.

3) Install Software once Software download is complete.

4) Install the program, click on “Run”

5) Click the Next button

6) Accept the default settings

7) Click the Next button

8) Click the finish  button

9) Exit the command window by typing x on the command line.

10) Open XAMPP Control Panel.

11) Start the Apache and MySQL components

12) Verify the Apache install, by clicking on the Apache administrative link in the Control Panel.

13) Verify the MySQL installation, by clicking on the MySQL administrative link in the XAMPP Control Panel.

14) Open Web browser and type ‘http://localhost/‘ in address field, Once load the page left side you can see phpinfo(), pearinfo(), perlinfo(), aspinfo() and tools like phpMyAdmin. Just click navigate to respective service and information. 


Cheap web Hosting


How to force www or non-www in your .htaccess file in cPanel


Cheap reseller Hosting


Force www or non-www in your .htaccess file in cPanel

Step 1:  Log into your cPanel.

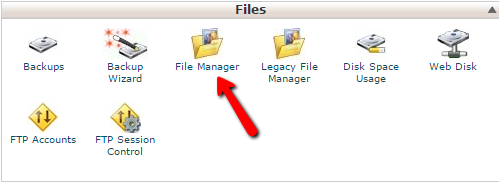
Step 2: Find the Files category and click on the File Manager icon.
  

Fail_Manager

Step 3 : A popup box will appear. For the primary domain, click on the Web Root radio button. For addon domains, click on the dropdown and find your desired addon domain name. Be sure the checkbox next to Show Hidden Files is checked.

Step 4 : Click the Go button to enter the File Manager.

Step 5 : You should now be in the root folder of the domain you chose. Look for the .htaccess file and right click on it. This brings up a menu.

Step 6 : Find and click on the Edit option. If you get a popup box, simply find and click the Edit button in the lower right corner to continue to the editor.

 Step 7 : You are now in the text editor. Place either selection of code in the file and click on the Save Changes button at the top right corner of the screen. Be sure to replace ‘example.com‘ with your actual domain name.

NOTE: Do not place both selections of code in the file as it will cause an error.

    #Force www:
    RewriteEngine on
    RewriteCond %{HTTP_HOST} ^example.com [NC]
    RewriteRule ^(.*)$ http://www.example.com/$1 [L,R=301,NC]

    #Force non-www:
    RewriteEngine on
    RewriteCond %{HTTP_HOST} ^www\.example\.com [NC]
    RewriteRule ^(.*)$ http://example.com/$1 [L,R=301]

 Step 8 : Once you insert the code, click on the Save Changes button in the upper right corner to save the code change. You can now type your domain name either with or without the www and it will display in the address bar in the format you have set the code for.


Cheap web Hosting


Redirect domain to subdirectory without changing URL


Cheap reseller Hosting


The simple way to redirect your primary domain to a sub folder without change the URL

Redirect_Domain

A)  Redirect and keep everything after the URL

Show all of the same content on one URL as you would another.

Example, if you just changed your domain to DomainB.com, but you still have plenty of visitors coming to DomainA.com, you would use this to show them all of the existing content that is located on the new domain, without the need to update both websites.

You would modify your .htaccess file for the domain that your users will go to, and insert these lines of code:

RewriteCond %{HTTP_HOST} ^DomainA.com
RewriteRule ^(.*) http://DomainB.com/$1 [P]

If you are using the file manager in cPanel, be sure that you have the option to show hidden files selected.

What does the above redirect do?

Adding this line into your .htaccess file, you will be able to go to DomainA.com/YourPage and it will show the content from DomainB.com/YourPage

B) Redirect a domain to a specific url

If you want visitors to go to DomainA.com with a specific page in mind when doing so, you may use this code:

RewriteCond %{HTTP_HOST} ^DomainA.com
RewriteRule ^(.*) http://DomainB.com/PathToPageHere [P]

Example, you had an external blog such as one on blogspot.com or maybe a shopping cart on etsy.com that you want people to visit your domain without fully hosting the domain there. Now, visitors can access your site using your domain, but see the content of an external URL.

C)  Re-directing an IP address

The following code shows how this can be done in the .htaccess file.

# Redirect all IP address (replace the ## with the IP address numerals) to same http://domain_name.com
RewriteCond %{HTTP_HOST} ^##\.##\.##\.##
RewriteRule (.*) http://domain_name.com/$1 [R=301,L]
Stipulations / Please read

Note: If using the first option, search engines such as Google or Bing will see multiple sites with the same content and can cause ranking drops in one, or both of the sites. From an SEO standpoint, your best option is to create 301 redirects instead.


Cheap web Hosting


How to install MariaDB Server in cPanel/WHM servers?


Cheap reseller Hosting


How to install MariaDB Server in cPanel/WHM servers?

And

What are the advantages of using MariaDB Server ?

Ans:

 *  Install MariaDB Server in cPanel/WHM servers

1. Backup existing MySQL data

# mysqldump --all-databases --routines --triggers > /home/db_dump/alldb.sql
# service mysql stop
# cp -r /var/lib/mysql/mysql /home/db_dump/
# service mysql start

2. Select MySQL version as MariaDB

# /usr/share/lve/dbgovernor/db-select-mysql --mysql-version=mariadb100

MariaDB versions:

mariadb55 for MariaDB v5.5
mariadb100 for MariaDB v10.0
mariadb101 for MariaDB v10.1

3. Install MariaDB

# /usr/share/lve/dbgovernor/db-select-mysql --install-now

Final step is to recompile PHP and Apache in the server.

# /scripts/easyapache

 * Advantages of using MariaDB Server

1) Faster and safer replication.

2) Indexes for the MEMORY(HEAP) engine are faster.

3) CHECKSUM TABLE is faster.

4) MariaDB improved the performance of character set conversions.

5) Pool of Threads in MariaDB 5.1 and even better in MariaDB 5.5.

6) There are some improvements to the DBUG code to make its execution faster when debug is compiled in but not used.

7) Our use of the Aria storage engine enables faster complex queries.

8) The test suite has been extended and now runs much faster than before, even though it tests more things.


Cheap web Hosting


How to Installation Linux Malware Detect (Maldet) On Linux


Cheap reseller Hosting


Linux Malware Detect (Maldet) :

Linux Malware Detect (LMD) is a malware scanner for Linux released under the GNU GPLv2 license, that is designed around the threats faced in shared hosted environments. It uses threat data from network edge intrusion detection systems to extract malware that is actively being used in attacks and generates signatures for detection.

Follow the steps below to install maldet on your server.

A) Install maldet on your server

1) SSH to your server
2) Download the tar file and install it.

cd /usr/local/src/ && wget http://www.rfxn.com/downloads/maldetect-current.tar.gz && tar -xzvf maldetect-current.tar.gz && cd maldetect-* && sh install.sh

This will automatically install a cronjob inside /etc/cron.daily/maldet so a daily scan will be run for local cPanel or Plesk accounts.

B) Update to the latest version and virus signatures:

maldet -d && maldet -u

C) Run the first scan manually

Launch a background scan for all user’s public_html and public_ftp in all home directories, run the following command:

maldet -b –scan-all /home?/?/public_?

D) Verify the scan report

1) List all scan reports time and SCANID:

maldet –report list

2) Show a specific report details :

maldet –report SCANID

3) Show all scan details from log file:

grep “{scan}” /usr/local/maldetect/event_log

E) Clean the malicious files

The quarantine is disabled. You will have to launch it manually.

maldet -q SCANID


Cheap web Hosting


How to Make your WordPress site Mobile-Friendly?


Cheap reseller Hosting


9 Steps to a Mobile-Friendly WordPress Site

Mobile has become an essential platform for a number of business owners to showcase their product and services through a business application. These app based services reach an extended audience and therefore it is more important than ever to let your website go mobile-friendly. How to take any WordPress site and make a mobile version of it that will load on all smart phones. There are 2 main reasons why this walk through is useful. The 1st one is if you currently have a theme that is not mobile friendly which creates a bad viewing experience when on a smart phone. The other reason would be if you have a responsive site but want more control over how it looks on all mobile phones.

Developing a mobile-friendly website is profitable in a number of ways. Here is a detailed guide on how to optimize your WordPress website for mobile visitors.

1) Find the right hosting plan

Picking the right hosting plan is the foremost requirement that should be addressed when trying to optimize your WordPress website. For this purpose, choose a reliable hosting company. Make sure your website is not shared over a common server as it can slow down the loading speed. Thus, beware of cheap hosting plans and choose the services of a company that offers economical and quality hosting services. Ensure that the hired company is efficiently handling web traffic towards your site.

2) Get A Responsive Theme

Select a perfect WordPress theme for your responsive website should be a top priority. You need to look for themes that are lightweight and can upload easily over major browsers. Mobile theme to use when viewing site on smart phone. Install it. Make sure what ever theme you choose allows for you to put custom CSS code directly into the theme options.

3) Install Theme

Install Theme Test Drive and Mobile Smart or Mobile Smart Pro plugins.

4) Make the content adaptive

The content can be made adaptive by creating alternatives such as short titles. Moreover, content type such as infographics may prove to be meaningless content for mobile simply because of the size of the screen. In such cases, it is advised not to deliver the content at all. If you wish to add any content display, add the content carefully by making it short and catchy.

5) Monitor your plugins

The more plugins on your WordPress website, the more performance issues may occur. Thus, it is important to install the plugins after performing thorough research. A number of plugins can slow down the speed of a WordPress website, which is always a loss for the website owner. Plugins slow down the speed of the website because of the bad coding and installation of outdated versions.

6) Optimize images for the website

Having images throughout your website enable users to remain interested in the content. It keeps the content from looking dull and boring and helps to share the article more frequently. Make use of plugins to optimize images over the websites. It won’t hurt the speed of the website. Uploading the right plugin for image optimization purposes ensures that images will only be uploaded when the required area over the phone becomes visible to the users. It helps to reduce the page load time offering satisfied user experience.

7) Setup mobile menu

The free version of WPtouch provides the essential option of specifying a menu for use on mobile devices and I would urge you to do so (after having first thought about what content is most important for your mobile visitors, of course!).

Create a new menu in the usual WordPress way (Appearance &gt; Menus). Give it an obvious name, such as Mobile Menu and then in the WPtouch Menus settings page, select the mobile menu from the drop down list and check Menu Options as appropriate (check it if you are unsure).

8) Go through the testing phase

After performing all the above-mentioned tasks, you then have to test the website for its performance. It is not wise to trust your code and responsive design without first testing everything; undergoing testing will help to ensure flawless performance. You can test the performance of your website by running it on several mobile devices. This will help you to notice the performance of the website and its appearance on different devices.

9) Add Bookmark Icons

When a visitor bookmarks your website, it potentially adds an icon to their home screen. If you don’t provide an icon the device will either use a default icon or take a screengrab neither of which is going to make your site’s icon easy to find or help with your branding.

Create two icons, one for Android (96×96 pixels) and one for iOS (120×120 pixels) both in the png format and upload them on the WPtouch &gt; Theme Settings &gt; Bookmark Icons options page. You can also override the site title here if you want to (perhaps if it is overly long).


Cheap web Hosting


1 14 15 16 17 18 25