Change Linux Root Password Temporarily


Cheap reseller Hosting


How to change Linux root password temporarily

If you are logged in as root and you don’t know the root password then you can follow the steps. You can easy to change your root password. 


Step 1. Back-up your current shadow file.

[root@hostripples ~]# cp /etc/shadow /etc/shadowbkup

Step 2. Change the current root password

[root@hostripples ~]# passwd root

Changing password for user root.
New UNIX password:
BAD PASSWORD: it is based on a dictionary word
Retype new UNIX password:
passwd: all authentication tokens updated successfully.

Step 3. Switch to a local user to test whether ‘your’ root password is working or not.

[root@hostripples ~]# su – localuser 
[localuser@hostripples ~]$ su – root
Password:
[root@hostripples ~]#

Yes, you are now logged in as root with ‘your’ password.

Step 4. Restore the previous root password

[root@hostripples ~]# mv /etc/shadowbkup /etc/shadow
mv: overwrite `/etc/shadow’? y
[root@hostripples ~]#

.

.

.

.

This trick is meant for students and kindly do not misuse.


Cheap web Hosting


“ffmpeg: error while loading shared libraries: libavdevice.so.52:”


Cheap reseller Hosting


Error While installing FFMPEG on CentOS server “ffmpeg: error while loading shared libraries: libavdevice.so.52:”

After installing FFMPEG on one of my client server, the above error apears whenrunning ffmpeg for the first time.


Error :


“ffmpegffmpeg: error while loading shared libraries: libavdevice.so.52: cannot open shared object file: No such file or directory”


Error-and-Solution


Solution :


It is very simple step to solve your error.

Change your library path by running following command :

root@hostripples[~]# export LD_LIBRARY_PATH=/usr/local/lib/

.
.
.
.

Its done!


Cheap web Hosting


How to Setup Minecraft on a Linux CentOS Server


Cheap reseller Hosting


Setup Minecraft on a Linux CentOS Server


-Setup-Minecraft


* First, To download PuTTY to access SSH.


* Installing Minecraft by using following command: 

yum install java-1.6.0-openjdk


* Switch to the root directory by using following command:

cd


* Create a Minecraft directory

mkdir minecraft


* Enter the directory by using following command: 

cd minecraft


* Download Minecraft by using following line 

wget http://minecraft.net/download/minecraft_server.jar


* Now, Using Following Scripts 

chmod +x minecraft_server.jar
yum install screen
screen


* Then, Start up Minecraft

java -Xmx1024M -Xms1024M -jar minecraft_server.jar nogui


===========================================


** To close PuTTY and keep Minecraft running.:

Control + a + d


** To get back to the screen where Minecraft is running hold the following keys on your keyboard:

screen -r


linux__minecraft


Cheap web Hosting


How to Install Minecraft Server on CentOS VPS


Cheap reseller Hosting


How to Install Minecraft Server on CentOS VPS


Install Minecraft_ashishkale.in copy


  • First, Installing Java-JDK by using following command: 

yum install java-1.6.0-openjdk

  • If have check Java was installed then you can use following command:

which java

  • The following command will be displayed if it was properly installed:

/usr/bin/java

  • Switch to the root directory by using following command:

cd

  • Create a Minecraft directory, using following command:

mkdir Minecraft

  • Now, Enter the directory:

cd Minecraft

  • Download Minecraft:

wget http://minecraft.net/download/minecraft_server.jar

.
.
.
.
Minecraft is now installed.


  • You’ll now need to install “screen” to keep the Minecraft server running after the SSH session is closed, you can use following command.

yum install screen

  • Use the screen and run Minecraft. Enter screen:

screen

  • Start up Minecraft

java -Xmx1024M -Xms1024M -jar minecraft_server.jar nogui


===========================================


  • To get back to the normal screen, press these keys:

Control+A+D

  • To get back to the screen where Minecraft is running:

screen -r


Cheap web Hosting


How To Reset A Kloxo Or LxAdmin Password From SSH


Cheap reseller Hosting


How to Reset A Kloxo Or LxAdmin Password From SSH

Kloxo is an another useful free control panel for web hosting management.

When your VPS is installed by us with lxadmin the password will be the same as what you asked for on setup.

If not try “admin”

Note: if you reinstall yourself it will also be “admin”

If you still can’t login:

Step 1 : Login via SSH server as root.

Step 2 : Execute the script.

cd /usr/local/lxlabs/kloxo/httpdocs

or

cd /usr/local/lxlabs/lxadmin/httpdocs

Step 3 : Restart Kloxo.

/usr/bin/lphp.exe ../bin/common/resetpassword.php master

Step 4 : Now try your password again.

If you still can’t get it to work, create a support ticket at Hostripples client area.

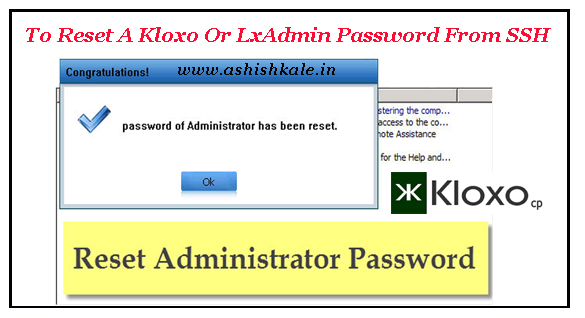
Reset a Kloxo password_ashishkale.in

That’s it!!


Cheap web Hosting


How to create cron jobs on your Kloxo Panel


Cheap reseller Hosting


How to create cron jobs on your Kloxo Panel

Kloxo is a free control panel for managing your VPS hosting or dedicated server hosting. Cronjob is scheduling a task to run later. The task can be either command or a script. The background process(daemon) behind the cronjob is the crond. In the /etc folder there is a file called crontab where we can write the command or name of the script that is to be executed at as per our customized time. By using the control panel we can manage the Cron-jobs simply.

Here I am explaining the steps for creating cron-jobs via Kloxo panel.

Step 1 : Login to your Kloxo control panel.

Step 2 : Click on “Cron Scheduled Task” under the Domain area,  see the following screenshot:

cronjob

Step 3 : There are two option in your Kloxo, Simple and Standard

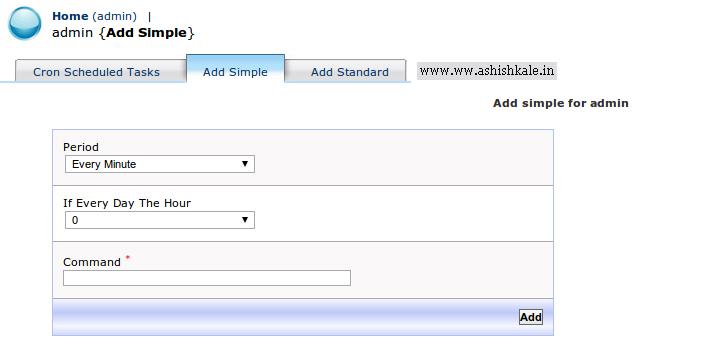
In simple section you can create simple cron jobs for every Minute, Hour or Day,  see the following screenshot:

Add Simple cron jobs ww.ashishkale.in

The standard section having the standard cronjob scheduling syntax.

You can create a standard Cron here, see the following screenshot:

add-standard-cronjob_ashish kale blog


That’s it!!


Cheap web Hosting


Error : Fix the WHM CSF Security Test


Cheap reseller Hosting


How to fix the WHM CSF security test errors!

Csf logo

As a part of ensuring security, Hostripples perform a CSF security scan from WHM. We may get the following error after the scan. 

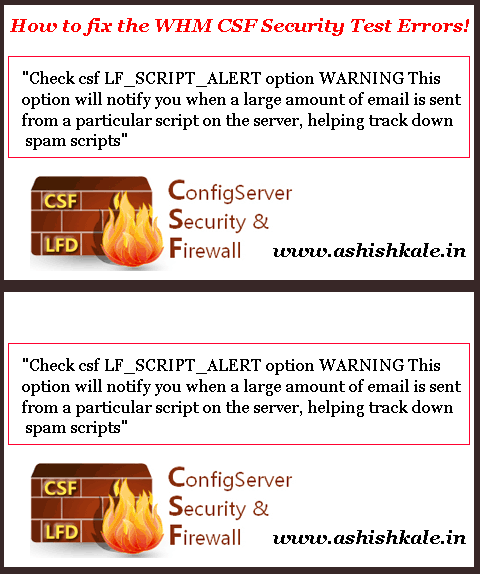
“Check csf LF_SCRIPT_ALERT option WARNING This option will notify you when a large amount of email is sent from a particular script on the server, helping track down spam scripts”


-fix-the-WHM-CSF


To fix this error :


1) SSH into the

href=”https://hostripples.com/dedicated-servers/ssh-server-hosting”>server

.

2) Edit the csf configuration file by using following command:

vi /etc/csf/csf.conf

3) Search for LF_SCRIPT_ALERT = “0″

4) Change the value from “0″ to “1″ to fix the issue.

5) Restart the CSF.


You may also get the following error :


“Check exim for extended logging (log_selector) WARNING You should enable extended exim logging to enable easier tracking potential outgoing spam issues. Add:log_selector = +arguments +subject +received_recipients”


FIX:

1) Edit the exim configuration file by using following command :

/etc/exim.conf

2) Change the value from “log_selector = +all” to the following :

log_selector = +arguments +subject +received_recipients

3) Save changes.

4) Restart the CSF.

.

.

.

.

This should resolve the error


Cheap web Hosting


How to Setup FTP with ProFTPD in Webmin


Cheap reseller Hosting


Setup FTP with ProFTPD

FTP stands for file transfer protocol, and along with telnet and SMTP is one of the oldest protocols still in common use on the Internet. ProFTPD generally uses a single configuration file, found at /etc/proftpd.conf. This file is made up of directives, each of which usually occupies a single line and has a name and value.


How to Setup FTP with ProFTPD in Webmin
1) Login to webmin

http://xx.xx.xx.xx:10000 (may be https:// for Debian/Ubuntu system)

2) Access the Webmin Modules option via Webmin > Webmin Configuration

3) Select Standard module

from www.webmin.com

4) Click the button on the right of that option

5) Choose: proftpd

6) Click Install Module

7) After installation, click Refresh Modules

8) Click Create a new user accessed via System > Users and Groups

9) Provide a username for what is to be your FTP account

10) Select Normal Password and provide a unique, complex password for the account.

11) Select a custom home directory.

12)  Otherwise choose Create home directory near the bottom of the options.

13) Select New Group with same name as user

14) Click Create

.

.

.

.

You should be able to access FTP with the username and password you selected, using your server’s IP address as the host.


Cheap web Hosting


How to Reboot your cpanel/whm in ssh


Cheap reseller Hosting


Reboot your cpanel

How to Reboot your cpanel/whm in ssh

If you happen to mess up your ssh configuration some how you can reset the ssh config from Cpanel then restart your machine via ssh by using following command

/etc/init.d/cpanel restart


Enjoy!!!


                                                                          Or


If you cannot reboot your server manually, you can restart it by requesting a power cycle.

1) Log in to your Account Manager.

2) Click Servers.

3) Next to the server you want to use, click Manage.

4) Click Power.

5) Click Restart.


Cheap web Hosting


How to fix ftp connection time out error!


Cheap reseller Hosting


How to fix ftp connection time out error!

Common errors when using FTP

When testing an FTP connection you may received of the following errors:

1) Socket Error # 11001, Host not found
2) Socket Error # 11004, Unable to connect
3) Socket Error # 10061, Connection refused
4) Socket Error # 10093
5) Socket Error # 10038
6) Socket Error # 10039
7) Socket Error # 10052
8) Unable to connect: Connection time out
9) Unable to connect. Not logged in
10) Unable to connect. Error connecting with SSL
11) Scan failed (-1): Read Timeout

ftp-connection_erroe

How to resolve the error?
If you receive an “FTP connection timed out error while trying to access your account”, there are several reasons for that. Please, take a look at the Script :


!connection failed xx.xx.xxx.xxx – connection timed out
!connectio:error 0
PORT xxx,xxx,x,x,x,xxx
500 Illegal PORT command
!Failed “port”
!Retrieve of folder listing failed (0)


Solution:
 
1 : Login to the WHM==> FTP Server Selection

2 : Change the FTP server to Pure-FTPD ==> Save

3 : Now ssh into the server as root

4 : Open the pure-ftp conf file /etc/pure-ftpd.conf

5 : Find the FTP port no: used

6 : And find the “PassivePortRange

7 : Add the port range

for eg :

[bash][/bash]PassivePortRange 30000 40000[bash][/bash]

8 : Save and Quit

9 : Go to csf(firewall) config file

10 : Add the ftp port along with the passive port range

eg :

[bash][/bash]# Allow incoming TCP ports TCP_IN = “20,22,25,53,80,110,143,443,465,587,993,995,2001,2077,2078,2082,2083,2086,2087, 2095,2096,30000:40000″[bash][/bash]

11 : Restart csf & Pure-ftpd


Cheap web Hosting


1 3 4 5 6 7 9