How to install PEAR for PHP in Linux


Cheap reseller Hosting


Install PEAR for PHP in Linux


-install-PEAR-for-PHP-in-Linux 

                 PEAR is a structured library of open-source code for users of PHP. When pear is not installed in your server, then install it. You can easily install PEAR for php in Linux

In this article we will give you how to install PEAR for php in Linux. Follow the steps for Installing PEAR.

Step 1 : Download the installation php file.

                     http://pear.php.net/go-pear

Step 2 : Rename to php file by using following command.

cp go-pear go-pear.php

Step 3 : Run the php script.

Then, Windows Command Prompt to start the installation.

Step 4 : You can install php various extensions by using following command.

pear install package


After installing PEAR, you can install modules by going to the PEAR admin at example :-

hostripples.com/pearadmin, where hostripples.com is your domain name.


Cheap web Hosting


How to install Nvidia drivers in Ubuntu


Cheap reseller Hosting


In this article will give you how you can easily install Nvidia drivers in Ubuntu. Follow the steps and install Nvidia drivers on Ubuntu.

install Nvidia drivers in Ubuntu

If you are using an older version of Ubuntu, or if you aren’t notified about additional drivers, you can launch the installation yourself.

Step 1 :  Go to Software & Updates -> Additional Drivers

Then you’ll see that Nvidia drivers are not in use.

Step 2 : To Check or tick the box underneath Enabled to enable the drivers.

Step 3 : Click Enable Driver.

Step 4 : Wait for the installer file to download.

Step 5 : Open the downloaded file.

Step 6 : Right click on downloaded file and mark it as execute.

Step 7 :  The drivers can only be installed in command mode, under sudo and the graphics daemon must not be running.

Step 8 : Switch to command mode tty CTRL+ALT+F1, then run following command to stop the display manager.

sudo service lightdm stop

Step 9 : If you see a blank screen, that means the mode resolution conflicts with improper video driver. Fix that by running this..

sudo sed -i -e ‘s/#GRUB_TERMINAL/GRUB_TERMINAL/g’ /etc/default/grub
sudo update-grub

Step 10 : Run your nvidia installer by using following command.

sudo ./NVIDIA_750TI_350.linux64.run


Thats it,


You’ll then see that the drivers are enabled and will be available for use upon a reboot.


Cheap web Hosting


How to Solve Application Error in Windows vzpp


Cheap reseller Hosting


Error :

“Application Error
The server encountered an internal error or misconfiguration.”

Error-and-Solution

Solution :

This is usually caused by VPS hitting its memory parameters , the QOS alerts can be checked from vzmc/pmc to confirm this.

A temporary solution would be restart the the vps to release the memory resource. You want to fix it permanent solution make sure to check how frequent the QOS parameters are hitting their limit and what is causing this high usage and resolve that accordingly.

After restarting virtual private servers , make sure to check it in new browser window about the Plesk login information. 


Cheap web Hosting


How to disable core dumps on Linux Servers


Cheap reseller Hosting


To disable core dumps on Linux Servers

Core dump is a memory or a storage dump which records the memory state of a computer program when it was terminated by the operating system due to various error behavior. In this article Hostripples will give you how to disable core dumps on Linux Servers.

disable-core-dumps-on-Linux-Servers

Please follow the steps to disable core dumps for all users : 

Step 1 :  Edit /etc/security/limits.conf and use the following command.

vi /etc/security/limits.conf

Step 2:  Make sure the following config directive exists by using following command. 

hard core 0

Step 3 : Disable core dumps for setuid programs by using following command.

echo ‘fs.suid_dumpable = 0’ >> /etc/sysctl.conf
sysctl -p

Step 4 : Now, Set a soft limit to stop core dumps being created by using following command.

echo ‘ulimit -S -c 0 > /dev/null 2>&1’ >> /etc/profile

That’s it!


Cheap web Hosting


How to Create a MySQL Database?


Cheap reseller Hosting


To Create a MySQL Database

How-to-Create-a-MySQL-Database

MySQL is an open-source relational database management system. It is one of the best RDBMS being used for developing web-based software applications. You have access to root user, you can easy create any database using mysql

In this article will give you how you can easily create a new database from your cPanel. Follow the steps and create a MySQL Database.

Step 1 : Log in your cPanel.

Step 2 : Go to MySQL Databases.

Step 3 : Navigate to the Create New Database box.

Step 4 : Enter the Database Name in the New Database text field.

Step 5 : Click on the Create Database button.

Step 6 : The database name will be preceded by the cPanel username.

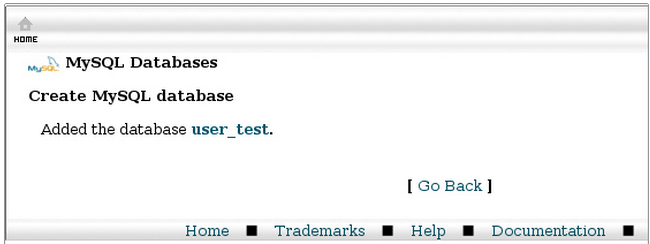
Example, if your cPanel user name is user and you want to have a database named test, the actual database name will be user_test.

create_mysql_database

Then, You will get a confirmation message.


Cheap web Hosting


How to Rebuild Plesk Apache Config Files


Cheap reseller Hosting


Rebuild Plesk Apache Config Files

Rebuild-Plesk-Apache-Config-Files

If you want to rebuild apache configuration files on the pleask server then, follow the condition.

  • Run the following coomand on the server

[root@hostripples~]# /usr/local/psa/admin/bin/websrvmng -av

This will rebuild all your httpd.include files.

That’s it!


Cheap web Hosting


How to install WordPress on Plesk


Cheap reseller Hosting


WordPress is an award-winning blog platform that we recommend for blogging. You can have your very own self-hosted WordPress blog with your own domain. Get started with your own WordPress installation with custom themes, plugins, and your own domain name with Hostripples today!

install WordPress on Plesk

This article will explain how you can install WordPress on your server using Plesk.

Step 1 : Login to the Plesk control.

Step 2 : Go to Websites and Domains tab.

Step 3 : Click on Domain Name in the bottom.

Step 4 : Click Add New Database.

Step 5 : Type the name for your database.

Step 6 : Select type of database.

Step 7 : Click OK button.

Step 8 : Next, you need to add a user to the database.  Click the Add New Database User icon.

Step 9 : Type the name of the database user.

Step 10 : Enter a complex password (make sure to note it for future use).

Step 11 : Click OK.

Now the database is created, it’s time to start the installation process.

Step 12 : Install wordpress by downloading the wordpress zip file.

Step 13 : Extracting under the domain directory.

Step 14 : Now, Running the link where wordpress files are located.

Step 15 : Use above database and database username when prompted.

Step 16 : Done


Your WordPress has been installed!


Cheap web Hosting


How to install Zend Optimizer in Cpanel Linux Server


Cheap reseller Hosting


install-Zend-Optimizer

Introduction : 

Zend Server is the most complete PHP distribution with a continuously updated set of advanced value-add features designed to optimize productivity, performance, scalability and reliability. It is a free PHP extension to enable the web server to execute files encoded by Zend Guard/Encoder so it’s executed the same as any regular PHP files. Zend Encoder also is useful for encoding PHP files to protect source code. Zend Server supports any and all PHP code and provides deep insights into that code including the most popular PHP applications and frameworks like WordPress, Magento, Drupal, Zend Framework, Symfony, and Laravel. Any code you have in PHP will run on Zend Server. You will need to install Zend Optimizer in your server running Linux.


Installing zend in cPanel Linux Server follow this Steps:

Step 1 : Log in to your server via SSH with root user.

Step 2 : Run the following command.

 /scripts/installzendopt

Step 3 : Follow the instructions on the screen to install Zend Optimizer.

Step 4 : Then, Restart the apache.

 service httpd restart

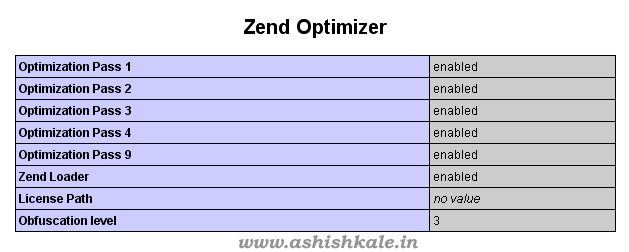
Step 5 : To check whether zend optimizer is running and vserion.

 php -v

It would show ioncube or zend optimizer version.
 

install Zend Optimizer


            OR


Follow the on-screen instructions.

When you want to install Zend Optimizer on a Non-cPanel server please follow the steps:

Step 1 : Download Zend Optimizer.

http://www.zend.com/en/products/guard/optimizer/

Step 2 : Upload the .tar.gz into your web server.

/home/temp

Step 3 : Extract the archive by using the following command.

tar -zxvf filename_here.tar.gz

Step 4 : Now a new directory should appear.

Step 5 : Execute the following command.

./install.sh

Step 6 : Follow the instructions on-screen.

Step 7 : Restart HTTPD (Apache) by using following command.

service httpd restart


That it !


Cheap web Hosting


How to Install Memcached on Ubuntu 12.04 LTS


Cheap reseller Hosting


Install Memcached on Ubuntu 12.04 LTS

Memcached is a system that works to speed up virtual private servers by caching server information. It is a high-performance distributed memory object caching that caches objects for faster website performance. The program functions somewhat like short term memory for your applications. Memcached runs on Unix, Linux, Mac OS X, Ubuntu, PHP and Windows. Installation of memcached on Ubuntu 12.04 is very simple. You can see how to install Memcache on Ubuntu 12.04.

Step 1 : To make sure that all of the packages we download to the VPS are up to date. Use the following command. 

sudo apt-get update

Step 2 : You should have MySQL and PHP installed on the virtual server.

sudo apt-get install mysql-server php5-mysql php5 php5-memcache


To Install Memcache on Ubuntu 12.04

Step 1 : To install memcached via apt-get by using following command. 

sudo apt-get install memcached


Step 2 : To install php-pear, the repository that stores memcache by using following command.

sudo apt-get install php-pear


Step 3 : To use PECL (PHP Extension Community Library) to install memcached by using following command.

sudo pecl install memcache


Step 4 : Click to Enable memcache session handler support? [yes].

You have completed the installation of memcache with PECL on the VPS

Add memcached to memcache.ini by using following command.

echo “extension=memcache.so” | sudo tee /etc/php5/conf.d/memcache.ini


You can start to using Memcache.


Cheap web Hosting


How to Install Softaculous in CentOS Web Panel


Cheap reseller Hosting


How to Install Softaculous in CentOS Web Panel

Softaculous is very easy to install in CentOS Web Panel.  The following article will show you how to install Softaculous on CentOS Web Panel. 

Install-Softaculous-in-CentOS-Web-Panel

Step 1 : Login to CentOS Web Panel.

Step 2 : Go to : Script Installers > Scripts Manager

Step 3 : Click on the Install Softaculous button.

The Installation of Softaculous is completed!
CWP

* When logged in as a USER

User logs in to the CentOS Web Panel they can access Softaculous Enduser Panel under the File Management and Script Installers section.


Cheap web Hosting


1 2 3 4 5 6