How to increase session timeout in php?


Cheap reseller Hosting


Sometimes php session timeouts quickly before your script execute. You can increase this time by simply editing some directives in php.ini.

First locate php.ini

root@host[~]# php -i | grep php.ini
Configuration File (php.ini) Path => /usr/local/lib
Loaded Configuration File => /usr/local/lib/php.ini

Get current session time out time

root@host[~]# grep -i session.gc_maxlifetime /usr/local/lib/php.ini
session.gc_maxlifetime = 14400
; setting session.gc_maxlifetime to 1440 (1440 seconds = 24 minutes):

Edit php.ini

root@host [~]# vi /usr/local/lib/php.ini

Change value of session.gc_maxlifetime.

Restart httpd service!! its done


Cheap web Hosting


cPanel vulnerability – TSR-2016-0001 Announcement


Cheap reseller Hosting


cpanel


cPanel TSR-2016-0001 Announcement

cPanel has released new builds for all public update tiers. These updates provide targeted changes to address security concerns with the cPanel & WHM product. These builds are currently available to all customers via the standard update system.

cPanel has rated these updates as having CVSSv2 scores ranging from 2.1 to 10.0.

Information on cPanel’s security ratings is available at Security Levels – cPanel Knowledge Base – cPanel Documentation.

If your deployed cPanel & WHM servers are configured to automatically update when new releases are available, then no action is required. Your systems will update automatically. If you have disabled automatic updates, then we strongly encourage you to update your cPanel & WHM installations at your earliest convenience.

RELEASES

The following cPanel & WHM versions address all known vulnerabilities:

11.54.0.4 & Greater
11.52.2.4 & Greater
11.50.4.3 & Greater
11.48.5.2 & Greater

The latest public releases of cPanel & WHM for all update tiers are available at Downloads | cPanel, Inc..

SECURITY ISSUE INFORMATION

The cPanel security team identified the resolved security issues. There is no reason to believe that these vulnerabilities have been made known to the public. As such, cPanel will only release limited information about the vulnerabilities at this time.

Once sufficient time has passed, allowing cPanel & WHM systems to automatically update to the new versions, cPanel will release additional information about the nature of the security issues. This Targeted Security Release addresses 20 vulnerabilities in cPanel & WHM software versions 11.54, 11.52, 11.50, and 11.48.

Due to the severity of the issues addressed in this release, cPanel is extending the blackout period on additional information to a full week. Additional information is scheduled for release on January 25, 2016.

For information on cPanel & WHM Versions and the Release Process, read our documentation at:
cPanel & WHM Product Versions and the Release Process – cPanel Knowledge Base – cPanel Documentation

For the PGP Signed version of this announcement please visit https://news.cpanel.com/wp-content/uploads/2016/01/TSR-2016-0001-Announcement.txt


Cheap web Hosting


How to use the Exim Mail Queue Manager in WHM


Cheap reseller Hosting


To Using the Exim Mail Queue Manager in WHM

Exim is the mail software that runs on your server to control email delivery, there are mail queue management options you can use with Exim directly via the command line.

How to use the Exim Mail Queue Manager in WHM

In this article Hostripples will show you how you can manage your Exim mail queue on your VPS or dedicated server in WHM.

Step 1 : Log into WHM.


tep 2 : Find the Email menu.


Step 3 : Go to Mail Queue Manager.


Step 4 : In the Search box type in user@hostripples.com.


Step 5 : From the Select Query drop-down and select Search Recipients.


Step 6 : In Search Type Click on Begins With.


Step 7 : Click on the calendar icon and Specify the Start Date and End Date.


Step 8 : Next, specify the Start Time and End Time.


Step 9 : Then, click on Run Report.


Step 10 : We can see that our messages to user@hostripples.com are Frozen.

This means that Exim has detected an error trying to deliver the message, and it is going to hold the message and try again later.


Step 11 : Click on the magnifying glass icon to view the message in a new window.

In this message we can see that it’s not delivering to user@hostripples.com because their mail server is giving us back the error of Mailbox quota exceeded.


Step 12 : At the top of the message you can choose to Delete Message which will completely remove it from the mail queue.


Or


you can choose to Deliver Message Now which will attempt to send the message again, in this case if the user has freed up some space on their email account it should go through successfully now.


That’s it !! 🙂 


Cheap web Hosting


How to access WHM on a Cloud VPS


Cheap reseller Hosting


How-to-Access-WHM

WHM (Web Host Manager) is cPanel’s server administrative management software. All customers on a Cloud VPS hosting package can access their WHM (Web Host Manager) interface by opening

http://yourdomain.com/whm

Where yourdomain.com is your actual domain name.

* If your domain is not yet pointed to your VPS, you will be able to access the VPS via its server name.

* When you access WHM, you will receive a warning about the SSL certificate used. The reason for the warning is that by default cPanel uses a shared self-signed SSL certificate. You can safely accept the certificate – the connection will still be secure.

* Next log in to your WHM

Note: You will be asked for your WHM login credentials.

1) The WHM username is your cPanel username.

2) The WHM password is your cPanel password.


That’s it! You will be able to manage your Cloud VPS.


See Cloud VPS Offers


Cheap web Hosting


How to install WHMCS from Softaculous


Cheap reseller Hosting


In this article Hostripples will give you how to install WHMCS from Softaculous, Please follow the steps and install it :

Install WHMCS

Step 1 : Log in to cPanel.

Step 2 : Click Softaculous in the Software/Services section.

Step 3 : In the Search text box, type whmcs.

Step 4 : Then press ENTER.

Step 5 : Click Install button. 

Step 6 : Select the protocol in Choose Protocol list box.

Step 7 : Select the domain for installation.

Step 8 : Type the directory where you want to install the application.

Step 9 : Type the directory where you want to store application data.

Step 10 : Type the name of the database to create for the application.

Step 12 : Type the cron job intervals in CRON Job text boxes.

Step 13 : Type the name of the company.

Step 14 : Type the directory for the administration interface in Admin Folder text box.

Step 15 : Type the company e-mail address.

Step 16 : Now type your WHMCS license key in Valid License Key text box.

Step 17 : Type the administrator username.

Step 18 : Type the administrator password.

Step 19 : Type the administrator’s first name.

Step 20 : Type the administrator’s last name.

Step 21 : Type the site administrator e-mail address.

Step 22 : Select the language for the administration interface.

Step 23 : Select the language for the site.

Step 24 : Click the Advanced Options icon to expand Advanced Options.

Step 25 : If you do not want to receive e-mail notifications when application updates are available, select the Disable Update Notifications check box.

Step 26 : To receive site configuration information after the installation is complete, type an e-mail address in the Email installation details to text box.

Step 27 : Review the installation options and settings, and then click Install.

When installation is complete, Softaculous provides information about the application’s configuration.


That’s it


Cheap web Hosting


Error : Fix the WHM CSF Security Test


Cheap reseller Hosting


How to fix the WHM CSF security test errors!

Csf logo

As a part of ensuring security, Hostripples perform a CSF security scan from WHM. We may get the following error after the scan. 

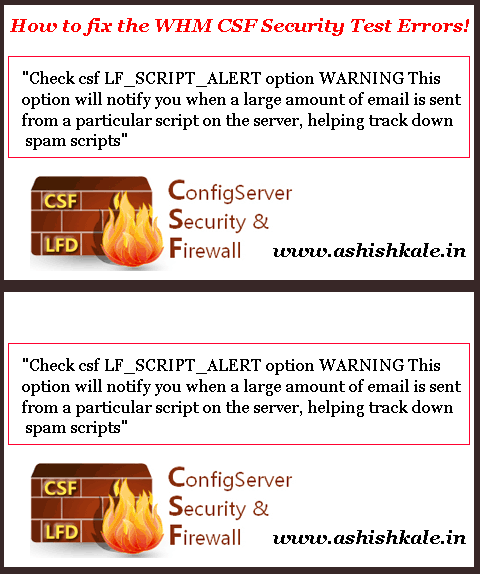
“Check csf LF_SCRIPT_ALERT option WARNING This option will notify you when a large amount of email is sent from a particular script on the server, helping track down spam scripts”


-fix-the-WHM-CSF


To fix this error :


1) SSH into the

href=”https://hostripples.com/dedicated-servers/ssh-server-hosting”>server

.

2) Edit the csf configuration file by using following command:

vi /etc/csf/csf.conf

3) Search for LF_SCRIPT_ALERT = “0″

4) Change the value from “0″ to “1″ to fix the issue.

5) Restart the CSF.


You may also get the following error :


“Check exim for extended logging (log_selector) WARNING You should enable extended exim logging to enable easier tracking potential outgoing spam issues. Add:log_selector = +arguments +subject +received_recipients”


FIX:

1) Edit the exim configuration file by using following command :

/etc/exim.conf

2) Change the value from “log_selector = +all” to the following :

log_selector = +arguments +subject +received_recipients

3) Save changes.

4) Restart the CSF.

.

.

.

.

This should resolve the error


Cheap web Hosting


How to Install mod_cloudflare on cPanel


Cheap reseller Hosting


cloudflare

Installing mod_cloudflare on cPanel

CloudFlare is a performance and security service. The CloudFlare cPanel plugin makes it easy to integrate into your hosting control panel. The CloudFlare module automatically translates visitor IP addresses to reflect the visitor’s original IP address rather than the IP address of the CloudFlare proxy servers.

Installing mod_cloudflare on a cPanel server is very easy. Just follow 8 steps as below. 


Step 1 :

Download core file by using the following command : 

wget https://raw.githubusercontent.com/cloudflare/mod_cloudflare/master/mod_cloudflare.c


Step 2 :

Connect to your server through SSH and log in as root.


Step 3 :

Change directory to /usr/local/src by using the following command : 

cd /usr/local/src


Step 4 :

Get the source code for mod_cloudflare by using the following command :

wget –no-check-certificate https://raw.github.com/cloudflare/mod_cloudflare/master/mod_cloudflare.c CloudFlare-Tools/master/mod_cloudflare.c


Step 5 :

Build and install mod_cloudflare by using Apache Extension Tool by using the following command : 

apxs -a -i -c mod_cloudflare.c


Step 6 :

Restart the Apache Server daemon by using the following command : 

service httpd restart


Step 7 :

Update the Apache configuration data by using the following command : 

/usr/local/cpanel/bin/apache_conf_distiller –update


Step 8 :

Confirm the module is loaded properly by using the following command : 

httpd -M | grep cloud

cloudflare
.
.
.
.
.

Now,

Apache will log the visitors’ IP addresses instead of the CloudFlare IP’s.


Cheap web Hosting


How to Uninstall MySQL Governor


Cheap reseller Hosting


Uninstall MySQL Governor

To uninstall MySQL Governor.

  • Run the following command to uninstall MySQL Governor:

/usr/share/lve/dbgovernor/install-mysql.py –delete
yum erase db-governor db-governor-mysql


Cheap web Hosting


How to Remove/Uninstall RVSkin from Cpanel/WHM Server ?


Cheap reseller Hosting


RVSkin

rvskin logo

RVSkin is a management software offered with cPanel server that provides a user with complete branding and skinning control over cPanel and Reseller accounts. In a short span of time you will be able to create impressive looking cPanel overlay skins for your end users that are customizable in accordance to your preferences.


Uninstall RVSkin from Cpanel


To Remove/Uninstall RVSkin from Cpanel/WHM Server

Follow the steps to uninstalling RVSkins from Cpanel/WHM Server

Step 1 : Login to Cpanel/WHM server via SSH

Step 2 : Run the following command as root on the server:

# perl /root/rvadmin/uninstall.pl

.

.

.

.

You will be completely Removed/Uninstall RVSkin from your Cpanel/WHM Server


And


If for some reason RVskin was installed in a different location, change the path accordingly.

Restart your cpanel by using following command: 

# /etc/rc.d/init.d/cpanel stop

# /etc/rc.d/init.d/cpanel start


Cheap web Hosting


How to Uninstall or Remove Trendy Site Builder ?


Cheap reseller Hosting


How to Uninstall/Remove Trendy Site Builder ?

Uninstall-Trendy-Site-Builder

Follow the steps you can uninstall Trendy Site Builder within a couple of minutes.

Step 1 : Login to cPanel/WHM

Step 2 : Download the uninstaller from trendyflashdownload.com

http://www.trendyflashdownload.com/installer/cp/uninstall.sh

Step 3 : Set execute permission for uninstall.sh using following command

chmod 755 uninstall.sh

Step 4 : Run the shellscript uninstall.sh

./unistall.sh

.
.
.
.
.
.

Trendy Site Builder will be completely removed from your server
                                               

                                                            Or


If you are quick remove Trendy Site Builder you can use following script.


cd /usr/local/cpanel/base/frontend/x3 rm -rf trendysitebuilder rm -f trendysitebuilder.tar.gz rm -f /usr/local/cpanel/Cpanel/trendysitebuilder.pm cd /usr/local/cpanel/whostmgr/docroot/cgi rm addon_trendysitebuilder.php rm -rf trendysitebuilder /usr/local/cpanel/bin/unregister_cpanelplugin /usr/local/cpanel/bin/trendysitebuilder.cpanelplugin rm -f/usr/local/cpanel/bin/trendysitebuilder.cpanelplugin /usr/local/cpanel/bin/rebuild_sprites


RELATED ARTICLE 


Cheap web Hosting


1 2