How to Enable LiteSpeed Web Cache Manager on cPanel?


Cheap reseller Hosting


LiteSpeed is a built-in caching engine that allows to boost website performance. This guide will describe the steps to enable LiteSpeed web cache manager in cPanel.Initially, you have to log in to your cPanel account with a username and password.

  1. Initially, you have to log in to your cPanel account with a username and password.

2. Once you have logged in to your cPanel the cPanel dashboard will be shown, scroll down and go to the Advanced section > LiteSpeed Web Cache Manager.

3. After logging in, you have to click on the WordPress cache icon.

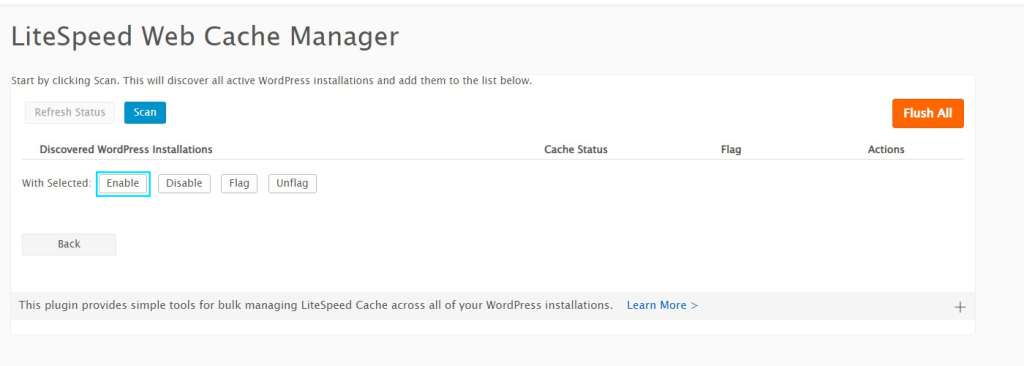
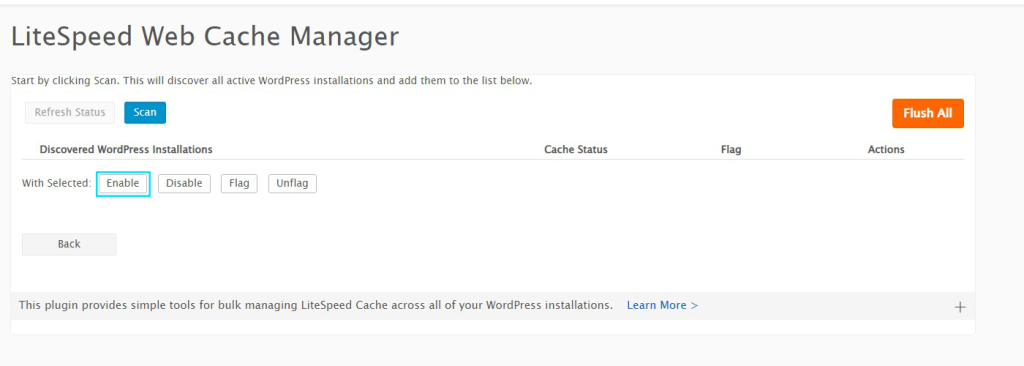
4. The next step is to click on the Scan button. This will highlight all the active WordPress installations.

5. Eventually, once all the WordPress installations are discovered, you have to select the ones you want to activate and then click on Enable.

This is how you can implement these steps to use LiteSpeed web cache manager for WordPress sites on your cPanel server.

In conclusion,

enabling LiteSpeed Web Cache Manager on cPanel can significantly enhance website performance and speed, ultimately improving user experience and search engine rankings.

By following the simple steps outlined in this guide, website owners can harness the power of caching to optimize their site’s performance.

Embracing LiteSpeed Cache can lead to tangible benefits, such as reduced server load and faster page load times. Stay ahead in the digital landscape by leveraging this powerful tool to deliver a seamless and efficient web experience for your visitors.


Cheap web Hosting


How to Set up Google Tag Manager in WordPress


Cheap reseller Hosting


Understanding exactly how visitors interact with your WordPress website will teach you a lot about its workings. Whereas analytics tools will help you to monitor certain information by default.

Simultaneously, Google Tag Manager offers an easy way to develop and manage tags on your website without understating the coding This tool will guide you to create conditions for tracking particular actions on the website, like how many times a document is downloaded, how often a link is clicked on, or how many people watched an embedded video.

This document will help you learn what Google Tag Manager is, and what are the steps to set up a Google Tag Manager in WordPress.

What is Google Tag Manager?

It is a free tracking tool that allows you to manage and deploy website tags without changing the code.

It has in-build templates that are integrated with Google Ads, Google Analytics, and other tools. With the help of its preview mode, you can monitor the tags or triggers that work well before they get published.

There are two main ways to set up Google Tag Manager (GTM) in WordPress:

1. Using a Plugin:

This is the recommended method for most users as it’s easier and doesn’t require editing theme files. Here’s how to do it:

  • Install the plugin: Search for “Google Tag Manager” in the WordPress plugin directory and install the plugin by DuracellTomi.
  • Activate the plugin: Once installed, go to “Settings” and then “Google Tag Manager.”
  • Enter your GTM container ID: You can find this ID in your GTM account under “Container”.
  • Save the settings: Now, the GTM code will be automatically added to your website’s header and body sections.

2. Editing Theme Files:

This method involves manually adding the GTM code to your theme’s header.php file. It’s a less recommended approach as it requires some technical knowledge and can be overwritten when you update your theme. Here’s how to do it:

  • Access your WordPress dashboard: Go to “Appearance” and then “Theme File Editor.”
  • Locate the header.php file: Click on the theme header file (e.g., header.php).
  • Find the <head> tag: Look for the opening <head> tag in the code.
  • Copy the GTM code snippet: Go to your GTM account and copy the provided code snippet.
  • Paste the code: Paste the first part of the code snippet just below the opening <head> tag.
  • Click on the Save button: You have to click on the “Update File” button to save your changes.

Additional Tips:

  • Backup your website: It’s always recommended to back up your website before making any changes to theme files.
  • Test your website: After adding the GTM code, ensure your website still functions correctly.
  • Use a preview and debug mode: GTM offers a preview and debug mode to help you test your tags before publishing them.

Set Up Google Tag Manager Soon!

Unleashing Google Tag Manager’s full potential in WordPress has never been this simple.

From better analytics to more personalized user experiences, Google Tag Manager on your WordPress site can make a world of difference. Ready to step up your game? Check out our step-by-step guide.

Tag or share with your friend who needs this setup on their WordPress site.


Cheap web Hosting


How to Remove WordPress from cPanel Softaculous?


Cheap reseller Hosting


You can easily install and remove WordPress from cPanel Softaculous.  

This tutorial article will help you to uninstall WordPress from cPanel Softaculous.  

  1. Login to your cPanel account

2. Click on the Softaculous App Installer section and click on WordPress.

3. After that you can click on the Installations tab where you’ll see all the installations.

4. Under Installations, you’ll see the dashboard consists of different options. Click on the red dustbin icon under options for the domain that you want to remove:

5. After clicking on the red dustbin icon, you’ll be redirected to this page.

6. Click on the button Remove Installation. You’ll be asked last time about removing the installation and you just need to click OK

When you click on the OK button,

7. You’ll get on the page informing installation was removed successfully.  


Cheap web Hosting


Steps to Install WordPress using Softaculous


Cheap reseller Hosting


This tutorial will help you to install WordPress using Softaculous.

Log-in to your cPanel (Control Panel)

The very first step is to login to your cPanel (control panel) login page and enter the correct details.  

After login, you can check for the Softaculous icon in the control panel as shown in the screenshot below. It will redirect you to Softaculous Endures panel.

Operate the Softaculous from your control panel.

Select the WordPress

Under Softaculous endure; you’ll see the multiple scripts lists from which you’ve to select the WordPress.

Click on the Install button which will showcase the install form.  

After clicking on the Install button, you’ll be redirected to the install form. 

Fill the all necessary details in the install form shown in the screenshot below. The form consists of many details that are prefilled by the default, you can also change it as per your requirement or leave it as it is and continue with the installation with default values.  

Select the installation URL

Select the domain and folder in which you want to install of WordPress. Also, select HTTPS to ensure your website is secure by using a SSL Certificate.

Note: If you want to install WordPress in document root i.e example.com instead of subdirectory i.e. example.com/wp then leaves the In Directory field blank. 

Next,

Finish the remaining installation setup. You can select the version of WordPress as per your requirement. We recommend using the most recent release, as it will be secure and compatible with most of themes and plugins.

In the Site Setting section, you need to type Website Name and Description. However, you can change this after installation.  

Finish the Admin Account section

For the admin username, it’s suggested to use something unique than the default ‘admin’ for the username, as this is the default for all WordPress installations and poses a security risk.  

For a password, you can create a password or generate one using the key icon.

An email address is needed to get notifications, including the password reset (if you forgot the password)

Choose Language helps you to select the default language for your website.

Select Plugin(s) helps you to select plugins as per your business.

In the Advanced Options section, mentioned options don’t need to be changed, but they include the database name, table prefix, disable update notification emails, set auto – upgrade, and more.

Rest of the options your web hosting provider will help you to mention in the boxes.  

The Select Theme helps you to select themes as per your business by default, WordPress uses a theme named after the year, but you can select one that fits the purpose of your website.  

After installing the plugin, the next step is to click on Install. A progress bar will get displayed on your installation status and refresh once the installation is done.

Note: during the going process avoid the closing of the browser as it can interrupt the installation.  

Last, you’ll get the notification displaying “Congratulations, the software was installed successfully.


Cheap web Hosting


How to install WordPress on Plesk


Cheap reseller Hosting


WordPress is an award-winning blog platform that we recommend for blogging. You can have your very own self-hosted WordPress blog with your own domain. Get started with your own WordPress installation with custom themes, plugins, and your own domain name with Hostripples today!

install WordPress on Plesk

This article will explain how you can install WordPress on your server using Plesk.

Step 1 : Login to the Plesk control.

Step 2 : Go to Websites and Domains tab.

Step 3 : Click on Domain Name in the bottom.

Step 4 : Click Add New Database.

Step 5 : Type the name for your database.

Step 6 : Select type of database.

Step 7 : Click OK button.

Step 8 : Next, you need to add a user to the database.  Click the Add New Database User icon.

Step 9 : Type the name of the database user.

Step 10 : Enter a complex password (make sure to note it for future use).

Step 11 : Click OK.

Now the database is created, it’s time to start the installation process.

Step 12 : Install wordpress by downloading the wordpress zip file.

Step 13 : Extracting under the domain directory.

Step 14 : Now, Running the link where wordpress files are located.

Step 15 : Use above database and database username when prompted.

Step 16 : Done


Your WordPress has been installed!


Cheap web Hosting


How to Fix the Internal Server Error in WordPress


Cheap reseller Hosting


How to Fix the Internal Server Error in WordPress

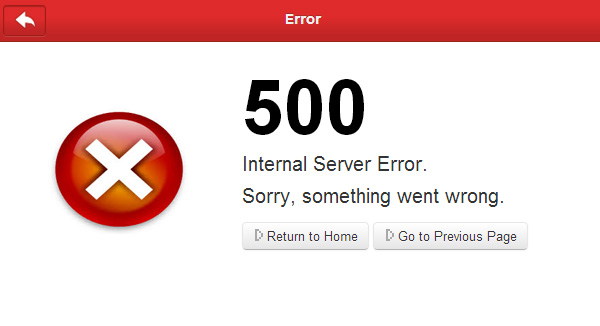
Internal server error is not new for the majority of webmasters. It is an error that generated by your web servers. As long as webmasters encounter this error, they can clearly know something wrong, but they cannot tell the specific information of the error condition because this error is not specific to WordPress. 500 Internal Server Error is one of the most common WordPress errors that a user can come across while using a self hosted WordPress website. 500 Internal Server Error is a generic error message, given when no other specific message is suitable. There can be number of reason for a 500 Internal Server Error to display in a web browser.


Internal Server Error


Following Reasons display to Internal Server Errors

Reason No.1 

Try deleting your .htaccess as your permalinks might not work, but you’ll at least know whether this is being caused by an error in htaccess.


Reason No.2 

I deletion of .htaccess did not work the re-upload it and add the following:

SecFilterEngine Off
SecFilterScanPOST Off


Reason No.3

 Increase the server memory in php.ini file for example from 64m to 128m


Reason No.4  

When you have changed the prefix of your MySQL database tables manually this can also affect it so revert back to your previous tables.


Reason No.5 

When you have just moved to another server/hosting and your php version is old try adding this to your .htaccess file:

AddType x-mapp-php5 .php


Reason No.6 

Disable your brower-cache then quit tour browser then open it again and see what happens. This one is pretty straight forward.


Reason No.7 

When you Check your file permissions as some server will behave better if you set your permissions to chmod 777 instead of chmod 755 – as strange as it sounds.


Cheap web Hosting


Disadvantage of Managed WordPress Hosting


Cheap reseller Hosting


Managed WordPress Hosting

Managed WordPress Hosting is specifically designed to serve the needs of WordPress users. They provide world class support, high security and lightning fast speed. Most of the companies use their own caching software to improve the site speed, and thus don’t allow any other cache plugins.

Managed WordPress Hosting

Disadvantage Of Managed WordPress Hosting

1) Higher Cost of Managed WordPress Hosting

Regular shared hosting plan cost less than a managed hosting. You will not get the same level of support for wordpress, but most companies still offer a basic level of support for their clients.

Higher Cost


2) Lack Of Control in Managed WordPress Hosting

Technical person manages technical aspects so you cannot actually control everything that would be changed. That time definitely the point for most people that opt for such a service, in the event that you do have a lot of technical knowledge and you want to control absolutely everything, you will not want someone else to manage the server.

Lack Of Control

3) Limitations on Managed WordPress Hosting

You can only run a site that is based on WordPress. You can not run all plugins because the shared hosting provider will basically eliminate all the plugins that would slow down everything. You will always have a site that runs at peak speed but there are situations in which you will be stressed by the fact that the provider does not want to install something you might need.

Limitations

4) Not Flexible:

You are Allows host multiple website, you are limited to build your website with wordpress only. In case of a virtual private server that can give your site the same level of performance and security, at similar cost, but without the dedicated support for the software, you can build multiple websites using other software than wordpress.


Cheap web Hosting


The Advantages Of Managed WordPress Hosting


Cheap reseller Hosting


Managed WordPress Hosting

Hosting is an essential part of any online business. Making sure that you use a plan that’s ideally suited to your needs is crucial to serving a fast, secure website for your visitors. As such, the hosting plan you choose can often directly influence your website’s earnings!


Wordpress hosting


When we comes to hosting, we have various options in terms of Hosting packages and companies. Most common once are Shared hosting, VPS hosting, Dedicated Hosting and so on. Now, one thing which is common about these hosting companies, they will let you host any type of Website. Be it WordPress, Joomla, Drupal, Web builder Websites and many more.

WordPress is a memory hogging software and despite of me being on Knownhost VPS, which is a powerful VPS hosting. Managed WordPress hosting takes care of every inch of server optimization for hosting a WordPress blog/Website.


Advantages Of Managed WordPress Hosting

1) Security :

Basic security sweeps are likely performed by shared hosts to ensure that their hundreds of users on each server aren’t hit by all sorts of threats. Managed WP hosting however, takes security to a whole other level. Increased security protocols, daily malware scans and the ability to ward off a all kinds of cyber threats (such as DDoS attacks) are features you’ll find pretty much as-standard on most managed WordPress hosting plans.

Hosting company provide of security and protection against intruders into their network and servers, it is very hard to make it 100% bullet-proof and to find out the source of the problem. That time managed wordpress hosting the server hardware and software is constantly updated to latest versions and technologies to ensure that your website is safe. Company has provide you with additional security, while managing the firewalls they create and more.

2) Support :

If something unfortunate happens to your site, for example, if it gets hacked, the database crashes or everything on the site is lost; a normal hosting service won’t be able to help you. The most managed WordPress hosting plans include not only automated daily backups, but also features that let you quickly and easily restore to your backups should you ever need to. Many shared hosting services do offer automatic backups via cPanel, however, these are almost always stored on the same server; meaning they’re just as susceptible to damage as the original data. In addition, restoring to one of these backups is usually no trivial task.

3) Core and Plugin updates:

The latest WordPress version has been designed so it can update itself. On some hosting servers this feature is disabled because it may cause pitfalls in server performance if all the websites hosted on the same servers are getting updated at the same time. If you choose to host your wordpress website on a managed hosting, these updated are performed automatically and the team will ensure that all of your plugins are also up to date.

4) Blazing Fast Speeds & performance:

A regular shared hosting is designed for general website needs. It provides an environment that fits everything and these servers has lots unnecessary modules and software installed that will slow down some websites. On a managed wordpress server, only those modules and software are installed that are needed to run wordpress and that are needed for some special plugins. This will significantly speed up your website and it will perform much better than on a regular hosting server.

5) Dedicated Memory : 

Traditional shared hosting account, in the worse case scenario your web site is located together with thousands of other websites on the same server, sharing the same CPU and core memory. With WPEngine and Traffic Planet Hosting, this load is a lot less. While you don’t have a dedicated server to your site, you tend to share with fewer clients on a dedicated managed WordPress environment.


Cheap web Hosting


How to Protect WordPress from malware?


Cheap reseller Hosting


 Protect WordPress

Malware

WordPress is installed on so many websites now, the global reach is comparable to a company like Microsoft. You probably already know the word malware from PC’s and computers. Computer viruses have been around a long time, as well as virus scanning software. With the Internet age came spyware (programs that spy on what you do and send the details to a remove computer), as well as anti-spyware computer software. 

Best way to protect your WordPress from malware

1) Reset your password:

Regularly reset your WordPress admin, FTP, and web hosting control panel passwords every 30-60 days. Be sure to use a 12+ character strong password. Never use the same password at multiple websites or for multiple accounts.

2) Update Everything:

To keep WordPress itself updated, and all plugins and your theme as well at all times. Check to see if your theme has an update available if you purchased it from a developer or a theme house. Have it reviewed by a competent WordPress developer once per year for vulnerabilities if it was custom coded.

3) Limit Access:

Limit and give admin access to only those with a “need to know” basis within your WordPress website.

4) Remove unused items:

Always remove all themes and plugins that are unused and inactive. In addition be sure to remove any plugins that haven’t had an update in 12-18+ months or more.

5) Setup alerting and monitoring:

web hosting companies are all kinds of free services that will alert or monitor you if your website is down.

6) Register with Google Web-master Tools: 

If you register with Google Web-master Tools and they find malware in your website, they will notify you via email. Keep in mind by the time they notify you, your website could have been infected for days or weeks.

7) Update wp-config security salts:

Since before version 3.0 the wp-config.php file of every WP installation has contained security salts and a URL to get random ones to update the file with. Be sure to update your wp-config file.

8) Install and configure a security plugin:

Setup and configure an all-inclusive security plugin, something like Better WP Security or Secure WordPress.

9) Setup and test a backup solution:

You can use a free plugin, premium solution, or web based service to backup your website to an offsite location for recovery in case you are hacked, or something at your web host goes down. This is even protection against issues if you upgrade WordPress or plugins and a conflict takes your website down. At least with an option like this, if you are taking regular versioned backups, you can easily revert to the last known good version.


Cheap web Hosting


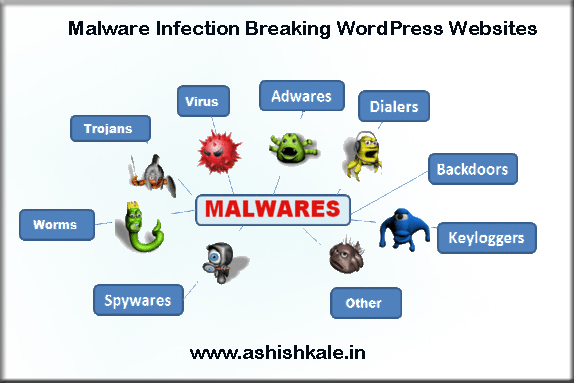
Malware Infection Breaking WordPress Websites


Cheap reseller Hosting


Malware Infection Breaking WordPress Websites

There is a known malware infection caused by a serious vulnerability in the MailPoet WordPress plugin. This malicious attack attempts to slyly inject Spam into the hacked site, which is causing websites to break, and focuses predominantly on WordPress sites with outdated plugins or weak admin passwords.


Malware Infection


  • The infected PHP code is very buggy and is corrupting legitimate website files, as well as themes and plugin files, which causes PHP errors to be displayed instead of website content:

Parse error: syntax error, unexpected ‘)’ in /home/user/public_html/site/wp-config.php on line 91


  • After removing the infecting malware, the only way to remedy the issues is to restore the corrupted files from a backup. This is what the malware code looks like:

< ?php $pblquldqei = ’5c%x7824-%x5c%x7824*!|!%x5c%x7824-%x5c%x7824%x5c%x785c%x5c%x7825j^%xq%x5c%x7825%x5?c%x7827Y%x5c%x78256<.msv%x5c%x7860ftsbqA7>q7825)3?of:opjudovg< ~%x5c%x7824!%x5c%x782421787825!|!*!***b%x5c%x7825)…


  • If you are running MailPoet, we recommend upgrading it to the latest version.

Note : If you do not have a firewall on your website, you have to upgrade the plugin or remove it altogether to avoid more issues.


Cheap web Hosting