How to Install mod_cloudflare on cPanel


Cheap reseller Hosting


cloudflare

Installing mod_cloudflare on cPanel

CloudFlare is a performance and security service. The CloudFlare cPanel plugin makes it easy to integrate into your hosting control panel. The CloudFlare module automatically translates visitor IP addresses to reflect the visitor’s original IP address rather than the IP address of the CloudFlare proxy servers.

Installing mod_cloudflare on a cPanel server is very easy. Just follow 8 steps as below. 


Step 1 :

Download core file by using the following command : 

wget https://raw.githubusercontent.com/cloudflare/mod_cloudflare/master/mod_cloudflare.c


Step 2 :

Connect to your server through SSH and log in as root.


Step 3 :

Change directory to /usr/local/src by using the following command : 

cd /usr/local/src


Step 4 :

Get the source code for mod_cloudflare by using the following command :

wget –no-check-certificate https://raw.github.com/cloudflare/mod_cloudflare/master/mod_cloudflare.c CloudFlare-Tools/master/mod_cloudflare.c


Step 5 :

Build and install mod_cloudflare by using Apache Extension Tool by using the following command : 

apxs -a -i -c mod_cloudflare.c


Step 6 :

Restart the Apache Server daemon by using the following command : 

service httpd restart


Step 7 :

Update the Apache configuration data by using the following command : 

/usr/local/cpanel/bin/apache_conf_distiller –update


Step 8 :

Confirm the module is loaded properly by using the following command : 

httpd -M | grep cloud

cloudflare
.
.
.
.
.

Now,

Apache will log the visitors’ IP addresses instead of the CloudFlare IP’s.


Cheap web Hosting


How to Uninstall MySQL Governor


Cheap reseller Hosting


Uninstall MySQL Governor

To uninstall MySQL Governor.

  • Run the following command to uninstall MySQL Governor:

/usr/share/lve/dbgovernor/install-mysql.py –delete
yum erase db-governor db-governor-mysql


Cheap web Hosting


How to Remove/Uninstall RVSkin from Cpanel/WHM Server ?


Cheap reseller Hosting


RVSkin

rvskin logo

RVSkin is a management software offered with cPanel server that provides a user with complete branding and skinning control over cPanel and Reseller accounts. In a short span of time you will be able to create impressive looking cPanel overlay skins for your end users that are customizable in accordance to your preferences.


Uninstall RVSkin from Cpanel


To Remove/Uninstall RVSkin from Cpanel/WHM Server

Follow the steps to uninstalling RVSkins from Cpanel/WHM Server

Step 1 : Login to Cpanel/WHM server via SSH

Step 2 : Run the following command as root on the server:

# perl /root/rvadmin/uninstall.pl

.

.

.

.

You will be completely Removed/Uninstall RVSkin from your Cpanel/WHM Server


And


If for some reason RVskin was installed in a different location, change the path accordingly.

Restart your cpanel by using following command: 

# /etc/rc.d/init.d/cpanel stop

# /etc/rc.d/init.d/cpanel start


Cheap web Hosting


How to Uninstall or Remove Trendy Site Builder ?


Cheap reseller Hosting


How to Uninstall/Remove Trendy Site Builder ?

Uninstall-Trendy-Site-Builder

Follow the steps you can uninstall Trendy Site Builder within a couple of minutes.

Step 1 : Login to cPanel/WHM

Step 2 : Download the uninstaller from trendyflashdownload.com

http://www.trendyflashdownload.com/installer/cp/uninstall.sh

Step 3 : Set execute permission for uninstall.sh using following command

chmod 755 uninstall.sh

Step 4 : Run the shellscript uninstall.sh

./unistall.sh

.
.
.
.
.
.

Trendy Site Builder will be completely removed from your server
                                               

                                                            Or


If you are quick remove Trendy Site Builder you can use following script.


cd /usr/local/cpanel/base/frontend/x3 rm -rf trendysitebuilder rm -f trendysitebuilder.tar.gz rm -f /usr/local/cpanel/Cpanel/trendysitebuilder.pm cd /usr/local/cpanel/whostmgr/docroot/cgi rm addon_trendysitebuilder.php rm -rf trendysitebuilder /usr/local/cpanel/bin/unregister_cpanelplugin /usr/local/cpanel/bin/trendysitebuilder.cpanelplugin rm -f/usr/local/cpanel/bin/trendysitebuilder.cpanelplugin /usr/local/cpanel/bin/rebuild_sprites


RELATED ARTICLE 


Cheap web Hosting


How to Update Fantastico Manually via WHM?


Cheap reseller Hosting


How to update fantastico manually via WHM?

Fantastico is a scripts library that automates the installation of web applications to a website.

Update Fantastico

Follow the steps to update Fantastico

Step 1 : Login to your cPanel server via WHM

Step 2 : Locate the section entitled Plugins

Step 3 : Click on “Fantastico De Luxe WHM Admin”

Step 4 : Click on “Update/Get files”

Step 5 : Then Click on “Install Latest Fantastico De Luxe” button

.
.
.

Your Fanstastico should be Fully Updated!!


Cheap web Hosting


How to Install Trendy Site Builder


Cheap reseller Hosting


Trendy Site Builder

Install-Trendy-Site-Builder

                         Trendy Site Builder is very easy to use. You don’t need to spend so much time in building a website when you use it. The software is known to run very fast and smooth.  It’s also very affordable. Trendy Site Builder is optimized for social network sites. It supports the best SEO practices and standards. You can attract steady traffic when you keep using it. You can also generate leads and gain lots of profits when you keep using the platform. We are going to use QuickInstall for the installation of Trendy Site Builder. Just go through following steps and Trendy Site Builder will be installed on your computer.

To Install Trendy Site Builder

1) Login to your cPanel Server via SSH

2) Download the installer file.

3) Run the following command Via SSH:


wget http://www.trendyflashdownload.com/installer/cp/ipbased/trendysitebuilder.sh


4) Adjust the permissions of the installer file, by doing the following command:


chmod 755 trendysitebuilder.sh


5) Run the installer file, by doing the following command:


./trendysitebuilder.sh


Please allow a few moments
.
.
.
.
.
The installation to comlete!
( You’ll be able to login to your cPanel/WHM web hosting server )
 
Logging into Trendy Site Builder via cPanel:

1) Login to your cPanel account via SSH

2) Next, locate the “Software/Services” section

3) Then, Click on “Trendy SiteBuilder Icon”
.
.
.

.
You will now be able to design your new website.


Cheap web Hosting


How to Configuring Self-Signed SSL / HTTPS Access


Cheap reseller Hosting


To Configuring Self-Signed SSL / HTTPS Access

1) To install OpenSSL on your VPS:

apt-get -y install openssl


2) To generate a self-signed certificate that ZPanel will use to secure your connection by using following commands:

openssl req -x509 -nodes -days 365 -newkey rsa:2048 -out /etc/pki/tls/certs/zpanel.crt -keyout /etc/pki/tls/certs/zpanel.key


3) To be configured to use the new certificate by using following commands:

nano /etc/httpd/conf.d/ssl.conf


4) Now, Find the SSLCertificateFile and SSLCertificateKeyFile entries and change them to :

SSLCertificateFile /etc/pki/tls/certs/zpanel.crt
SSLCertificateKeyFile /etc/pki/tls/certs/zpanel.key


5) Save changes and Exit from the file.

We need to redirect all HTTP based ZPanel login attempts to the secure HTTPS URL.

1) Login to ZPanel


2) Navigate the menu system as follows:

Zpanel -> Admin -> Module Admin -> Apache Admin


3) In Global Zpanel section, insert the following:

Redirect Permanent / https://[VPS FQDN]/


4) Now restart the Apache server on your VPS.

service apache2 restart

.
.
.
.
.
.

The installation is now complete!

You can now access your Ubuntu ZPanel installation via secure SSL (HTTPS) connections!


Cheap web Hosting


How to install ZPanel on Ubuntu


Cheap reseller Hosting


How to install ZPanel on Ubuntu

Install ZPanel on Ubuntu

ZPanel is a free to download and use Web hosting control panel. It is written to work effortlessly with Microsoft Windows and POSIX (Linux, UNIX and MacOSX) based servers or computers. This solution can turn a home or professional server into a fully fledged, easy to use and manage web hosting server.

As of writing the currently release of ZPanel is 10.1.0. You can go to the ZPanel download page to find the latest version.


To Install ZPanel on Ubuntu

1) Log into the VPS as root.


2) To the update and upgrade by entering the following commands:

apt-get update -y && apt-get upgrade -y


3) Obtain the ZPanel installer:

wget http://www.zvps.co.uk/sites/default/files/downloads/ubuntu-12-04/package/installer-x86_64-install.sh.x.tar.gz


4) Extract the .tar.gz installer by using following commands: 

tar -xf installer-x86_64-install.sh.x.tar.gz


5) Run the installer by using following commands: 

./installer-x86_64-install.sh.x


6) Follow the on screen prompts to complete the install.

.
.
.
.
.

Your ZPanel Installation Complete !

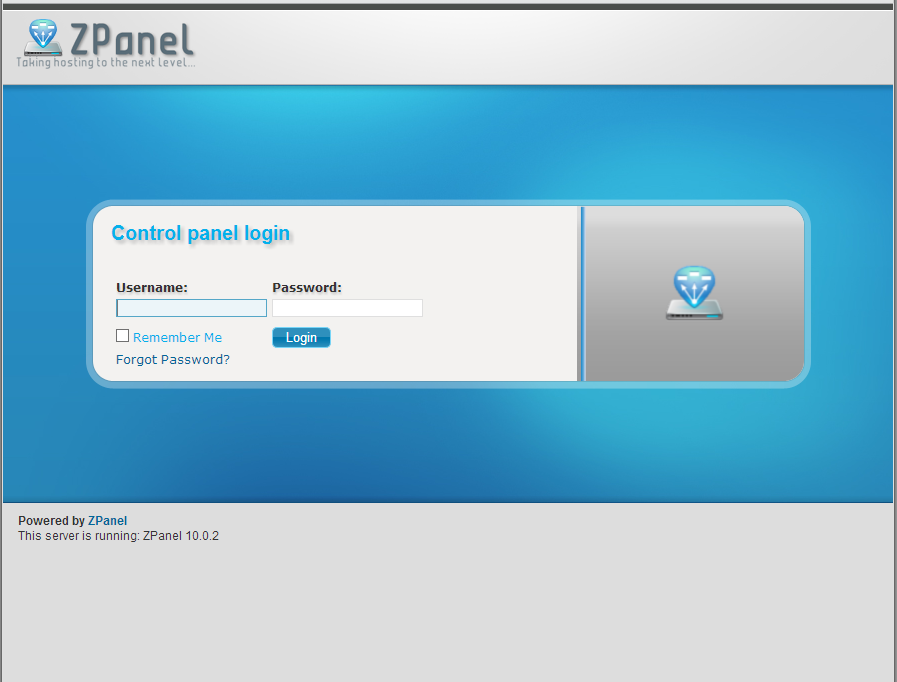
screenshot_Zpanel Login

Then,

1) After installation, reboot your VPS.


2)  Go to the VPS’s IP address in your web browser you can access ZPanel.


3) The default admin login is zadmin, the password is located inside the

/root/passwords.txt file.

4) You can get the password by logging into SSH and issuing :

cat /root/passwords.txt


Cheap web Hosting


How to Install Ajenti on Ubuntu


Cheap reseller Hosting


Install-Ajentii

Ajenti is a simple, lightweight, free and open source tool with a web-based administration control panel. It allowing to manage ubuntu servers and this is similar to Webmin. Ajenti is provides fast and responsive web interface for managing small server set-ups and also best suitable for VPS and Dedicated servers. It has built with many pre-made plugins for configuring and monitoring server software’s and services such as Apache, Cron, File System, Firewall, MySQL, Nginx, Munin, Samba, FTP, Squid and many other tools like File Manager, Code Editor for developers and Terminal access.


Connecting To Your VPS

1) Establish a SSH connection to your virtual server and authenticate as root by using follownig commands

ssh root@your-ip


2) Download the latest package files by using following commands :

apt-get update


Importing the repository key

The following command downloads the key and automatically adds it to your system.

wget http://repo.ajenti.org/debian/key -O- | apt-key add –


Adding the APT repository

1) To Add the repository to your sources.list by using the following command

echo “deb http://repo.ajenti.org/ng/debian main main ubuntu” >> /etc/apt/sources.list


2) Navigate to the end of the file and paste the following line

deb http://repo.ajenti.org/debian main main debian


3) Save this changes and Exit.


Installing Ajenti


Step 1 : Update the package sources.


Step 2 : Install ajenti package by using following commands

apt-get update && apt-get install ajenti -y


Step 3 : Start the service by using following commands

service ajenti restart


Step 4 : If you are using UFW firewall open port 8000 to enable access to the control panel by using following command

ufw allow 8000

.
.
.
.
Congratulation’s! You have successfully installed Ajenti.


   Or


Quick automatic installation then use following commands  

wget -O- https://raw.github.com/ajenti/ajenti/1.x/scripts/install-ubuntu.sh | sudo sh


Related Post “How to Configure Ajenti on Ubuntu


Cheap web Hosting


How to Install phpmyadmin on centOs 7


Cheap reseller Hosting


phpmyadmin on centOs 7 

phpMyAdmin is an open source tool used for the administration of MySQL. phpMyAdmin depends on the LAMP stack. It requires Apache2 or any compatible web servers, MySQL and PHP. This post will show you how to install phpmyadmin on centos 7.

Install-phpMyadmin-CentOS

Installation : 

Step 1 : 

Download epel-release-7-x.noarch.rpm

Step 2 :

Install epel-release-7-x.noarch.rpm file

Step 3 : 

Copying the rpm link by using follownig command

[root@hostripples ~]# rpm -ivh http://epel.mirror.net.in/epel/7/x86_64/e/epel-release-7-1.noarch.rpm

Step 4 : 

Now, update repositories by issuing follownig command

[root@hostripples ~]# yum check-update

Step 5 :

Install phpmyadmin package along with dependencies

[root@hostripples ~]# yum -y install phpmyadmin

When you are finished

Step 6 :

Open /etc/httpd/conf.d/phpMyAdmin.conf file and edit as follows and Find follownig lines.

Note : ( you are found these line 2 times )

# Apache 2.4
<RequireAny>
Require ip 127.0.0.1
Require ip ::1
</RequireAny>


Replace with


# Apache 2.4
<RequireAny>
# Require ip 127.0.0.1
# Require ip ::1
Require all granted
</RequireAny>

Step 7 :

Then, Restart Apache service by using following commands

[root@hostripples ~]# systemctl restart httpd.service

Step 8 :

Now open http://serverIP/phpmyadmin in your browser.

.
.
.
.
.

Congratulations! You have just installed phpMyAdmin on your CentOS 7


You can login using root as username and mysql root password.


Cheap web Hosting


1 4 5 6 7 8 9