How to Install Minecraft Server on CentOS VPS


Cheap reseller Hosting


How to Install Minecraft Server on CentOS VPS


Install Minecraft_ashishkale.in copy


  • First, Installing Java-JDK by using following command: 

yum install java-1.6.0-openjdk

  • If have check Java was installed then you can use following command:

which java

  • The following command will be displayed if it was properly installed:

/usr/bin/java

  • Switch to the root directory by using following command:

cd

  • Create a Minecraft directory, using following command:

mkdir Minecraft

  • Now, Enter the directory:

cd Minecraft

  • Download Minecraft:

wget http://minecraft.net/download/minecraft_server.jar

.
.
.
.
Minecraft is now installed.


  • You’ll now need to install “screen” to keep the Minecraft server running after the SSH session is closed, you can use following command.

yum install screen

  • Use the screen and run Minecraft. Enter screen:

screen

  • Start up Minecraft

java -Xmx1024M -Xms1024M -jar minecraft_server.jar nogui


===========================================


  • To get back to the normal screen, press these keys:

Control+A+D

  • To get back to the screen where Minecraft is running:

screen -r


Cheap web Hosting


How to Install Trendy Site Builder


Cheap reseller Hosting


Trendy Site Builder

Install-Trendy-Site-Builder

                         Trendy Site Builder is very easy to use. You don’t need to spend so much time in building a website when you use it. The software is known to run very fast and smooth.  It’s also very affordable. Trendy Site Builder is optimized for social network sites. It supports the best SEO practices and standards. You can attract steady traffic when you keep using it. You can also generate leads and gain lots of profits when you keep using the platform. We are going to use QuickInstall for the installation of Trendy Site Builder. Just go through following steps and Trendy Site Builder will be installed on your computer.

To Install Trendy Site Builder

1) Login to your cPanel Server via SSH

2) Download the installer file.

3) Run the following command Via SSH:


wget http://www.trendyflashdownload.com/installer/cp/ipbased/trendysitebuilder.sh


4) Adjust the permissions of the installer file, by doing the following command:


chmod 755 trendysitebuilder.sh


5) Run the installer file, by doing the following command:


./trendysitebuilder.sh


Please allow a few moments
.
.
.
.
.
The installation to comlete!
( You’ll be able to login to your cPanel/WHM web hosting server )
 
Logging into Trendy Site Builder via cPanel:

1) Login to your cPanel account via SSH

2) Next, locate the “Software/Services” section

3) Then, Click on “Trendy SiteBuilder Icon”
.
.
.

.
You will now be able to design your new website.


Cheap web Hosting


How to install ZPanel on Ubuntu


Cheap reseller Hosting


How to install ZPanel on Ubuntu

Install ZPanel on Ubuntu

ZPanel is a free to download and use Web hosting control panel. It is written to work effortlessly with Microsoft Windows and POSIX (Linux, UNIX and MacOSX) based servers or computers. This solution can turn a home or professional server into a fully fledged, easy to use and manage web hosting server.

As of writing the currently release of ZPanel is 10.1.0. You can go to the ZPanel download page to find the latest version.


To Install ZPanel on Ubuntu

1) Log into the VPS as root.


2) To the update and upgrade by entering the following commands:

apt-get update -y && apt-get upgrade -y


3) Obtain the ZPanel installer:

wget http://www.zvps.co.uk/sites/default/files/downloads/ubuntu-12-04/package/installer-x86_64-install.sh.x.tar.gz


4) Extract the .tar.gz installer by using following commands: 

tar -xf installer-x86_64-install.sh.x.tar.gz


5) Run the installer by using following commands: 

./installer-x86_64-install.sh.x


6) Follow the on screen prompts to complete the install.

.
.
.
.
.

Your ZPanel Installation Complete !

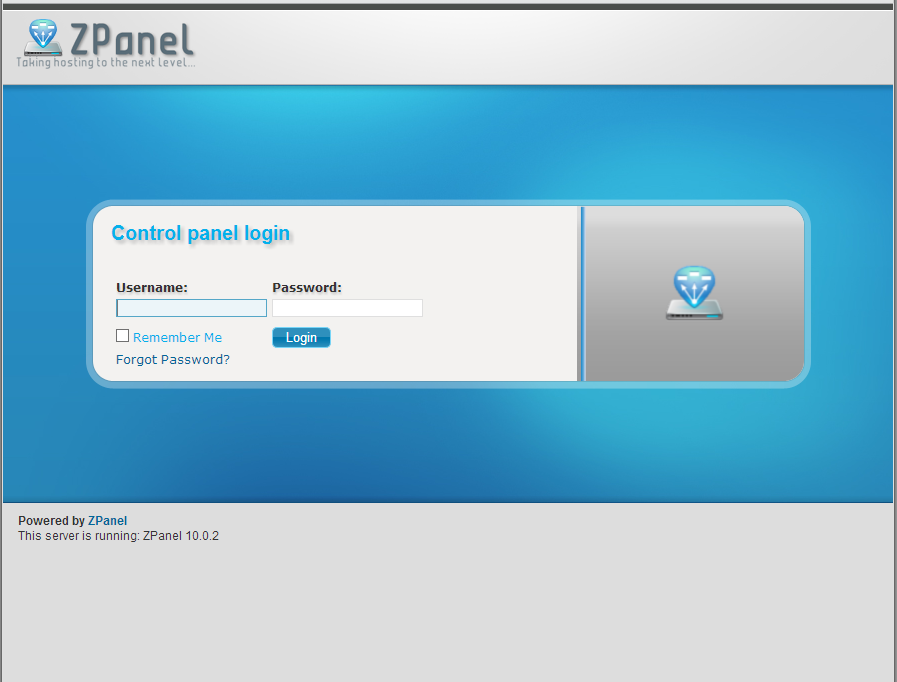
screenshot_Zpanel Login

Then,

1) After installation, reboot your VPS.


2)  Go to the VPS’s IP address in your web browser you can access ZPanel.


3) The default admin login is zadmin, the password is located inside the

/root/passwords.txt file.

4) You can get the password by logging into SSH and issuing :

cat /root/passwords.txt


Cheap web Hosting


How to Install Ajenti on Ubuntu


Cheap reseller Hosting


Install-Ajentii

Ajenti is a simple, lightweight, free and open source tool with a web-based administration control panel. It allowing to manage ubuntu servers and this is similar to Webmin. Ajenti is provides fast and responsive web interface for managing small server set-ups and also best suitable for VPS and Dedicated servers. It has built with many pre-made plugins for configuring and monitoring server software’s and services such as Apache, Cron, File System, Firewall, MySQL, Nginx, Munin, Samba, FTP, Squid and many other tools like File Manager, Code Editor for developers and Terminal access.


Connecting To Your VPS

1) Establish a SSH connection to your virtual server and authenticate as root by using follownig commands

ssh root@your-ip


2) Download the latest package files by using following commands :

apt-get update


Importing the repository key

The following command downloads the key and automatically adds it to your system.

wget http://repo.ajenti.org/debian/key -O- | apt-key add –


Adding the APT repository

1) To Add the repository to your sources.list by using the following command

echo “deb http://repo.ajenti.org/ng/debian main main ubuntu” >> /etc/apt/sources.list


2) Navigate to the end of the file and paste the following line

deb http://repo.ajenti.org/debian main main debian


3) Save this changes and Exit.


Installing Ajenti


Step 1 : Update the package sources.


Step 2 : Install ajenti package by using following commands

apt-get update && apt-get install ajenti -y


Step 3 : Start the service by using following commands

service ajenti restart


Step 4 : If you are using UFW firewall open port 8000 to enable access to the control panel by using following command

ufw allow 8000

.
.
.
.
Congratulation’s! You have successfully installed Ajenti.


   Or


Quick automatic installation then use following commands  

wget -O- https://raw.github.com/ajenti/ajenti/1.x/scripts/install-ubuntu.sh | sudo sh


Related Post “How to Configure Ajenti on Ubuntu


Cheap web Hosting


How to Install phpmyadmin on centOs 7


Cheap reseller Hosting


phpmyadmin on centOs 7 

phpMyAdmin is an open source tool used for the administration of MySQL. phpMyAdmin depends on the LAMP stack. It requires Apache2 or any compatible web servers, MySQL and PHP. This post will show you how to install phpmyadmin on centos 7.

Install-phpMyadmin-CentOS

Installation : 

Step 1 : 

Download epel-release-7-x.noarch.rpm

Step 2 :

Install epel-release-7-x.noarch.rpm file

Step 3 : 

Copying the rpm link by using follownig command

[root@hostripples ~]# rpm -ivh http://epel.mirror.net.in/epel/7/x86_64/e/epel-release-7-1.noarch.rpm

Step 4 : 

Now, update repositories by issuing follownig command

[root@hostripples ~]# yum check-update

Step 5 :

Install phpmyadmin package along with dependencies

[root@hostripples ~]# yum -y install phpmyadmin

When you are finished

Step 6 :

Open /etc/httpd/conf.d/phpMyAdmin.conf file and edit as follows and Find follownig lines.

Note : ( you are found these line 2 times )

# Apache 2.4
<RequireAny>
Require ip 127.0.0.1
Require ip ::1
</RequireAny>


Replace with


# Apache 2.4
<RequireAny>
# Require ip 127.0.0.1
# Require ip ::1
Require all granted
</RequireAny>

Step 7 :

Then, Restart Apache service by using following commands

[root@hostripples ~]# systemctl restart httpd.service

Step 8 :

Now open http://serverIP/phpmyadmin in your browser.

.
.
.
.
.

Congratulations! You have just installed phpMyAdmin on your CentOS 7


You can login using root as username and mysql root password.


Cheap web Hosting


Install Mytop in Linux and Cpanel


Cheap reseller Hosting


How to install mytop in linux and cpanel


MySQL is one of the most important programs on a server, unfortunately it is also pretty resource intensive. One a  server it is not uncommon for a single user or even a query to take up the bulk of the servers CPU cycles. Mytop is a very useful program to see what queries a server is currently processing as well as which user is executing them. Think of mytop as top for mysql. If you see a lot from a user that means they are probably the hog. Mytop can also be useful for figuring out exactly which queries are causing the problem in the case of a self-designed website.


install mytop


The following commands use  how to install mytop on the server and run it.

1) To Install Term Read Key:

cd /usr/local/src

wget http://search.cpan.org/CPAN/authors/id/J/JS/JSTOWE/TermReadKey-2.30.tar.gz

tar -zxf TermReadKey-2.30.tar.gz

cd TermRead*

perl Makefile.PL

make test

make

make install

cd ..


2) Now,To Install DBI:

wget http://search.cpan.org/CPAN/authors/id/T/TI/TIMB/DBI-1.48.tar.gz

tar -zxf DBI-1.48.tar.gz

cd DBI*

perl Makefile.PL

make test

make

make install

cd ..


3) Finally  To Install MYTOP:

wget http://jeremy.zawodny.com/mysql/mytop/mytop-1.4.tar.gz

tar -zxf mytop-1.4.tar.gz

cd mytop*

perl Makefile.PL

make test

make

make install


NOTE: You may get following error in CentOS 5.3

Error in option spec: “long|!”

Search for the line in Makefile.PL

“long|!” => \$config{long_nums},

Change it to by commenting using #

#”long|!” => \$config{long_nums},


Cheap web Hosting


Install Easy Hosting Control Panel


Cheap reseller Hosting


EHCP

Easy Hosting Control Panel


                 EHCP (Easy Hosting Control Panel) is an open source hosting control panel for administrators who want to sell hosting or set up hosting servers. EHCP is compatible with a server running a Debian-based system such as Debian Squeeze, Ubuntu, Linux Mint, etc. Ehcp is a Hosting Control Panel (hcp). hcp is a tool in a server to facilate the process of hosting domains, emails, adding domains, ftp users and so on.


EHCP Features:

EHCP has many unique features compared to other control panels.

General Features:

* Full php, full opensource, easily modifiable, customazible, ehcp templates
* Unlimited “resellers, panel users, domains, ftp users, emails, mysqls”
* Domains, subdomains, ftp, mysql, dns (automatic), email etc. management
* password protected domains,
* Email forwarding, autoreply, catch-all emails
* Web-stats (webalizer)
* web-ftp (net2ftp)
* Easy Install Scripts (scripts easily downloaded and copied by means of server)
* Disk quota control,
* Custom http, custom dns, domain aliases, domain redirect,
* Ssl support
* Different languages, templates support, a few lang/templates included,
* Different Menus/pages for Server Admin, Reseller, domain admin, email user (4 level)
* server backup/restore (files+db)
* domain transfer to another ehcp user
* simple, light, fast, host hundreds of domains in it.
* supports Ubuntu 6-9.10, debian 4,5, all debian based linux’es
* Any server related program may be installed with Ubuntu’s apt-get command
* Almost all programs are always up-to-date when you update your server, with Ubuntu’s: apt-get update ; apt-get upgrade
* Opensource, GPL, free, full php, object oriented, modular, easily modifiable/extendable design..
* More features that I forgot to write..

New with 0.29.12:

* Customizable, templates
* add domain to my ftp
* add ftp with any directory under home
* add ftp with subdomain
* add ftp with subdirectory under domainname
* list related/similar functions in ehcp
* edit dns/apache template for a domain
* domain aliases
* email forwardings
* catch all email
* default domain settable for ehcp gui
* “fix apache configuration” link in options
* “fix email (postfix) configuration” link in options
* apache ssl support
* new default theme: xp5-z7
* more “easy install scripts”, a total of 30 scripts
* disk quota support
* smtp auth support
* more options for ehcp
* bulk add domain feature
* multi server intro: separate mysql server support
* improved installer


EHCP


How to Install Easy Hosting Control Panel (EHCP) In Ubuntu 14.04 ?


1) Login as root user using ssh and download the EHCP installation script using the following command:


# wget http://www.ehcp.net/ehcp_latest.tgz


2) Extract the downloaded file using tar command:


# tar -zxvf ehcp_latest.tgz


3) Switch to the extracted folder and run the installation script using the following commands:


# cd ehcp
# ./install.sh


Follow installation wizard and read the instructions carefully, the install script will install all required packages including Apache, MySql and Postfix. You will need to provide some information to configure the services and set the admin passwords.

When the installer is finished. you will be provided with the ehcp login page in your Web browser window, if you are on your local machine, otherwise, you need to connect to your new web Server by entering the IP address of you server.


http://hostripples.com/vhosts/ehcp


Your default admin username: admin
Default admin pass: 1234


Cheap web Hosting


How to Install Zamfoo


Cheap reseller Hosting


What is Zamfoo ?

zamfoo

Zamfoo is a plugin which provides additional features to a Reseller and makes his work a bit easy. Zamfoo plugin needs to be installed on the server and can be integrated with Reseller center. The OS recommended for Zamfoo is Cent OS, as its the most compatible OS for cPanel/WHM. Altough there are few limitations to use the this with WHM reseller.


Zamfoo_ashishkale.in


To Install Zamfoo 

Run the following commands in SSH:

cd/

Use of this commands : This will take you to the root directory of your server.


wget http://www.zamfoo.com/downloads/zamfoo_installer.tar

Use of this commands : This command will download zafoo on your server.


tar -xvf zamfoo_installer.tar

Use of this commands : This command will extract contents on the server.


chmod 755 runme.cgi

Use of this commands : This command will modify the permissions to make it executable.


./runme.cgi

Use of this commands : This command will run the installer.


After firing all these commands,

You will have to enter the license key here:-

$license=”License key”

Once enter the License key
press CTRL + X

then Save it.

.

.

.

.

 Zamfoo will be installed on your Linux server.


Cheap web Hosting


Important cPanel Scripts


Cheap reseller Hosting


cpanel

WHM / cPanel Scripts are located in /scripts/

/scripts/adddns – Adds a DNS zone.
/scripts/addnetmaskips – Add the netmask 255.255.255.0 to all IPs that have no netmask.
/scripts/addnobodygrp – Adds the group nobody and activates security.
/scripts/addpop – Add a Pop Account.
/scripts/addservlets – Add JSP support to an account (requires tomcat).
/scripts/adduser – Add a user to the system.
/scripts/betaexim – Installs the latest version of exim.
/scripts/biglogcheck – looks for logs nearing 2 gigabytes in size
/scripts/bsdcryptoinstall – Installs crypto on FreeBSD.
/scripts/bsdldconfig – Configures the proper lib directories in FreeBSD.
/scripts/bsdpkgpingtest – Tests the connection speed for downloading FreeBSD packages.
/scripts/buildeximconf – Rebuilds exim.conf.
/scripts/buildpostgrebsd-dev – Installs postgresql on FreeBSD.
/scripts/checkbadconf – Checks /usr/local/apache/conf/httpd.conf for bad users.
/scripts/checkbsdgroups – Checks and repairs proftpd ownership on FreeBSD.
/scripts/checkccompiler – Checks to make sure the C compiler works on your system.
/scripts/checkfpkey – Checks for the FrontPage suid key
/scripts/checkgd – Checks to see if GD is built.
/scripts/checkinterchange – (Internal use).
/scripts/checklibssl – Checks to make sure the proper libssl symlinks exist.
/scripts/checkmaxclients – Checks to see if apache has reached the maximum clients allowed.
/scripts/checkoldperl – Checks to see if the version of Perl on your system is old.
/scripts/checkrsync – Checks to make sure rsync is up to date.
/scripts/checksuexecpatch – Checks to see if mailman has been patched for suexec.
/scripts/checksuspendpages – Checks to see if suspend pages are properly named.
/scripts/checkup2date – Makes sure up2date is set up properly (RedHat)
/scripts/checkyum – Makes sure yum is set up properly.
/scripts/chkpaths – Makes sure /usr/sbin/chown has a symlink to /bin/chown
/scripts/chownpublichtmls – Change ownership of all users web space to them, which is useful for converting to
suexec. Files owned by nobody are deleted.
/scripts/ckillall – Allows you to kill a process (used like killall).
/scripts/cleanbw – Cleans up old bandwidth logs.
/scripts/cleandns8 – Clean up named.conf.
/scripts/cleangd – Cleans up old GD installs and reinstalls GD
/scripts/cleanmd5 – Fix CPAN md5 problems.
/scripts/cleanmsglog – cleans exim’s msglog
/scripts/cleanupmysqlprivs – Cleans up improper mySQL privileges.
/scripts/compilers – Disables the usage of compilers for unprivileged users.
/scripts/convert2maildir – Converts mail from mbox to maildir format and installs courier impap and pop (cpimap is
removed).
/scripts/cpbackup – Runs backups.
/scripts/distupgrade – Upgrades RedHat to the newest version (for testing only)
/scripts/dnscluster – Enables DNS clustering.
/scripts/dnstransfer – Only if the server has a DNS master (sync with DNS master).
/scripts/downgradefp – Downgrades FrontPage Extensions (to 5.0-0)
/scripts/dropmysqldb – Drops a mySQL database.
/scripts/easyapache – Upgrade Apache
/scripts/editquota – Change a users quota.
/scripts/enablechkservdwebmail – Enable service checking of webmaild.
/scripts/enablefileprotect – Protects home directories if file protection is built in apache.
/scripts/ensurepkg – Installs a FreeBSD package.
/scripts/ensurerpm – Installs a rpm.
/scripts/exim3 – Installs exim 3.
/scripts/exim4 – Installs exim 4.
/scripts/eximlocalsend – Enables/Disables exim local sending.
/scripts/eximup – Installs/Updates exim.
/scripts/findhacks – Search for common Trojan Horses.
/scripts/findoddrootprocesses – Lists root processes that may need to be checked out.
/scripts/findphpversion – Check to see if your php version file is up to date.
/scripts/fixallcartswithsuexec – Fixes permissions on carts when using suexec.
/scripts/fixbinpath – Makes sure all bin file paths are correct.
/scripts/fixbuggynamed – Updates bind to solve any problems with bugs.
/scripts/fixcommonproblems – Attempt to fix the most common problems.
/scripts/fixetchosts – Fixes problems with /etc/hosts
/scripts/fixeverything – Fix common problems and quotas.
/scripts/fixinterchange – Reinstall interchange Perl modules.
/scripts/fixinterchangeperm – fix permissions on a user’s interchange cart.
/scripts/fixlocalhostwithphp – Change /etc/hosts to work better with PHP 4.2.0 + MySQL.
/scripts/fixmailman – Updates and restarts mailman.
/scripts/fixmysql – Fixes problems with mySQL.
/scripts/fixmysqlbsd – Fixes problesm with mySQL on FreeBSD.
/scripts/fixnamed – Updates bind to handle many DNS zones (more than 512).
/scripts/fixpop – Fix a POP account and reset password.
/scripts/fixproftpdconf – Fixes problems with /usr/local/etc/proftpd.conf
/scripts/fixproftpddupes – Updates proftpd.
/scripts/fixquotas – Fix quotas.
/scripts/fixrndc – Fixes named.conf to prevent rndc staus failed.
/scripts/fixsubdomainlogs – Run if subdomain logs don’t show up in cPanel.
/scripts/fixsuexeccgiscripts – Fix CGI scripts that are broken after suexec installed.
/scripts/fixvaliases – Fix permisions on valiases.
/scripts/fixwebalizer – Repair a Webalizer that has stopped updating.
/scripts/fpanonuserpatch – Updates FrontPage extensions to include the anonymous user patch.
/scripts/ftpquaotacheck – Runs quota checking for all ftp users.
/scripts/ftpup – Updates your ftp server.
/scripts/fullhordereset – Resets Horde and displays the current Horde password.
/scripts/gcc3 – Installs gcc-3.3.3
/scripts/gencrt – Generate a .crt and .csr file.
/scripts/initfpsuexec – Enable FrontPage suexec support.
/scripts/initquotas – Turn on quota support on new drives.
/scripts/initsslhttpd – Make sure HTTP starts with SSL.
/scripts/initsuexec – Turn on suexec support if suexec is installed.
/scripts/installfpfreebsd – Installs FrontPage 5 Extensions on FreeBSD.
/scripts/installfpgentoo – Installs FrontPage on Gentoo.
/scripts/installgd – Builds GD.
/scripts/installpkg – Installs a FreeBSD package.
/scripts/installpostgres – Installs PostrgeSQL.
/scripts/installzendopt – Install zend optimzer.
/scripts/installzendopt-freebsd – Install zend optimizer on a freebsd machine.
/scripts/isdedicatedip – Checks an ip to see if it is dedicated.
/scripts/killacct – Delete an account.
/scripts/killdns – Delete a DNS zone.
/scripts/killpvhost – Removes a virtual host from proftpd.conf.
/scripts/killspamkeys – Removes a spam key.
/scripts/killsslvhost – Removes a SSL entry for a virtual host.
/scripts/killvhost – Delete a vhost.
/scripts/listcheck – Checks mailing lists for issues.
/scripts/listproblems – Lists common problems.
/scripts/listsubdomains – List subdomains.
/scripts/mailperm – Fix almost any mail permission problem.
/scripts/mailscannerupdate – Updates MailScanner
/scripts/makecpphp – Installs php.
/scripts/manualupcp – Updates cPanel manually.
/scripts/md5crypt – Encrypts a password into MD5.
/scripts/mysqladduserdb – Create a MySQL databse and user.
/scripts/mysqlconnectioncheck – Attempts to connect to MySQL, restarts SQL if necessary.
/scripts/mysqldeluserdb – Delete a MySQL database and user.
/scripts/mysqlpasswd – Change MySQL password.
/scripts/mysqlup – Updates mySQL.
/scripts/newexim – Installs the latest version of exim.
/scripts/nofsck – Make fsck always use -y
/scripts/nomodattach – Removes mod_attach from httpd.conf.
/scripts/nomodauthmysql -Removes mod_auth_mysql from httpd.conf.
/scripts/nomodbwprotect – Removes mod_bwportect from httpd.conf.
/scripts/nomodgzipconfmods – Removes mod_gzip from httpd.conf.
/scripts/nomodperl – Removes mod_perl from httpd.conf.
/scripts/park – Parks a domain.
/scripts/patcheximconf – Fixes exim.conf.
/scripts/perlinstaller – Installs perl.
/scripts/phpini – Create a php.ini file.
/scripts/proftpd128 – Installs proftpd-1.2.8.
/scripts/quickkernel – Updates your kernel.
/scripts/quicksecure – Quickly kill useless services.
/scripts/rebuildcpanelsslcrt – Rebuilds the cPanel SSL Certificate.
/scripts/rebuildcpusers – Rebuilds /var/cpanel/users.
/scripts/rebuildetcpasswd – Rebuilds /etc/passwd.
/scripts/rebuildeximbsd – Rebuilds exim on FreeBSD.
/scripts/rebuildhttpdconffromproftpd – Rebuild httpd.conf from the proftpd.conf file.
/scripts/rebuildnamedconf – Restore named.conf from files in /var/named.
/scripts/rebuildproftpd – Restore proftpd.conf from httpd.conf.
/scripts/reinstallmailman – Reinstalls mailman.
/scripts/reseteximtodefaults – Resets exim’s default settings.
/scripts/resetimappasswds – Resets all imap passwords.
/scripts/restartsrv – Restart a service.
/scripts/restartsrv_apache – Restart apache.
/scripts/restartsrv_bind – Restart bind.
/scripts/restartsrv_clamd – Restart clamd.
/scripts/restartsrv_courier – Restart courier imap.
/scripts/restartsrv_cppop – Restart cppop.
/scripts/restartsrv_entropychat – Restart entropy chat.
/scripts/restartsrv_exim – Restart exim.
/scripts/restartsrv_eximstats – Restart exim statistics.
/scripts/restartsrv_ftpserver – Restart your ftp server.
/scripts/restartsrv_httpd – Restart httpd.
/scripts/restartsrv_imap – Restart impad.
/scripts/restartsrv_inetd – Restart inetd.
/scripts/restartsrv_interchange – Restart Interchange Shopping Cart.
/scripts/restartsrv_melange – Restart melange chat.
/scripts/restartsrv_mysql – Restart mysqld.
/scripts/restartsrv_named – Restart named.
/scripts/restartsrv_postgres – Restart postgresql.
/scripts/restartsrv_postgresql – Restart postgresql.
/scripts/restartsrv_proftpd – Restart proftpd.
/scripts/restartsrv_pureftpd – Restart pure-ftpd.
/scripts/restartsrv_spamd – Restart spamd.
/scripts/restartsrv_sshd – Restart sshd.
/scripts/restartsrv_syslogd – Restart syslogd.
/scripts/restartsrv_tomcat – Restart tomcat.
/scripts/restartsrv_xinetd – Restart xinetd.
/scripts/restoremail – Restores a user’s mail.
/scripts/runstatsonce – Runs statistics (should be used from the crontab).
/scripts/runweblogs – Run analog/webalizer/etc. for a user.
/scripts/safeyum – Runs yum safely.
/scripts/setupfp – Install FrontPage 3 on an account.
/scripts/setupfp4 – Install FrontPage 4 (2000) installer on an account.
/scripts/setupfp5 – Install FrontPage 5 (2002) installer on an account.
/scripts/setupfp5.nosueuxec – Install FrontPage 5 (2002) installer on an account when not using suexec.
/scripts/unsetupfp4 – Removes FrontPage 4 or 5 from an account.
/scripts/unsuspendacct – Unsuspends an account.
/scripts/upcp – Updates cPanel.
/scripts/whoowns – Finds out who owns a domain.
/scripts/wwwacct – Creates an account.


Cheap web Hosting


How to install WebCalendar using Fantastico


Cheap reseller Hosting


Install WebCalendar

1) Open your control panel. then Login to cPanel

2) Click on Fantastico

3) Click on WebCalendar from the list

4) Click on Install to begin the installation process

5) Choose the domain name from the drop down menu

6) Choose the directory you want WebCalendar to reside under

7) Fill in the admin username and the password

8) Choose the nickname under which you’ll be posting and fill in your email address

9) Fill in all other necessary fields

10) Click install – on the next screen click finish installation and you’re done.

11) After the installation completes, you can click on the link to visit your WebCalendar installation.

12)  you’ll see this error:

My Calendar Error
Error removing temporary file.
The permissions for the following directory do not support the db_cachedir option in includes/settings.php:
/tmp

The setting for db_cachedir will be set to /tmp by default:

db_cachedir: /tmp

You’ll want to change this to your cPanel user’s /tmp directory by editing this value to:

db_cachedir: /home/userna5/tmp

13) Then just click Save

14) Now try to access your WebCalendar install again, you should see the month display by default.


Cheap web Hosting


1 2 3 4