Magento web e-commerce SUPEE-5344 critical RCE (remote code execution) vulnerability .


Cheap reseller Hosting


magento-security-update

A patch to address the flaws was released on February 9, 2015 (SUPEE-5344 available here). Store owners and administrators are urged to apply the patch immediately if they haven’t done so already.

RECOMMENDED ACTIONS:

1. Check for unknown files in the web server document root directory. If you find any, you may be impacted.

2. Download and implement 2 patches from the Magento Community Edition download page.

    • SUPEE-5344 – Addresses a potential remote code execution exploit (Added Feb 9, 2015)
    • SUPEE-1533 – Addresses two potential remote code execution exploits (Added Oct 3, 2014)

3. Implement and test the patches in a development environment first to confirm that they work as expected before deploying them to your production site.

Note: Different versions of the patch are available for Magento Community Edition 1.4.x through 1.9.x.

HOW TO DOWNLOAD?

You can access Magento’s Community Edition download page from here. Find “Magento Community Edition Patches” section and download the right security patch.


Cheap web Hosting


How to Setup Mod Security on CentOs Web Panel


Cheap reseller Hosting


centos-web-panel

Setup Mod Security

ModSecurity is an open source, cross-platform web application firewall (WAF) module. Known as the “Swiss Army Knife” of WAFs, it enables web application defenders to gain visibility into HTTP(S) traffic and provides a power rules language and API to implement advanced protections.

list of the most important usage scenarios :

  • Real-time application security monitoring and access control
  • Virtual patching
  • Full HTTP traffic logging
  • Continuous passive security assessment
  • Web application hardening
  • Something small, yet very important to you

Find more details of Mod Security

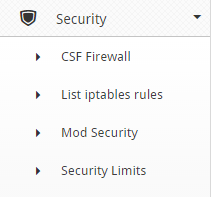
Step 1 – Go to Security then Click on Mod Security menu:

cwp10

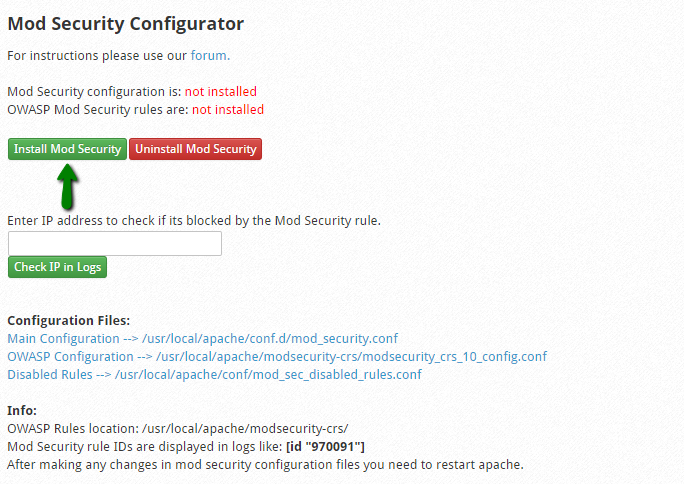
Step 2 – By default this module is not installed. Click on Install Mod Security Tab .

cwp11

Once you click on it you can see the below message :

cwp12

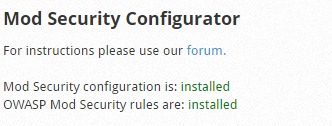
Once its install you can see the message :

cwp13

That’s it. Mod_security includes some necessary rules  by default. But however if you want to go advance, you can manually edit each configuration file and adjust the rules as per your requirement.


Cheap web Hosting


How to Enable Config Server Firewall (CSF) on Centos Web Panel


Cheap reseller Hosting


centos-web-panel

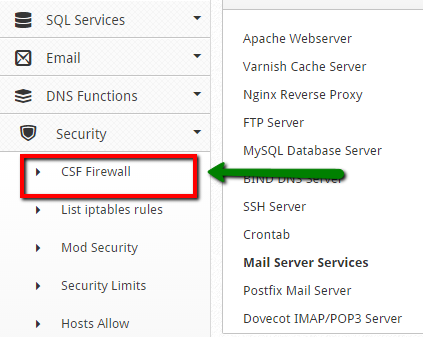
Step 1 – Go to Security then Click on CSF Firewall

cwp7


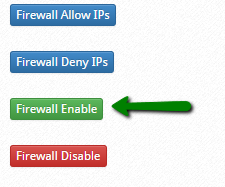
Click on CSF Firewall and Scroll down . Then you can see an Option to Enable firewall :

cwp8


Click on Firewall Enable .

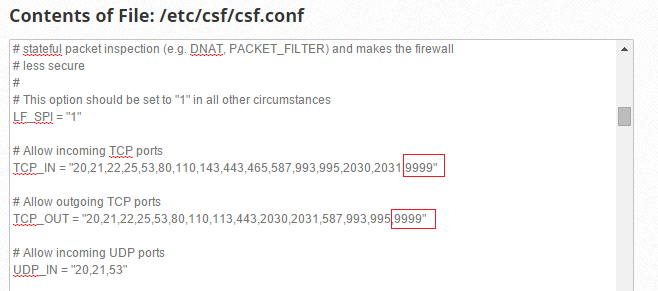
Step 3 – Once activated, you can now edit few lines of CSF Configuration. Click on the Firewall Configuration button. And Add the SSH Port which we have changed in my  Previous Post  how to change SSH Port . You can see the New Port number added in CSF configuration file :

cwp9


Once done, click the Save Changes button.


Cheap web Hosting


How to change default SSH port on CentOS Web Panel (CWP)


Cheap reseller Hosting


centos-web-panel


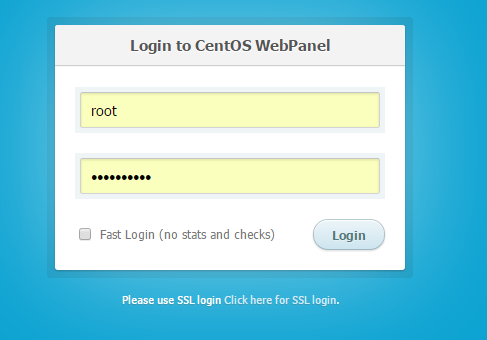
Step 1 – Login to CWP Admin page as root via:

http://server-ip-address:2030/login.php

cwp1


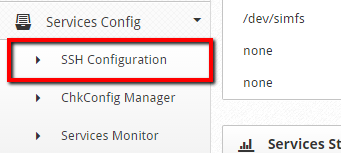
Step 2 – Now go to Services Config then click on SSH Configuration:

cwp2


Once you click on SSH Configuration scroll down and you can see an option to Create File Backup

cwp3


Click on the Button to take the backup . Once the Backup is completed you can see the below message :

cwp4


Step 3 – Find the Following Line :

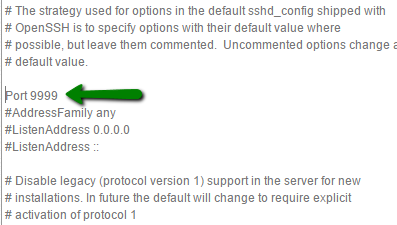
#port 22

Remove the # symbol and change the “22” (it is default port) to to any number between 1025 and 65536, For example is port 9999.

cwp5


Now click on Save Changes and you can see the message :

cwp6


Done .


Cheap web Hosting


London Railway System Passwords Exposed During TV Documentary


Cheap reseller Hosting


The Weakest Link In the Information Security Chain is still – Humans.

And this news has ability to prove this fact Right.

One of London’s busiest railway stations has unwittingly exposed their system credentials during a BBC documentary. The sensitive credentials printed and attached to the top of a station controller’s monitor were aired on Wednesday night on BBC.

What could be even


Source: Hacker News


Cheap web Hosting


Mumblehard Malware Targets Linux and FreeBSD Servers


Cheap reseller Hosting


Thousands of computers and web servers running Linux and FreeBSD operating systems have been infected over past five years with sophisticated malware that turn the machines into spambots.

The new Linux malware, discovered by the security researchers from the antivirus provider Eset, has been dubbed “Mumblehard” because it is Muttering spam from your servers, says Eset 23-page long report (


Source: Hacker News


Cheap web Hosting


Hacker Finds a Simple Way to Bypass Google Password Alert


Cheap reseller Hosting


Less than 24 hours after Google launched the new Phishing alert extension Password Alert, a security researcher was able to bypass the feature using deadly simple exploits.

On Wednesday, the search engine giant launched a new Password Alert Chrome extension to alert its users whenever they accidentally enter their Google password on a carefully crafted phishing website that aimed at


Source: Hacker News


Cheap web Hosting


Fastest Operating System for Quantum Computing Developed By Researchers


Cheap reseller Hosting


So far, we just have heard about Quantum computing that could make even complex calculations trivial, but there are no practical Quantum computers exist.
However, the dream of Quantum computers could become a reality in coming future.
Cambridge Quantum Computing Limited (CQCL) has build a new Fastest Operating System aimed at running the futuristic superfast quantum computers.
The new operating


Source: Hacker News


Cheap web Hosting


How to Activate Varnish Cache Server on Centos Web Panel.


Cheap reseller Hosting


varnish

Activate Varnish Cache Server on Centos Web Panel.

  1. First, install CWP on your server.
  2. Do some basic configuration tasks.
  3. Login to CWP admin page as root or as user with root privilege via:
    http://ip-address:2030


Step 1 – Go to Apache Settings then Varnish Cache Server.
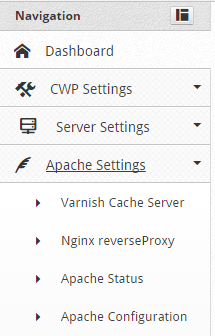
cwp19


Step 2 – You’ll then see a message saying that ***Varnish not installed. Now click on the blue Install Varnish button.

cwp20


Once you Click on Install Varnish you can see all the Install Process :

Preparing...                ##################################################
varnish-release             ##################################################
Loaded plugins: fastestmirror
Loading mirror speeds from cached hostfile
 * base: mirror1.babylon.network
 * extras: mirror1.babylon.network
 * rpmforge: www.mirrorservice.org
 * updates: mirror1.babylon.network
Setting up Install Process
Resolving Dependencies
--> Running transaction check
---> Package varnish.x86_64 0:3.0.7-1.el6 will be installed
--> Processing Dependency: varnish-libs = 3.0.7-1.el6 for package: varnish-3.0.7-1.el6.x86_64
--> Processing Dependency: libvarnishapi.so.1(LIBVARNISHAPI_1.0)(64bit) for package: varnish-3.0.7-1.el6.x86_64
--> Processing Dependency: libvarnishapi.so.1()(64bit) for package: varnish-3.0.7-1.el6.x86_64
--> Running transaction check
---> Package varnish-libs.x86_64 0:3.0.7-1.el6 will be installed
--> Finished Dependency Resolution

Dependencies Resolved

================================================================================
 Package             Arch          Version             Repository          Size
================================================================================
Installing:
 varnish             x86_64        3.0.7-1.el6         varnish-3.0        445 k
Installing for dependencies:
 varnish-libs        x86_64        3.0.7-1.el6         varnish-3.0         42 k

Transaction Summary
================================================================================
Install       2 Package(s)

Total download size: 487 k
Installed size: 1.2 M
Downloading Packages:
--------------------------------------------------------------------------------
Total                                           1.1 MB/s | 487 kB     00:00     
Running rpm_check_debug
Running Transaction Test
Transaction Test Succeeded
Running Transaction

  Installing : varnish-libs-3.0.7-1.el6.x86_64                              1/2 

  Installing : varnish-3.0.7-1.el6.x86_64                                   2/2 

  Verifying  : varnish-libs-3.0.7-1.el6.x86_64                              1/2 

  Verifying  : varnish-3.0.7-1.el6.x86_64                                   2/2 

Installed:
  varnish.x86_64 0:3.0.7-1.el6                                                  

Dependency Installed:
  varnish-libs.x86_64 0:3.0.7-1.el6                                             

Complete!

Step 3 – Make few changes in  configuration so Varnish can run properly. By default, the configuration is set as following:

cwp21


Now scroll down and you can see the options to Adjust the values :
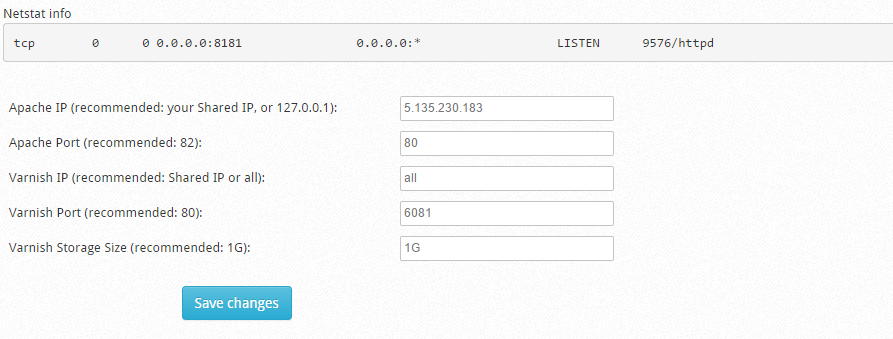
cwp22


Edit all the values as recommended . Also you can see that Varnish Storage Size recommendation is 1 GB . Make sure you have more than 1 GB RAM on your Server. If you have 1 GB RAM then you can set it to 256MB or 512 MB. In my case I will set it as 1GB as i have 5 GB ram on the server.
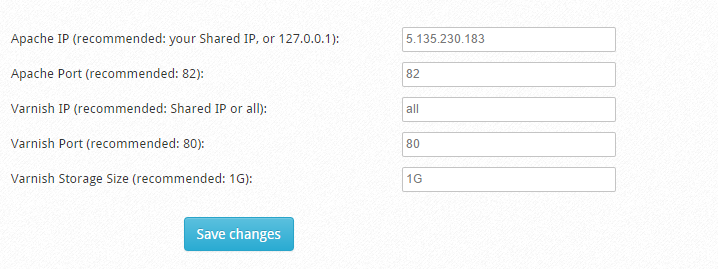
cwp23


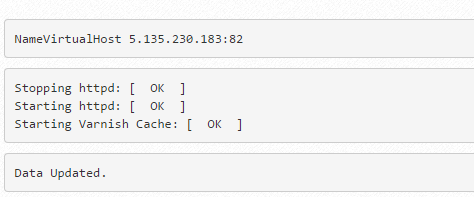
Click on Save Changes . You can see the message Data Updated.
cwp24


This means CentOs Web Panel has updated all Virtual Host entries adjusting its port to 82 (Apache).


Cheap web Hosting


1 15 16 17 18 19 25