How to Install Drupal Using Softaculous


Cheap reseller Hosting


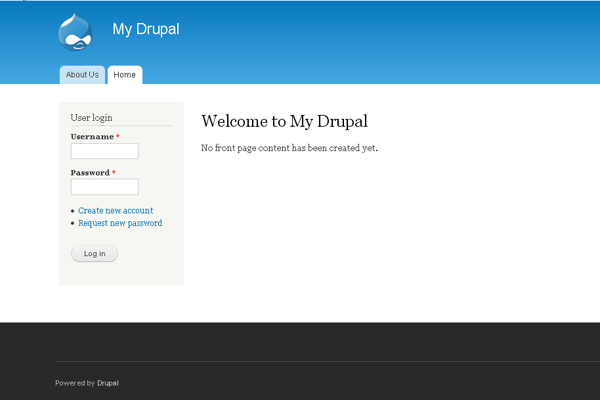
Install Drupal Using Softaculous

Hostripples offer super-easy Drupal installation using programs is called Softaculous. Softaculous is ideal for Web Hosting companies. It is used by diverse organizations, from local businesses to global corporations.

In this artical we will show you how to install Drupal with Softaculous. Please, follow these steps:

1) Log into your Cpanel.

2) You will see a page of options for your new site.

3) Click the Softaculous icon. 

See Following Screenshot : 

Softaculous

4) On the left hand side, you will see a list of all the programs that Softaculous has the ability to manage.

5) Scroll down the list until, you find the name Drupal in the Portals/CMS section of the menu.

6) Click the Drupal link.

See Following Screenshot : 

Drupal link-Portals-CMS

7) Click the Install tab near the top of the page.

See Following Screenshot : 

Install Drupal

8) Enter a directory where you want Drupal to appear on your website in the In Directory text box.

9) Enter a Username and Password.

Note : The username and password allow you to administer and customize your site. Choose a strong password; otherwise, you risk someone hacking your site.

10) Enter your e-mail address

11) Click the Install Drupal button.

12) Click the Finish Installation button.

You will see a confirmation screen when the installation finishes, and you will be e-mailed a confirmation that your site has been installed.

See Following Screenshot : 

Drupal-Finish Installation

13) Click the link to your site.

.
.
.
.

“Drupal has been successfully installed”

See Following Screenshot : 

my Drupalscreenshot1


Cheap web Hosting


How to Install Minecraft Server on CentOS VPS


Cheap reseller Hosting


How to Install Minecraft Server on CentOS VPS


Install Minecraft_ashishkale.in copy


  • First, Installing Java-JDK by using following command: 

yum install java-1.6.0-openjdk

  • If have check Java was installed then you can use following command:

which java

  • The following command will be displayed if it was properly installed:

/usr/bin/java

  • Switch to the root directory by using following command:

cd

  • Create a Minecraft directory, using following command:

mkdir Minecraft

  • Now, Enter the directory:

cd Minecraft

  • Download Minecraft:

wget http://minecraft.net/download/minecraft_server.jar

.
.
.
.
Minecraft is now installed.


  • You’ll now need to install “screen” to keep the Minecraft server running after the SSH session is closed, you can use following command.

yum install screen

  • Use the screen and run Minecraft. Enter screen:

screen

  • Start up Minecraft

java -Xmx1024M -Xms1024M -jar minecraft_server.jar nogui


===========================================


  • To get back to the normal screen, press these keys:

Control+A+D

  • To get back to the screen where Minecraft is running:

screen -r


Cheap web Hosting


How to Install mod_cloudflare on cPanel


Cheap reseller Hosting


cloudflare

Installing mod_cloudflare on cPanel

CloudFlare is a performance and security service. The CloudFlare cPanel plugin makes it easy to integrate into your hosting control panel. The CloudFlare module automatically translates visitor IP addresses to reflect the visitor’s original IP address rather than the IP address of the CloudFlare proxy servers.

Installing mod_cloudflare on a cPanel server is very easy. Just follow 8 steps as below. 


Step 1 :

Download core file by using the following command : 

wget https://raw.githubusercontent.com/cloudflare/mod_cloudflare/master/mod_cloudflare.c


Step 2 :

Connect to your server through SSH and log in as root.


Step 3 :

Change directory to /usr/local/src by using the following command : 

cd /usr/local/src


Step 4 :

Get the source code for mod_cloudflare by using the following command :

wget –no-check-certificate https://raw.github.com/cloudflare/mod_cloudflare/master/mod_cloudflare.c CloudFlare-Tools/master/mod_cloudflare.c


Step 5 :

Build and install mod_cloudflare by using Apache Extension Tool by using the following command : 

apxs -a -i -c mod_cloudflare.c


Step 6 :

Restart the Apache Server daemon by using the following command : 

service httpd restart


Step 7 :

Update the Apache configuration data by using the following command : 

/usr/local/cpanel/bin/apache_conf_distiller –update


Step 8 :

Confirm the module is loaded properly by using the following command : 

httpd -M | grep cloud

cloudflare
.
.
.
.
.

Now,

Apache will log the visitors’ IP addresses instead of the CloudFlare IP’s.


Cheap web Hosting


How to Install Trendy Site Builder


Cheap reseller Hosting


Trendy Site Builder

Install-Trendy-Site-Builder

                         Trendy Site Builder is very easy to use. You don’t need to spend so much time in building a website when you use it. The software is known to run very fast and smooth.  It’s also very affordable. Trendy Site Builder is optimized for social network sites. It supports the best SEO practices and standards. You can attract steady traffic when you keep using it. You can also generate leads and gain lots of profits when you keep using the platform. We are going to use QuickInstall for the installation of Trendy Site Builder. Just go through following steps and Trendy Site Builder will be installed on your computer.

To Install Trendy Site Builder

1) Login to your cPanel Server via SSH

2) Download the installer file.

3) Run the following command Via SSH:


wget http://www.trendyflashdownload.com/installer/cp/ipbased/trendysitebuilder.sh


4) Adjust the permissions of the installer file, by doing the following command:


chmod 755 trendysitebuilder.sh


5) Run the installer file, by doing the following command:


./trendysitebuilder.sh


Please allow a few moments
.
.
.
.
.
The installation to comlete!
( You’ll be able to login to your cPanel/WHM web hosting server )
 
Logging into Trendy Site Builder via cPanel:

1) Login to your cPanel account via SSH

2) Next, locate the “Software/Services” section

3) Then, Click on “Trendy SiteBuilder Icon”
.
.
.

.
You will now be able to design your new website.


Cheap web Hosting


How to install ZPanel on Ubuntu


Cheap reseller Hosting


How to install ZPanel on Ubuntu

Install ZPanel on Ubuntu

ZPanel is a free to download and use Web hosting control panel. It is written to work effortlessly with Microsoft Windows and POSIX (Linux, UNIX and MacOSX) based servers or computers. This solution can turn a home or professional server into a fully fledged, easy to use and manage web hosting server.

As of writing the currently release of ZPanel is 10.1.0. You can go to the ZPanel download page to find the latest version.


To Install ZPanel on Ubuntu

1) Log into the VPS as root.


2) To the update and upgrade by entering the following commands:

apt-get update -y && apt-get upgrade -y


3) Obtain the ZPanel installer:

wget http://www.zvps.co.uk/sites/default/files/downloads/ubuntu-12-04/package/installer-x86_64-install.sh.x.tar.gz


4) Extract the .tar.gz installer by using following commands: 

tar -xf installer-x86_64-install.sh.x.tar.gz


5) Run the installer by using following commands: 

./installer-x86_64-install.sh.x


6) Follow the on screen prompts to complete the install.

.
.
.
.
.

Your ZPanel Installation Complete !

screenshot_Zpanel Login

Then,

1) After installation, reboot your VPS.


2)  Go to the VPS’s IP address in your web browser you can access ZPanel.


3) The default admin login is zadmin, the password is located inside the

/root/passwords.txt file.

4) You can get the password by logging into SSH and issuing :

cat /root/passwords.txt


Cheap web Hosting


How to Install Ajenti on Ubuntu


Cheap reseller Hosting


Install-Ajentii

Ajenti is a simple, lightweight, free and open source tool with a web-based administration control panel. It allowing to manage ubuntu servers and this is similar to Webmin. Ajenti is provides fast and responsive web interface for managing small server set-ups and also best suitable for VPS and Dedicated servers. It has built with many pre-made plugins for configuring and monitoring server software’s and services such as Apache, Cron, File System, Firewall, MySQL, Nginx, Munin, Samba, FTP, Squid and many other tools like File Manager, Code Editor for developers and Terminal access.


Connecting To Your VPS

1) Establish a SSH connection to your virtual server and authenticate as root by using follownig commands

ssh root@your-ip


2) Download the latest package files by using following commands :

apt-get update


Importing the repository key

The following command downloads the key and automatically adds it to your system.

wget http://repo.ajenti.org/debian/key -O- | apt-key add –


Adding the APT repository

1) To Add the repository to your sources.list by using the following command

echo “deb http://repo.ajenti.org/ng/debian main main ubuntu” >> /etc/apt/sources.list


2) Navigate to the end of the file and paste the following line

deb http://repo.ajenti.org/debian main main debian


3) Save this changes and Exit.


Installing Ajenti


Step 1 : Update the package sources.


Step 2 : Install ajenti package by using following commands

apt-get update && apt-get install ajenti -y


Step 3 : Start the service by using following commands

service ajenti restart


Step 4 : If you are using UFW firewall open port 8000 to enable access to the control panel by using following command

ufw allow 8000

.
.
.
.
Congratulation’s! You have successfully installed Ajenti.


   Or


Quick automatic installation then use following commands  

wget -O- https://raw.github.com/ajenti/ajenti/1.x/scripts/install-ubuntu.sh | sudo sh


Related Post “How to Configure Ajenti on Ubuntu


Cheap web Hosting


How to Install phpmyadmin on centOs 7


Cheap reseller Hosting


phpmyadmin on centOs 7 

phpMyAdmin is an open source tool used for the administration of MySQL. phpMyAdmin depends on the LAMP stack. It requires Apache2 or any compatible web servers, MySQL and PHP. This post will show you how to install phpmyadmin on centos 7.

Install-phpMyadmin-CentOS

Installation : 

Step 1 : 

Download epel-release-7-x.noarch.rpm

Step 2 :

Install epel-release-7-x.noarch.rpm file

Step 3 : 

Copying the rpm link by using follownig command

[root@hostripples ~]# rpm -ivh http://epel.mirror.net.in/epel/7/x86_64/e/epel-release-7-1.noarch.rpm

Step 4 : 

Now, update repositories by issuing follownig command

[root@hostripples ~]# yum check-update

Step 5 :

Install phpmyadmin package along with dependencies

[root@hostripples ~]# yum -y install phpmyadmin

When you are finished

Step 6 :

Open /etc/httpd/conf.d/phpMyAdmin.conf file and edit as follows and Find follownig lines.

Note : ( you are found these line 2 times )

# Apache 2.4
<RequireAny>
Require ip 127.0.0.1
Require ip ::1
</RequireAny>


Replace with


# Apache 2.4
<RequireAny>
# Require ip 127.0.0.1
# Require ip ::1
Require all granted
</RequireAny>

Step 7 :

Then, Restart Apache service by using following commands

[root@hostripples ~]# systemctl restart httpd.service

Step 8 :

Now open http://serverIP/phpmyadmin in your browser.

.
.
.
.
.

Congratulations! You have just installed phpMyAdmin on your CentOS 7


You can login using root as username and mysql root password.


Cheap web Hosting


To Configuring NodeJS, Grunt, and Bower for CageFS


Cheap reseller Hosting


NodeJS is a powerful platform built on Chrome’s Javascript Runtime that can be used to build fast and scalable web applications. Using the following Steps to Install and Configure NodeJS, Grunt, and Bower for CageFS.

Configuring NodeJS


To Install NodeJS, Grunt, and Bower on CloudLinux

1) Login to your root server


2) Create a directory and move into it using following scripts

mkdir ~/nodejs-install; cd ~/nodejs-install


3) To Copy the install files to using following scripts

( These install file is currently maintained for the rpms )

git clone https://github.com/nodesource/distributions.git


4) Move to rpm install folder


5) Run the setup to using following scripts

cd distributions/rpm; sh setup


6) Install nodejs to using following scripts

yum install nodejs


7) Install grunt and bower to using following scripts

npm install -g grunt-cli; npm install -g bower


If you are not using CageFS with CloudLinux you are done. Your nodejs, grunt, and bower commands should all work in the shell. Then you are using CageFS


How to Configuring NodeJS, Grunt, and Bower for CageFS


1) Configure cagefs for nodejs to using following scripts

touch /etc/cagefs/conf.d/nodejs.cfg


2) In grunt.cfg file use the any editor & copy the following scripts

[grunt]
comment=Grunt tools
paths=/usr/bin/grunt, /usr/local/bin/grunt, /usr/lib/node_modules/grunt-cli


3) Configure cagefs for bower to using following scripts

touch /etc/cagefs/conf.d/bower.cfg


4) In bower.cfg file use the any editor & copy the following scripts

[bower]
comment=Bower web tools
paths=/usr/bin/bower, /usr/local/bin/bower, /usr/lib/node_modules/bower


5) Then re-initialize cagefs to using following scripts

cagefsctl –force-update

.
.
.
.
Congrast Your nodejs, grunt, and bower commands should be available on cPanel accounts.


Test


To test an installation is working (and that the setup scripts are working!) use:

curl -sL https://deb.nodesource.com/test | bash –


Cheap web Hosting


How to Install Node.js On CentOS 7


Cheap reseller Hosting


Install-Node.js


Node.js is an open source, cross-platform runtime environment for server-side and networking applications. Node.js applications are written in JavaScript and can be run within the Node.js runtime on OS X, Microsoft Windows, Linux, FreeBSD, NonStop, IBM AIX, IBM System z and IBM i.


Install Node.js From Source


The following steps to install Node.js From Source

1) Open a new terminal tab on your CentOS 7 machine.

2) Run the following command to download the archive file which we need to use for the installation.

wget http://nodejs.org/dist/v0.12.0/node-v0.12.0.tar.gz

3) Eextract the tar file

tar xvf node-v0.12.0.tar.gz

4) Use the following command to change the working directory to node.

cd node-v*

Before compiling our code we need to install some packages in our CentOS machine that will help us to do so.

1) Opened tab of your terminal enter the followings.

sudo yum install gcc gcc-c++

2) Wait for these packages to install

3) Run the following commands to configure and compile

./configure
make

Don’t worry if the above takes some time to complete because the compilation will take awhile.

4) Use the following command to install Node.js on your system.

sudo make install


.

.

.

Once the installation is finished


You can start using Node.js and to make sure that the correct version is installed you can use the following command in order to check it.

node –version


Cheap web Hosting


How to Install MODx using Softaculous in cPanel


Cheap reseller Hosting


What is MODx?

MODx is an open source Content Management System and Application Framework. Initially inspired by Etomite 0.6, MODx is an ongoing project written by Raymond Irving and a core team of contributors at the MODx Project. MODx is distributed under the GPL license and is now run by a professional team of developers from all over the world.

Install MODx

How to Install MODx using Softaculous in cPanel

Follow these steps to install MODx using Softaculous

1) Login to the Cpanel


cpanel-login-page


2) Click on the Softaculous icon in the Software/Services section of cPanel. The Softaculous installer page appears.


Install_Softaculous


3) Go to the top right corner and click on the Search field. type modx and then press Enter.

Search box

4) Go to the top right and click on the blue button labeled Install.


modx-install


5) Fill out all of information the boxes.

6) In Directory type the name of a new directory you would like created.


MoDx software setup


7) By default, the box will be left blank to install the software into your main directory.

8) When you are finished, Click Install.


MODx Installed successfully


9) Then you will get a Confirmation page of your installation.


Cheap web Hosting


1 2 3 4