How to Update Your cPanel License Key


Cheap reseller Hosting


In this Article I will explain how to update cPanel License key of a server. If you need to update your server license key when you have a new licence key, or you want to upgrade from trail version to paid version. Please follow the instruction and update cPanel License key.

cPanel License Key

Login to cpanel VPS or dedicated server via shell (SSH).

  • Open your “putty program”.
  • Log in as “root”.
  • Enter your password.
  • And run the following at the command line:

/usr/local/cpanel/cpkeyclt


Note : If you just want to update cPanel, run:

/scripts/upcp


That’s it !! This will update it and your good to go


Cheap web Hosting


Top 26 List Of Cheap $1 Dollar Web Hosting Companies


Cheap reseller Hosting


When it comes to web hosting, you want to make sure that you are getting the best provider and the best value.  For those of you who are looking for cheap web hosting providers that start at $1 per hosting, here is a list of some of the best dollar web hosting providers shown below.  If you are also looking to create a blog network and want a way to get CHEAP ips, then you will also find that by hosting 1-2 websites per web host will allow you to do just this.

Host Ripples – https://hostripples.com/ Starting at $1 per month for linux and $2 per month for windows hosting. (also one of my favorite hosts – very friendly customer service)

HostDens – http://hostdens.com/ Starting at $1 per month for linux  (also one of my favorite hosts – very friendly customer service)

AI Cheap web Hosting – http://www.aicheapwebhosting.com/ $1 per month web hosting and up to 100gb bandwidth

Dollar SEO Hosting – http://www.dollarseohosting.com/ starts at $1 per month and $1 per c-class ip address

3ix – http://www.3ix.org/ One of my favorite cheap hosting providers starting $1 per month

123 Systems – http://123systems.net/Another favorite web hosting starting at $4 per year!

Hobo Host – https://www.hobohost.com/ Cheap $1 per month host with 3,000 mb space

My True Host – http://www.mytruehost.com/ Starts at $1 per month with unlimited bandwidth

Link Alone – http://www.linkalone.com/ Another $1 host with 1gb disk space

Hostica – http://www.hostica.com/ Starts at $1 for only 1 website

Host So – http://www.hostso.com/ $1 hosting with unlimited bandwidth and 20gb disk space

VPS Hosting Deal – http://www.vpshostingdeal.com/ Starts at $12 per year 1 core CPU and 20gb disk space

Host Bandit – http://hostbandit.com/ Starts at $1 a month with a cute little doggy mascot!

Zetta Host – http://www.zettahost.com/1-dollar-web-hosting $1 web hosting provider with unlimited disk space and bandwidth

Host Budget – http://www.hostbudget.com/1dollar-web-hosting.html Starts at $1 with 1 gb disk space

1 dollar Hosting – http://www.1dollar-webhosting.com/ Cheapest host yet starting at $.50 per month

Hosting Dude – http://www.hostingdude.com/ They still have their old 1970’s design! Starts at $1 per month hosting

Level Hosting – http://www.levelhosting.ca/hosting.html Offer plans from $35.70 a year or $2.98 a month (use coupon code “wht50life”)

Stable host – http://www.stablehost.com/ Offer plans starting at $3.95 per month (use coupon code “US-WHT2012-25” for 25% OFF For Life or “WHTLOVE” for 50% Off your first invoice)

Eleven 2 – http://www.eleven2.com/shared-hosting/ plans starting at $59.40 a year (use coupon code “wht40off” for 40% off)

Geek Storage – https://www.geekstorage.com/order/web-hosting.html plans starting at $7.99 a month (use coupon code “30OFF4LIFE” for 30% off for life)

Cirtex Hosting – http://www.cirtexhosting.com/ starting at $2.49 per month with unlimited storage and bandwidth (use coupon “forum” for 50% off)

Hawk Host – http://www.hawkhost.com/ Starting at $20 annually (coupon code “whts50v2” for 50% off your first payment)

Shark Space – http://www.eleven2.com/ Starting at $2.47 per month (use coupon “50offlife” for a 50% discount for life)

Always Web Hosting – http://www.alwayswebhosting.com/ starting at $6.95 (use coupon code “happynewyear” for 90% off)

Ninja Lion – http://www.ninjalion.com/shared.php plans starting at $29.50 per year (use coupon “launch” to get 50% off for life)


Cheap web Hosting


How to install Zend Optimizer in Cpanel Linux Server


Cheap reseller Hosting


install-Zend-Optimizer

Introduction : 

Zend Server is the most complete PHP distribution with a continuously updated set of advanced value-add features designed to optimize productivity, performance, scalability and reliability. It is a free PHP extension to enable the web server to execute files encoded by Zend Guard/Encoder so it’s executed the same as any regular PHP files. Zend Encoder also is useful for encoding PHP files to protect source code. Zend Server supports any and all PHP code and provides deep insights into that code including the most popular PHP applications and frameworks like WordPress, Magento, Drupal, Zend Framework, Symfony, and Laravel. Any code you have in PHP will run on Zend Server. You will need to install Zend Optimizer in your server running Linux.


Installing zend in cPanel Linux Server follow this Steps:

Step 1 : Log in to your server via SSH with root user.

Step 2 : Run the following command.

 /scripts/installzendopt

Step 3 : Follow the instructions on the screen to install Zend Optimizer.

Step 4 : Then, Restart the apache.

 service httpd restart

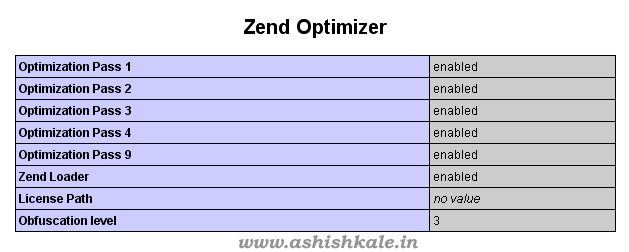
Step 5 : To check whether zend optimizer is running and vserion.

 php -v

It would show ioncube or zend optimizer version.


install Zend Optimizer


            OR


Follow the on-screen instructions.

When you want to install Zend Optimizer on a Non-cPanel server please follow the steps:

Step 1 : Download Zend Optimizer.

http://www.zend.com/en/products/guard/optimizer/

Step 2 : Upload the .tar.gz into your web server.

/home/temp

Step 3 : Extract the archive by using the following command.

tar -zxvf filename_here.tar.gz

Step 4 : Now a new directory should appear.

Step 5 : Execute the following command.

./install.sh

Step 6 : Follow the instructions on-screen.

Step 7 : Restart HTTPD (Apache) by using following command.

service httpd restart


That it !


Cheap web Hosting


How to create cron jobs on your Kloxo Panel


Cheap reseller Hosting


How to create cron jobs on your Kloxo Panel

Kloxo is a free control panel for managing your VPS hosting or dedicated server hosting. Cronjob is scheduling a task to run later. The task can be either command or a script. The background process(daemon) behind the cronjob is the crond. In the /etc folder there is a file called crontab where we can write the command or name of the script that is to be executed at as per our customized time. By using the control panel we can manage the Cron-jobs simply.

Here I am explaining the steps for creating cron-jobs via Kloxo panel.

Step 1 : Login to your Kloxo control panel.

Step 2 : Click on “Cron Scheduled Task” under the Domain area,  see the following screenshot:

cronjob

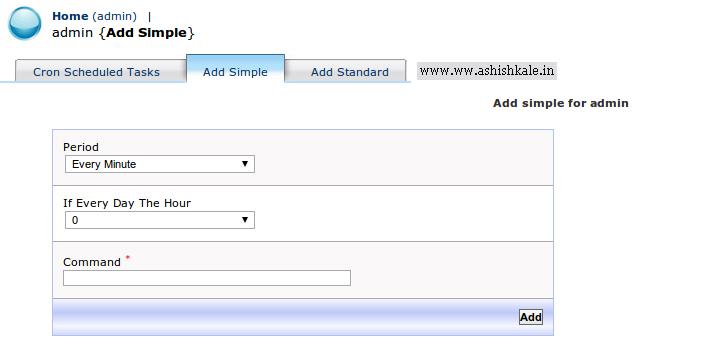
Step 3 : There are two option in your Kloxo, Simple and Standard

In simple section you can create simple cron jobs for every Minute, Hour or Day,  see the following screenshot:

Add Simple cron jobs ww.ashishkale.in

The standard section having the standard cronjob scheduling syntax.

You can create a standard Cron here, see the following screenshot:

add-standard-cronjob_ashish kale blog


That’s it!!


Cheap web Hosting


Error : Fix the WHM CSF Security Test


Cheap reseller Hosting


How to fix the WHM CSF security test errors!

Csf logo

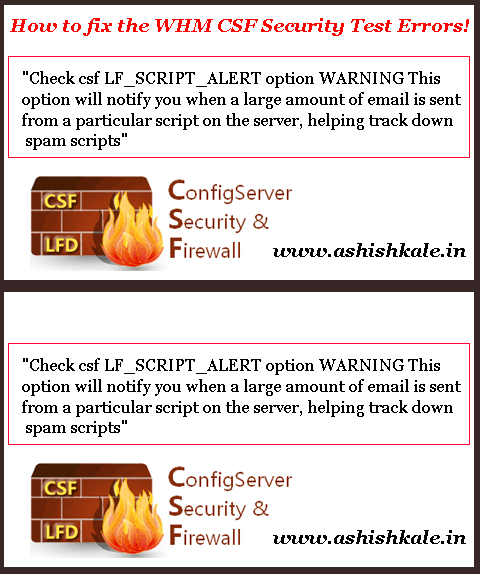
As a part of ensuring security, Hostripples perform a CSF security scan from WHM. We may get the following error after the scan. 

“Check csf LF_SCRIPT_ALERT option WARNING This option will notify you when a large amount of email is sent from a particular script on the server, helping track down spam scripts”


-fix-the-WHM-CSF


To fix this error :


1) SSH into the

href=”https://hostripples.com/dedicated-servers/ssh-server-hosting”>server

.

2) Edit the csf configuration file by using following command:

vi /etc/csf/csf.conf

3) Search for LF_SCRIPT_ALERT = “0″

4) Change the value from “0″ to “1″ to fix the issue.

5) Restart the CSF.


You may also get the following error :


“Check exim for extended logging (log_selector) WARNING You should enable extended exim logging to enable easier tracking potential outgoing spam issues. Add:log_selector = +arguments +subject +received_recipients”


FIX:

1) Edit the exim configuration file by using following command :

/etc/exim.conf

2) Change the value from “log_selector = +all” to the following :

log_selector = +arguments +subject +received_recipients

3) Save changes.

4) Restart the CSF.

.

.

.

.

This should resolve the error


Cheap web Hosting


How to Reboot your cpanel/whm in ssh


Cheap reseller Hosting


Reboot your cpanel

How to Reboot your cpanel/whm in ssh

If you happen to mess up your ssh configuration some how you can reset the ssh config from Cpanel then restart your machine via ssh by using following command

/etc/init.d/cpanel restart


Enjoy!!!


                                                                          Or


If you cannot reboot your server manually, you can restart it by requesting a power cycle.

1) Log in to your Account Manager.

2) Click Servers.

3) Next to the server you want to use, click Manage.

4) Click Power.

5) Click Restart.


Cheap web Hosting


How to Install mod_cloudflare on cPanel


Cheap reseller Hosting


cloudflare

Installing mod_cloudflare on cPanel

CloudFlare is a performance and security service. The CloudFlare cPanel plugin makes it easy to integrate into your hosting control panel. The CloudFlare module automatically translates visitor IP addresses to reflect the visitor’s original IP address rather than the IP address of the CloudFlare proxy servers.

Installing mod_cloudflare on a cPanel server is very easy. Just follow 8 steps as below. 


Step 1 :

Download core file by using the following command : 

wget https://raw.githubusercontent.com/cloudflare/mod_cloudflare/master/mod_cloudflare.c


Step 2 :

Connect to your server through SSH and log in as root.


Step 3 :

Change directory to /usr/local/src by using the following command : 

cd /usr/local/src


Step 4 :

Get the source code for mod_cloudflare by using the following command :

wget –no-check-certificate https://raw.github.com/cloudflare/mod_cloudflare/master/mod_cloudflare.c CloudFlare-Tools/master/mod_cloudflare.c


Step 5 :

Build and install mod_cloudflare by using Apache Extension Tool by using the following command : 

apxs -a -i -c mod_cloudflare.c


Step 6 :

Restart the Apache Server daemon by using the following command : 

service httpd restart


Step 7 :

Update the Apache configuration data by using the following command : 

/usr/local/cpanel/bin/apache_conf_distiller –update


Step 8 :

Confirm the module is loaded properly by using the following command : 

httpd -M | grep cloud

cloudflare
.
.
.
.
.

Now,

Apache will log the visitors’ IP addresses instead of the CloudFlare IP’s.


Cheap web Hosting


How to Uninstall MySQL Governor


Cheap reseller Hosting


Uninstall MySQL Governor

To uninstall MySQL Governor.

  • Run the following command to uninstall MySQL Governor:

/usr/share/lve/dbgovernor/install-mysql.py –delete
yum erase db-governor db-governor-mysql


Cheap web Hosting


How to Remove/Uninstall RVSkin from Cpanel/WHM Server ?


Cheap reseller Hosting


RVSkin

rvskin logo

RVSkin is a management software offered with cPanel server that provides a user with complete branding and skinning control over cPanel and Reseller accounts. In a short span of time you will be able to create impressive looking cPanel overlay skins for your end users that are customizable in accordance to your preferences.


Uninstall RVSkin from Cpanel


To Remove/Uninstall RVSkin from Cpanel/WHM Server

Follow the steps to uninstalling RVSkins from Cpanel/WHM Server

Step 1 : Login to Cpanel/WHM server via SSH

Step 2 : Run the following command as root on the server:

# perl /root/rvadmin/uninstall.pl

.

.

.

.

You will be completely Removed/Uninstall RVSkin from your Cpanel/WHM Server


And


If for some reason RVskin was installed in a different location, change the path accordingly.

Restart your cpanel by using following command: 

# /etc/rc.d/init.d/cpanel stop

# /etc/rc.d/init.d/cpanel start


Cheap web Hosting


1 2 3 4 6