The post How to Fix the Error While Starting a New VPS? first appeared on Web Hosting Stuff.
]]>Part I
- Identify the culprit:
Error message: The first step is to examine any error messages displayed during startup. These messages often pinpoint the problem area.
- Resource limitations:
Check resource allocation: Make sure your VPS has enough CPU, RAM, and disk space to run the chosen operating system and applications. You can usually adjust resource allocation through your VPS provider’s control panel. If resources are limited, consider an upgrade or optimizing resource usage.
- Network blues:
Inspect network configuration: Verify that your VPS has the correct network settings, including IP address, subnet mask, gateway, and DNS servers. However, incorrect settings can prevent the VPS from starting properly.
- Delving deeper:
- Access console (if available): Some providers offer a console where you can see detailed boot logs that might reveal the startup issue.
- Examine logs: System logs often contain valuable information about errors during startup. The specific location may vary depending on your provider and operating system, but commonly they reside in the /var/log/ directory.
- Seeking help:
Contact VPS provider: If the above steps don’t solve the problem, contact your VPS provider’s support team. They have access to specific details about your VPS configuration and can offer tailored guidance.
Remember, these are general steps. The specific troubleshooting process might differ depending on the error message and your VPS provider’s setup.
Part II
While working with this process you will come across an error as mentioned below- “setlocale: No such file or directory error: failed to connect to the hypervisor error- Failed to connect socket to ‘/var/run/libvirt/libvirt-sock’: No such file or directory”
Follow the steps mentioned below to overcome the error:
- Firstly, you have to monitor the server status.
2. Then, run the below command to monitor the server status:
systemctl status libvirtd.service
3. If the server fails or stops, the below status will be seen:
<strong><em>systemctl start libvirtd.service</em></strong>
4. After running this command, you have to start the VPS server from the admin panel and you will see the error has been eliminated.
In conclusion, troubleshooting steps can be taken to resolve errors encountered when starting a new VPS, ensuring a smooth and successful setup process.
The post How to Fix the Error While Starting a New VPS? first appeared on Web Hosting Stuff.
]]>The post How to use the Exim Mail Queue Manager in WHM first appeared on Web Hosting Stuff.
]]>Exim is the mail software that runs on your server to control email delivery, there are mail queue management options you can use with Exim directly via the command line.

In this article Hostripples will show you how you can manage your Exim mail queue on your VPS or dedicated server in WHM.
Step 1 : Log into WHM.
tep 2 : Find the Email menu.
Step 3 : Go to Mail Queue Manager.
Step 4 : In the Search box type in user@hostripples.com.
Step 5 : From the Select Query drop-down and select Search Recipients.
Step 6 : In Search Type Click on Begins With.
Step 7 : Click on the calendar icon and Specify the Start Date and End Date.
Step 8 : Next, specify the Start Time and End Time.
Step 9 : Then, click on Run Report.
Step 10 : We can see that our messages to user@hostripples.com are Frozen.
This means that Exim has detected an error trying to deliver the message, and it is going to hold the message and try again later.
Step 11 : Click on the magnifying glass icon to view the message in a new window.
In this message we can see that it’s not delivering to user@hostripples.com because their mail server is giving us back the error of Mailbox quota exceeded.
Step 12 : At the top of the message you can choose to Delete Message which will completely remove it from the mail queue.
Or
you can choose to Deliver Message Now which will attempt to send the message again, in this case if the user has freed up some space on their email account it should go through successfully now.
That’s it !! 
The post How to use the Exim Mail Queue Manager in WHM first appeared on Web Hosting Stuff.
]]>The post How to Connect Remote Desktop of a VPS/Dedicated Server first appeared on Web Hosting Stuff.
]]>
In this article Hostripples are showing the steps to connect your windows pc to the dedicated server using Microsoft Remote Desktop Connection Application.
Step 1 : Go to Start menu
Step 2 : Select all programs.
Step 3 : Click run.
Step 4 : Type mstsc.exe to access remote desktop.
Step 5 : Type your server IP address.
Step 6 : Then click on connect.
Step 7 : Enter your user name and password.

The post How to Connect Remote Desktop of a VPS/Dedicated Server first appeared on Web Hosting Stuff.
]]>The post How to Solve Application Error in Windows vzpp first appeared on Web Hosting Stuff.
]]>“Application Error
The server encountered an internal error or misconfiguration.”

Solution :
This is usually caused by VPS hitting its memory parameters , the QOS alerts can be checked from vzmc/pmc to confirm this.
A temporary solution would be restart the the vps to release the memory resource. You want to fix it permanent solution make sure to check how frequent the QOS parameters are hitting their limit and what is causing this high usage and resolve that accordingly.
After restarting virtual private servers , make sure to check it in new browser window about the Plesk login information.
The post How to Solve Application Error in Windows vzpp first appeared on Web Hosting Stuff.
]]>The post How to Install Minecraft Server on CentOS VPS first appeared on Web Hosting Stuff.
]]>

- First, Installing Java-JDK by using following command:
yum install java-1.6.0-openjdk
- If have check Java was installed then you can use following command:
which java
- The following command will be displayed if it was properly installed:
/usr/bin/java
- Switch to the root directory by using following command:
cd
- Create a Minecraft directory, using following command:
mkdir Minecraft
- Now, Enter the directory:
cd Minecraft
- Download Minecraft:
wget http://minecraft.net/download/minecraft_server.jar
.
.
.
.
Minecraft is now installed.
- You’ll now need to install “screen” to keep the Minecraft server running after the SSH session is closed, you can use following command.
yum install screen
- Use the screen and run Minecraft. Enter screen:
screen
- Start up Minecraft
java -Xmx1024M -Xms1024M -jar minecraft_server.jar nogui
===========================================
- To get back to the normal screen, press these keys:
Control+A+D
- To get back to the screen where Minecraft is running:
screen -r
The post How to Install Minecraft Server on CentOS VPS first appeared on Web Hosting Stuff.
]]>The post How to RDP connect to windows server / VPS ? first appeared on Web Hosting Stuff.
]]>
Connecting to a remote Windows server or Windows VPS from your Windows 7 PC is easy with Microsoft’s own Remote Desktop Connection (RDC) program. It is included with most versions of Windows.
To launch RDC
Enter the following:
1) Open the Start menu of your computer
2) Search for “Remote Desktop Connection”.
Note (If you can’t find it, you can start it manually with Start > Run > mstsc.exe).
3) Enter your Windows VPS details as follows:
Computer: [IP address of your RDP VPS or Windows Server.]

4) Click Connect button
You see a message like the following.

5) Select “Don’t ask me again.”
6) Click Connect button
RDC will prompt for your password
Enter the following:
1) Type Username: Administrator
2) Type Password: Password is supplied by your Windows VPS provider.

3) Click Ok button
You should now be connected to your server’s desktop. Please take care to update your Administrator password right away!
The post How to RDP connect to windows server / VPS ? first appeared on Web Hosting Stuff.
]]>The post Benefits of Using a Virtual Private Server first appeared on Web Hosting Stuff.
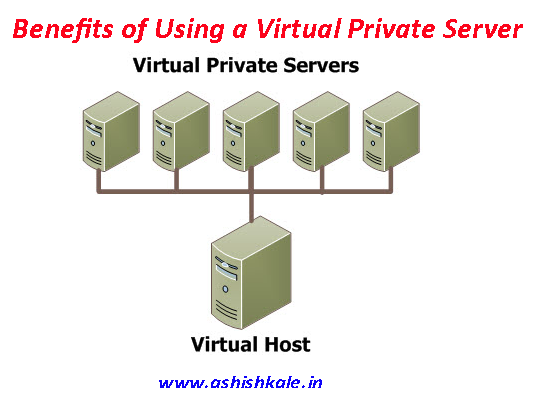
]]>VPS hosting is a web hosting solution where in virtualized servers are deployed to give user a grass root-level access over their servers, while sharing bandwidth, CPU, and RAM with other users. Virtual private servers provide the performance of a dedicated server running on a machine located in a shared environment. Through root access, customers get the full control of the server just like a dedicated server.
1) Shorter deployment time for new servers:
– No procurement of hardware
– Resources virtual server pool are allocated
– Multiple servers created from same image
– Reduced staffing time required to deploy a new service
– Server deployment time shortened to less than a day
2) Scalability and Flexibility:
– Virtual resources can be quickly added to increase the capacity
– You buy only what you need
– Adding vCPUs and RAM is as simple as a reboot
– Additional disk space can frequently be added on the fly
– Move data from a slow storage tier to a faster one without disruption to services
– Reduced need to over-build a server “just to be safe”, saving money and power.
3) Simplifies Development and Testing Environments:
– Virtualization reduces the costs of running separate development, staging and production environments
– Development servers may be created from production images with no downtime
– Quickly modify, test and deploy images into production, speeding up the development cycle
– Decommission development and staging environments when no longer needed, further reducing costs.
3) It’s Green – Save on Power, Space, and Cooling:
– Virtual server units dramatically reduce the physical space, power, and cooling compared to their physical counterparts
– Reduced consumption of power and cooling and saves money too.
4) No physical server upgrades and maintenance:
– No scheduled downtime to perform hardware upgrades, replace failing components or replace aging hardware
– Seamlessly migrate to a different server , perform preventative maintenance and even completely refresh the hardware.
5) Hardware Fault Tolerance:
– Virtual infrastructure is built with fault tolerant components (redundant power supplies, storage and network connections), in the event a host should fail, virtual servers are automatically migrated and restarted using spare capacity in the data center.
6) Simplified Disaster Recovery and Business Continuity:
– Virtualization software can replicate virtual machines to a remote data center
– Disaster recovery and business continuity plans are relatively standard and do not require custom engineering for each physical system and application.
7) Leverage other benefits of the data center:
– 24×7 staffing, precision power and cooling, enhanced security and encrypted tape backups.
The post Benefits of Using a Virtual Private Server first appeared on Web Hosting Stuff.
]]>