The post WordPress Admin Login Problems: 7 Professional Recovery Techniques first appeared on Web Hosting Stuff.
]]>The post WordPress Admin Login Problems: 7 Professional Recovery Techniques first appeared on Web Hosting Stuff.
]]>The post How Can I Create a WordPress Plugin as a Beginner? first appeared on Web Hosting Stuff.
]]> Creating a WordPress Plugin (Beginner Friendly)
Creating a WordPress plugin may sound complicated, but it’s actually quite simple once you understand the basics. A plugin is just a small piece of code that adds new features or functions to your website — like adding extra toppings to your favorite pizza  . You don’t need to be an expert developer to start; just some basic PHP knowledge, a text editor, and a bit of curiosity are enough.
 What You’ll Do in This Guide
In this guide, you’ll learn step-by-step how to create your very first WordPress plugin — from setting it up to making it display something fun on your website. By the end, you’ll see how easy (and rewarding) it is to bring your own ideas to life in WordPress!
 (optional but highly recommended).
 Congratulations! You’ve just created your first working WordPress plugin.
 Security First: Always sanitize user input
 Performance: Only load scripts or styles when necessary.
 Prefixes: Use unique prefixes (like
 Translation: Wrap text strings with
 Cleanup: Add an
The post How Can I Create a WordPress Plugin as a Beginner? first appeared on Web Hosting Stuff.
]]>The post How Can I Fix 403 Forbidden Error in WordPress? first appeared on Web Hosting Stuff.
]]>A 403 Forbidden error is an HTTP status code that indicates the server has received your request, but denies authorization to operate the requested resource.
In simpler terms, it’s like trying to enter a private building. The doorman (the server) knows you’re there and what you’re asking for (the resource), but they’re telling you, “No, you’re not allowed in here,” even if your request itself was perfectly valid.
Common Causes and Solutions:
- Move browser cache and cookies: Clear your browser cache and cookies. A 403 error can occur if the browser cache is not cleared.How to: Clear your browser’s cache and cookies, then try accessing your site again. You can also try a “hard refresh” (Ctrl+F5 or Cmd+Shift+R) or access the site in an incognito/private window.
- Corrupted .htaccess file: It is a strong configuration file that enables server interactions with your WordPress site. A manipulated or misconfigured .htaccess file leads to 403 errors.How to:
- Join the website via FTP/SFTP or your web hosting provider’s File Manager.
- Identify the .htaccess file in the root directory of the WordPress installation, which is public_html or www.
- Make a copy of the .htaccess file by downloading and saving it into your computer.
- Next, you have to delete the .htaccess file from the server.
- Try to access your website. If it’s done, then the actual problem was the .htaccess file.
- Generate a new .htaccess file:
- Log in to your WordPress admin dashboard.
- Go to Settings > Permalinks.
- Without making any changes, simply click the “Save Changes” button at the bottom. This will generate a new, default .htaccess
- Incorrect File and Directory Permissions: Files and folders on your server have permissions that dictate who can read, write, or execute them. False permission can block the server and deny access to important files, leading to a 403 error.
- Recommended Permissions:
- Folders (directories): 755
- Files: 644
- wp-config.php (for security): 440 or 400
- How to (using an FTP/SFTP client like FileZilla or File Manager in cPanel):
- Connect to your website via FTP/SFTP.
- Navigate to your WordPress root directory.
- For folders: Right-click on a folder (e.g., wp-admin, wp-content, wp-includes, etc.), and go to “File Permissions” (or “Change Permissions”). Give the name in numeric value to 755. Look for “Recurse into subdirectories” and “Apply to directories only”.
- For files: You have to cover all the files available in the directory (or your entire WordPress root). Right-click and choose “File Permissions”. Set the numeric value to 644. Check the option “Recurse into subdirectories” and “Apply to files only”.
- For wp-config.php: You have to locate the wp-config.php file in your root directory. Right-click, select “File Permissions”, and set the numeric value to 440 or 400.
- After adjusting permissions, check your website again.
- Recommended Permissions:
- Plugin Conflicts: A misbehaving or incompatible plugin, especially security plugins, can sometimes cause a 403 error by blocking legitimate access.
- How to:
- Deactivate all plugins:
- If you can access your WordPress dashboard, go to Plugins > Installed Plugins, select all, and choose “Deactivate” from the bulk actions dropdown.
- If you’re not able to operate your dashboard, then try to connect via FTP/SFTP. Navigate to wp-content/plugins/. Rename the plugins folder to something like plugins_old. This will deactivate all plugins.
- Check your website. If the error is ended, then the plugin was the offender.
- Reactivate plugins one by one:
- Rename the plugins_old folder back to plugins.
- Go back to your WordPress dashboard (or simply rename the individual plugin folders back via FTP/SFTP and check your site after each one).
- Activate each plugin one by one, checking your site after each activation, until the 403 error reappears.
- Once you locate the complex plugin, you can follow these steps to overcome the issue:
- Find an alternative.
- Contact the plugin developer for support.
- Adjust its settings if it’s a security plugin that’s being too aggressive.
- Deactivate all plugins:
- How to:
- Theme Incompatibility: Less common than plugins, but a theme can also cause conflicts.How to:
You can opt for the default WordPress theme.
After setting up WordPress, you’ll see the default WordPress theme, with which you can start.
If you can access your dashboard, go to Appearance > Themes and activate a default theme.
If you cannot access your dashboard, connect via FTP/SFTP. Go to wp-content/themes/. Rename your active theme’s folder to something like yourtheme_old.
WordPress will automatically fall back to a default theme if one is present.
Check your site.
If you have overcome the issue, then assume there was an issue in the theme only.
You might need to update your theme, contact the theme developer, or switch to a different theme. - Security Plugin Settings: Many security plugins are designed to block suspicious activity, and sometimes they can be overly aggressive and block legitimate users or your IP address.How to: If you have a security plugin installed (like Wordfence, Sucuri, iThemes Security), check its settings for any blocking rules, blacklisted IP addresses, or firewall configurations that might be causing the issue. Temporarily disabling the plugin (as in step 4) can help to confirm if it’s the cause.
- Hotlink Protection: Some hosting providers or CDNs have hotlink protection enabled to prevent others from directly linking to your images or files. In case a wrong configuration takes place, then 403 errors occur.How to: You can look for a web hosting control panel or CDN settings to protect the hotlink and disable it to check whether it resolves the issue.
- CDN (Content Delivery Network) Issues: If you’re using a CDN (like Cloudflare), it may consist of security rules or caching issues that can cause a 403 error.How to: Temporarily disable your CDN and see if the error resolves. If it does, check your CDN’s settings for any IP blocking, firewall rules, or caching problems.
- Malware Infection: Malware can often modify core WordPress files, .htaccess, or inject malicious code that results in 403 errors.
How to:- Scan your website for malware using a reputable security plugin (like Wordfence or Sucuri).
- Remove any detected malware.
- Consider restoring a clean backup from before the issue started.
- Server-Side Issues / Contact Hosting Support: If none of the above solutions work, the problem might be on your hosting provider’s end (e.g., misconfigured server, mod_security rules, IP blocking at the server level).How to: Contact your web hosting support team. Provide them with details about the error, what troubleshooting steps you’ve already taken, and any relevant error messages you might have found in your server logs. They have access to server logs and can diagnose server-specific issues.
By systematically going through these steps, you should be able to identify and fix the 403 Forbidden error on your WordPress website. Remember to work methodically and test your site after each change.
Read: Boost Your Site Speed: 11 Essential WordPress Caching Plugins
Conclusion
In summary, resolving a 403 Forbidden error in WordPress typically involves checking file permissions, reviewing security settings, and ensuring that plugins or themes are not causing conflicts, ultimately restoring access and functionality to your site. By systematically addressing these potential issues, users can effectively troubleshoot and eliminate this frustrating error.
The post How Can I Fix 403 Forbidden Error in WordPress? first appeared on Web Hosting Stuff.
]]>The post How to Install WordPress on Your Localhost Easily? first appeared on Web Hosting Stuff.
]]>What Is Localhost?
In simple terms, localhost refers to your own computer. It’s a reserved hostname that always points back to the machine you’re currently using. Think of it as a special address (typically the IP address 127.0.0.1 for IPv4, or ::1 for IPv6) that your computer uses to refer to itself.
When you type “localhost” into your web browser, or when a program on your computer tries to connect to “localhost,” the request doesn’t go out to the internet. Instead, it “loops back” internally, allowing your computer to communicate with itself as if it were a remote server. This is possible because your operating system is inherently configured to manage these “loopback” requests.
Essentially, localhost allows you to run a web server directly on your machine, turning your computer into a local development environment.
Why Should You Use It?
Safe Testing Environment: Experiment with themes, plugins, and code without risking your live website or affecting visitors.
Offline Development: Work on your site anytime, anywhere, without needing an internet connection.
Faster Workflow: Local environments typically run much faster than live servers, speeding up development and debugging.
Cost-Effective: No need to pay for hosting or a domain name while you’re still building and testing.
Privacy: Your work remains private until you’re ready to deploy it to a live server.
Learning and Experimentation: It’s a perfect sandbox for beginners to learn WordPress and for experienced users to try out new ideas.
Requirements to Install WordPress on Localhost
Local Server Environment Software: This software package simulates a web server, PHP, and a MySQL database on your computer. Popular options include:
- XAMPP: Cross-platform (Windows, macOS, Linux)
- WAMP: For Windows only
- MAMP: For macOS (and Windows)
- Local by Flywheel (LocalWP): A more user-friendly, specialized tool for WordPress development.
WordPress Files: The latest version of WordPress, which you’ll download from the official WordPress.org website.
A Database: A blank MySQL (or MariaDB) database will be created within your local server environment to store your WordPress site’s content and settings.
Read: WordPress on Windows: Installation Made Simple
Step-by-Step Guide to Install WordPress on Localhost
Step 1: Install XAMPP
- Download XAMPP: Click to Apache Friends website and download the XAMPP installer. After that start operating the system easily.
- Run the Installer: Once downloaded, run the XAMPP installer.
- Windows: You might get a User Account Control (UAC) prompt. Click “Yes.”
- Follow Installation Prompts: Click “Next” through the initial screens. You can keep the default components selected unless you have specific reasons to deselect any.
- Choose Installation Directory: The default directory is usually C:\xampp (on Windows). You can change it if you prefer, but remember this location for future reference. Click “Next.”
- Uncheck Bitnami: You’ll likely see an option to learn more about Bitnami for XAMPP. Uncheck this option unless you specifically want it, then click “Next.”
- Complete Installation: Click “Next” to start the installation. Once finished, you can check the box to start the XAMPP Control Panel immediately, then click “Finish.”
Step 2: Start Apache and MySQL in XAMPP
- Open XAMPP Control Panel: If it didn’t start automatically, search for “XAMPP Control Panel” on your computer and open it.
- Start Modules: In the XAMPP Control Panel, you’ll see a list of modules. Click the “Start” button next to:
- Apache: This is your web server.
- MySQL: This is your database server.
- The status should change to green, indicating they are running. If you encounter any port conflicts, you might need to change the default ports for Apache or MySQL (this is less common for basic installations).
Step 3: Download and Extract WordPress
- Download WordPress: Go to https://wordpress.org/download/ and click the “Download WordPress” button to get the latest .zip
- Extract WordPress:
- Locate the downloaded WordPress .zip file (usually in your “Downloads” folder).
- Right-click on the .zip file and choose “Extract All…” (on Windows) or use your preferred unzipping tool.
- This will create a new folder named wordpress.
- Move WordPress to XAMPP’s htdocs folder:
- Open the extracted wordpress
- Copy all the contents inside the wordpress folder (not the folder itself).
- Navigate to your XAMPP installation directory (e.g., C:\xampp).
- Open the htdocs folder inside the XAMPP directory (e.g., C:\xampp\htdocs).
- Create a new folder inside htdocs for your WordPress site. Give it a meaningful name, e.g., mywebsite, wordpress_dev, or test_site. This name will be part of your localhost URL.
- Paste the copied WordPress files into this newly created folder (e.g., C:\xampp\htdocs\mywebsite).
Step 4: Create a MySQL Database for WordPress
- Access phpMyAdmin: Open your web browser and go to http://localhost/phpmyadmin. This is the web interface for managing your MySQL databases.
- Create New Database:
- In phpMyAdmin, click on “New” in the left sidebar.
- Under “Create database,” enter a name for your new database (e.g., wordpress_db, my_site_db). Choose a simple and memorable name.
- For “Collation,” you can usually leave it as utf8mb4_unicode_ci or just utf8_general_ci.
- Click the “Create” button.
Step 5: Run the WordPress Installation
- Open WordPress Installer in Browser: Open your web browser and go to the URL where you placed your WordPress files. The URL will be http://localhost/your_site_folder_name/.
- For example, if you named your folder mywebsite, the URL would be http://localhost/mywebsite/.
- Select Language: Choose your preferred language for the WordPress installation and click “Continue.”
- Welcome Screen: You’ll see a welcome screen telling you what information you’ll need. Click “Let’s go!”
- Database Details: This is where you’ll connect WordPress to the database you created:
- Database Name: Enter the exact name of the database you created in phpMyAdmin (e.g., wordpress_db).
- Username: For localhost XAMPP installations, the default MySQL username is root.
- Password: Leave this field blank for localhost XAMPP installations (there’s no default password).
- Database Host: Keep this as localhost.
- Table Prefix: You can keep the default wp_ or change it for security purposes (e.g., wp_mysite_).
- Click “Submit.”
- Run the Installation: If the database connection is successful, you’ll see a screen confirming this. Click “Run the installation.”
- Site Information: Fill in the following details:
- Site Title: The name of your website (you can change this later).
- Username: This will be your administrator username for logging into WordPress. Do not use “admin” for security reasons. Choose a strong, unique username.
- Password: Create a strong password for your administrator account. WordPress will show you its strength. Make sure to remember this!
- Your Email: Enter your email address.
- Search Engine Visibility: For a localhost site, it’s a good idea to check “Discourage search engines from indexing this site” as you don’t want your development site to appear in search results.
- Click “Install WordPress.”
Step 6: Log in to Your WordPress Dashboard
- Installation Success: Once the installation is complete, you’ll see a “Success!” message.
- Log In: Click the “Log In” button.
- Enter Credentials: Enter the username and password you just created for your administrator account.
- WordPress Dashboard: You will now be redirected to your WordPress dashboard (http://localhost/your_site_folder_name/wp-admin/).
Congratulations! You have successfully installed WordPress on your localhost using XAMPP. You can now start building and customizing your website in this local development environment.
Read: AlmaLinux / Rocky Linux 8 Open HTTP/HTTPS Port 80/443 with Firewalld
Summary
Installing WordPress on your localhost is a straightforward process that empowers you to develop and test your website in a controlled environment. By following the outlined steps, you can efficiently set up a robust platform for your online presence.
The post How to Install WordPress on Your Localhost Easily? first appeared on Web Hosting Stuff.
]]>The post How to Stop Contact Form Spam in WordPress? first appeared on Web Hosting Stuff.
]]>As contact forms consist of blank fields, any spam bots can fill out these fields in the way they like. It is normal to get 1 or 2 messages, but if it’s happening repeatedly, you have to take it seriously. There are possibilities you will lose the real message from the potential customers. For all this, the spam bots are the main culprit. Before getting into deep it’s time to study what is Spam bots.
What are Spam bots?
Spam Bots: Automated Pestilence
Spam bots are malicious computer programs designed to automate the sending of spam. They are the digital equivalent of unsolicited junk mail, but far more pervasive and efficient.
Read: How to Update the Plugin Manually via FTP
How Spam Bots Work
- Creating fake accounts: These bots generate numerous fake profiles on various online platforms to spread their spam content.
- Harvesting email addresses: They scour the internet to gather email addresses, building extensive lists for mass spamming.
- Sending spam messages: Once armed with email addresses or platform accounts, spam bots relentlessly distribute unwanted messages, often containing advertisements, scams, or malware.
- Overloading systems: By flooding platforms with spam, they can disrupt normal operations and hinder user experience.
Types of Spam
Spam bots can distribute various forms of spam, including:
- Email spam: Unwanted commercial or deceptive messages sent via email.
- Social media spam: Spammy posts, comments, or messages on platforms like Facebook, Twitter, or Instagram.
- Comment spam: Irrelevant or promotional comments on blogs and websites.
- Form spam: Automated filling of online forms with spam content.
Now, we will study the various techniques to block the contact form spam in WordPress.
Read: How to Fix Error in WordPress, “Sorry You are Not Allowed to Upload this File Type”
What Are the Best Practices for Controlling Spam in WordPress?
1. Use a Strong Anti-Spam Plugin
A dedicated anti-spam plugin can be your first line of defense.
Some popular options include:
- Akismet: This is a well-known plugin that effectively filters out spam comments and contact form submissions.
- Contact Form 7 Honeypot: This plugin specifically targets contact form spam using the honeypot method.
- Google reCAPTCHA: While not a standalone plugin, it’s a robust anti-spam tool that can be integrated into many contact form plugins.
2. Implement CAPTCHA
CAPTCHA (Completely Automated Public Turing test to tell Computers and Humans Apart) is a challenge-response test used to determine whether a user is a human or a computer. It’s a reliable way to deter spam bots.
- reCAPTCHA: Google’s reCAPTCHA is a popular choice, offering various levels of protection.
- hCaptcha: An alternative to reCAPTCHA, hCaptcha also provides effective spam protection.
3. Honeypot Fields
A honeypot field is a hidden field in your contact form that only bots can see. If this field is filled out, the submission is likely spam.
Many anti-spam plugins, like Contact Form 7 Honeypot, utilize this method.
4. Limit Form Submissions
Restricting the number of submissions from a single IP address can help to prevent spam attacks. Selected contact form plugins provide this feature.
5. Block Spammy IP Addresses
If you identify the IP addresses of spammers, you can block them manually in your WordPress settings or use a firewall plugin.
6. Regularly Update WordPress and Plugins
Keeping your WordPress installation and plugins up-to-date is essential for security. Updates often include patches for vulnerabilities that spammers exploit.
7. Consider a Firewall Plugin
A firewall plugin can provide an additional layer of protection by blocking malicious traffic and detecting suspicious activity.
Additional Tips
- You can opt for a branded form with built-in anti-spam features.
- Monitor your contact form submissions regularly to identify any suspicious activity.
- Be cautious of free contact form plugins as they might not offer adequate spam protection.
By combining these methods, you can significantly reduce spam on your WordPress contact form and protect your website
Wrapping
Combatting contact form spam in WordPress is essential for maintaining the integrity of your website and ensuring genuine interactions with your audience. By implementing the strategies outlined in this guide, such as using CAPTCHA, employing spam filters, and regularly updating and monitoring your plugins, you can significantly reduce spam submissions and protect the user experience.
Remember, staying proactive and vigilant is key to keeping your WordPress contact forms spam-free. By taking these steps, you can enhance the security and effectiveness of your website’s communication channels, ultimately fostering a more positive user experience for your visitors.
The post How to Stop Contact Form Spam in WordPress? first appeared on Web Hosting Stuff.
]]>The post How to Update the Plugin Manually via FTP first appeared on Web Hosting Stuff.
]]>Downloading the New Plugin Version:
- Find the latest version of the plugin you want to update. You will get it from the plugin’s official website or the WordPress plugin directory.
Using an FTP Client:
- You can download and install an FTP client like FileZilla if you already don’t have one.
- Next, you can use your FTP credentials (host, username, and password) to connect to your web server. These can be found in your web hosting provider’s control panel.
Backing Up and Replacing the Old Plugin:
- Here, you have to navigate > /wp-content/plugins/ directory within your server’s file structure.
- Then, you have to locate the folder for the plugin you want to update.
- Here’s where you create a backup: Right-click on the plugin folder and choose “Rename.” Add “-old” to the end of the folder name (e.g., “my-plugin-old”). This creates a backup in case you need to revert to the previous version.
- Now you can delete the original plugin folder.
Uploading the New Plugin Files:
- Now, on your local computer, you have to locate the downloaded folder containing the new plugin version.
- In your FTP client, go to the local files section (usually on the left side) and browse to the new plugin folder.
- Here, you have to right-click on the folder and select “Upload” to transfer it to the /wp-content/plugins/ directory on your server.
Activating the Updated Plugin:
- To activate the plugin, you have to log in to your WordPress admin dashboard.
- Move to the “Plugins” page.
- You will see the newly uploaded plugin listed as inactive.
- Find the plugin and click “Activate.”
Optional: Cleaning Up
- Once you’ve verified the updated plugin that works properly, you can go back to your FTP client and delete the old plugin folder (the one renamed with “-old”) if you don’t need it anymore.
Remember: Updating plugins via FTP bypasses the WordPress update process, so the plugin’s database entries might not be automatically updated. If the plugin requires database changes, you need to follow additional instructions provided by the plugin developer.
It’s generally recommended to update the plugins through the WordPress dashboard whenever possible, as it’s a simpler and safer process. But in case of issues, manually updating via FTP can be a helpful alternative.
The post How to Update the Plugin Manually via FTP first appeared on Web Hosting Stuff.
]]>The post How to install JetBackup for WordPress? first appeared on Web Hosting Stuff.
]]>Free Version:
To get the free version check these steps below:
Log in to your WordPress Admin Dashboard.
Navigate to “Plugins” > “Add New“.
Search for “JetBackup for WordPress” in the WordPress Plugin Repository.
Click “Install Now” and “Activate Plugin” once the installation is complete.
Paid Version:
To get a paid version of JetBackup for WordPress, check these steps below:
If you have the Free Version Installed, you have to uninstall it by logging into your WordPress Admin Dashboard > “Plugins” > “Installed Plugins”, look for “JetBackup for WordPress” and click “Deactivate” then click on “Delete”.
Next, log in to the JetApps Client Area, and navigate to “Services”. “My Services” {JetApps Services Page}, click on the corresponding “JetBackup for WordPress” license then click download.
The post How to install JetBackup for WordPress? first appeared on Web Hosting Stuff.
]]>The post How to Set up Google Tag Manager in WordPress first appeared on Web Hosting Stuff.
]]>Simultaneously, Google Tag Manager offers an easy way to develop and manage tags on your website without understating the coding This tool will guide you to create conditions for tracking particular actions on the website, like how many times a document is downloaded, how often a link is clicked on, or how many people watched an embedded video.
This document will help you learn what Google Tag Manager is, and what are the steps to set up a Google Tag Manager in WordPress.
What is Google Tag Manager?
It is a free tracking tool that allows you to manage and deploy website tags without changing the code.
It has in-build templates that are integrated with Google Ads, Google Analytics, and other tools. With the help of its preview mode, you can monitor the tags or triggers that work well before they get published.
There are two main ways to set up Google Tag Manager (GTM) in WordPress:
1. Using a Plugin:
This is the recommended method for most users as it’s easier and doesn’t require editing theme files. Here’s how to do it:
- Install the plugin: Search for “Google Tag Manager” in the WordPress plugin directory and install the plugin by DuracellTomi.
- Activate the plugin: Once installed, go to “Settings” and then “Google Tag Manager.”
- Enter your GTM container ID: You can find this ID in your GTM account under “Container”.
- Save the settings: Now, the GTM code will be automatically added to your website’s header and body sections.
2. Editing Theme Files:
This method involves manually adding the GTM code to your theme’s header.php file. It’s a less recommended approach as it requires some technical knowledge and can be overwritten when you update your theme. Here’s how to do it:
- Access your WordPress dashboard: Go to “Appearance” and then “Theme File Editor.”
- Locate the header.php file: Click on the theme header file (e.g., header.php).
- Find the <head> tag: Look for the opening <head> tag in the code.
- Copy the GTM code snippet: Go to your GTM account and copy the provided code snippet.
- Paste the code: Paste the first part of the code snippet just below the opening <head> tag.
- Click on the Save button: You have to click on the “Update File” button to save your changes.
Additional Tips:
- Backup your website: It’s always recommended to back up your website before making any changes to theme files.
- Test your website: After adding the GTM code, ensure your website still functions correctly.
- Use a preview and debug mode: GTM offers a preview and debug mode to help you test your tags before publishing them.
Set Up Google Tag Manager Soon!
Unleashing Google Tag Manager’s full potential in WordPress has never been this simple.
From better analytics to more personalized user experiences, Google Tag Manager on your WordPress site can make a world of difference. Ready to step up your game? Check out our step-by-step guide.
Tag or share with your friend who needs this setup on their WordPress site.
The post How to Set up Google Tag Manager in WordPress first appeared on Web Hosting Stuff.
]]>The post How to Remove WordPress from cPanel Softaculous? first appeared on Web Hosting Stuff.
]]>This tutorial article will help you to uninstall WordPress from cPanel Softaculous.
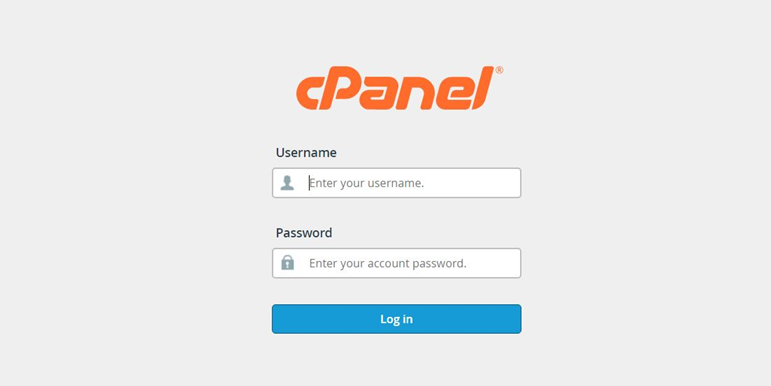
- Login to your cPanel account
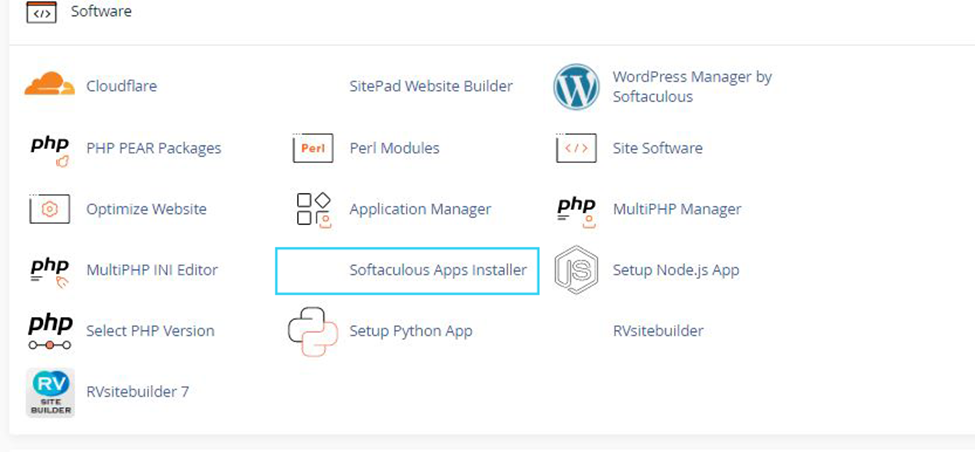
2. Click on the Softaculous App Installer section and click on WordPress.
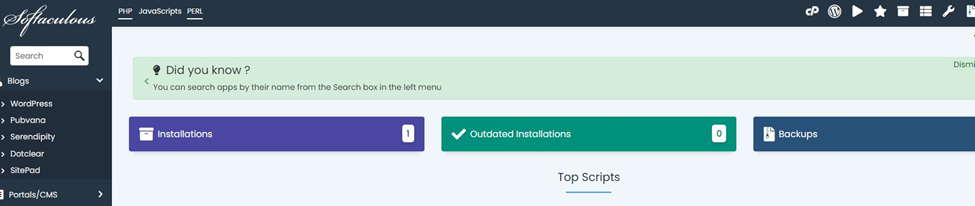
3. After that you can click on the Installations tab where you’ll see all the installations.
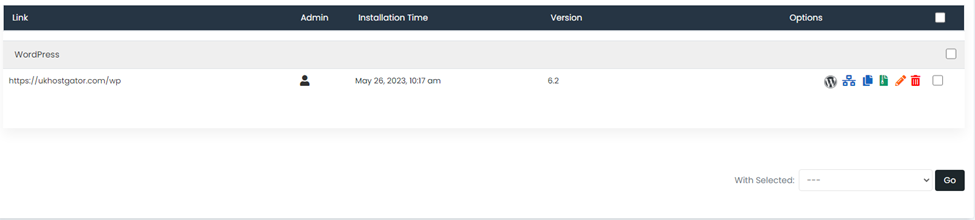
4. Under Installations, you’ll see the dashboard consists of different options. Click on the red dustbin icon under options for the domain that you want to remove:
5. After clicking on the red dustbin icon, you’ll be redirected to this page.
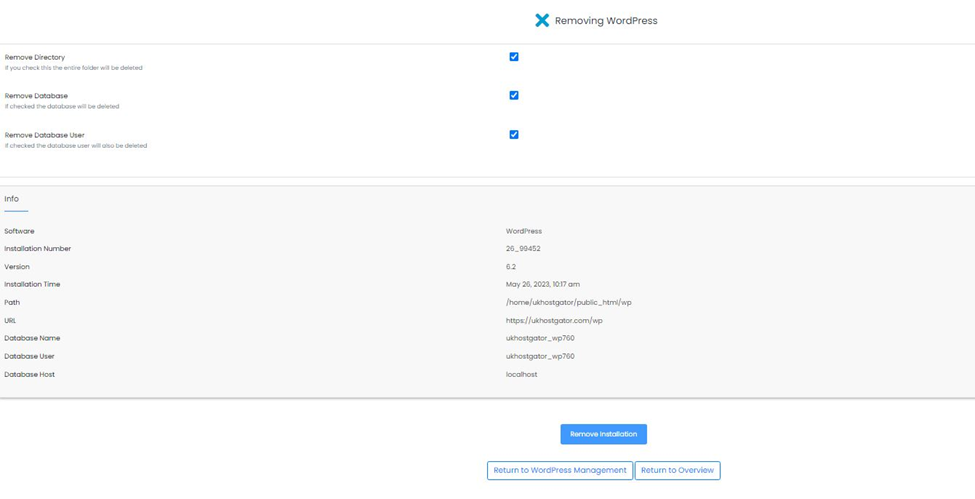
6. Click on the button Remove Installation. You’ll be asked last time about removing the installation and you just need to click OK.
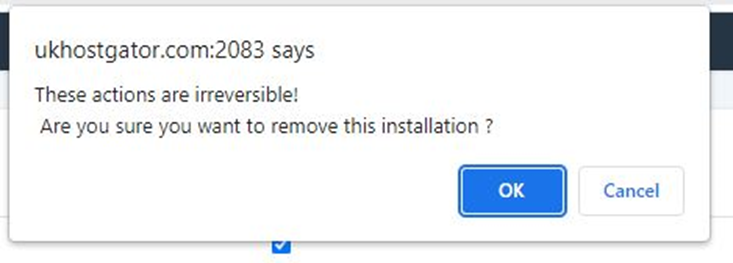
When you click on the OK button,

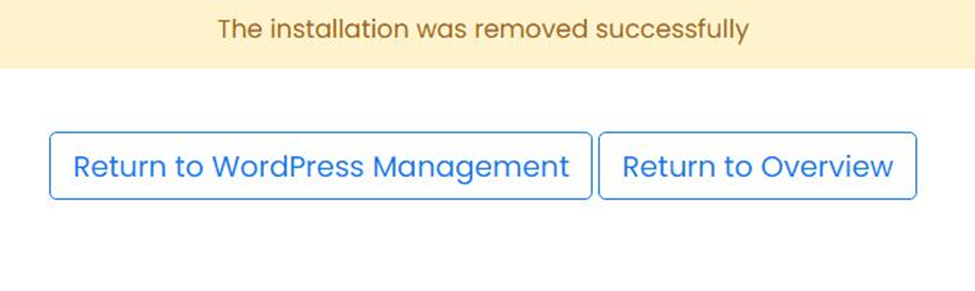
7. You’ll get on the page informing installation was removed successfully.
The post How to Remove WordPress from cPanel Softaculous? first appeared on Web Hosting Stuff.
]]>The post Steps to Install WordPress using Softaculous first appeared on Web Hosting Stuff.
]]>Log-in to your cPanel (Control Panel)
The very first step is to login to your cPanel (control panel) login page and enter the correct details.
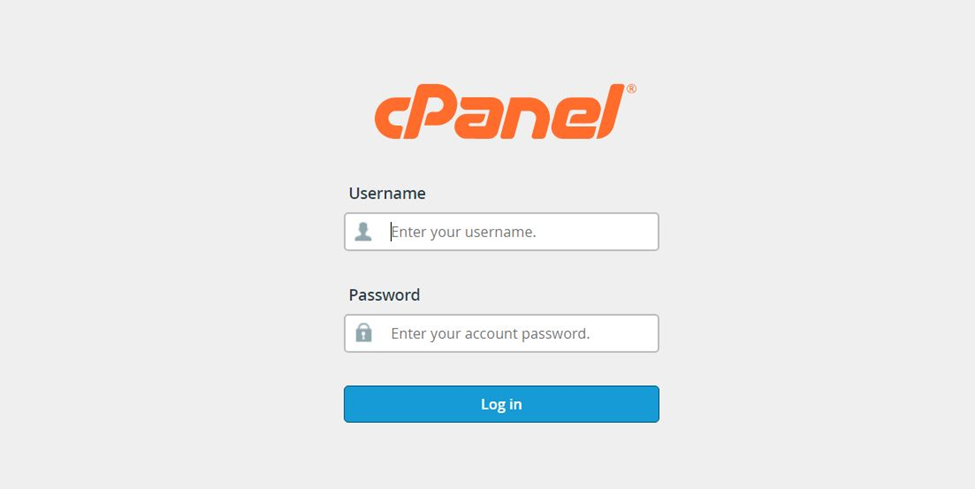
After login, you can check for the Softaculous icon in the control panel as shown in the screenshot below. It will redirect you to Softaculous Endures panel.
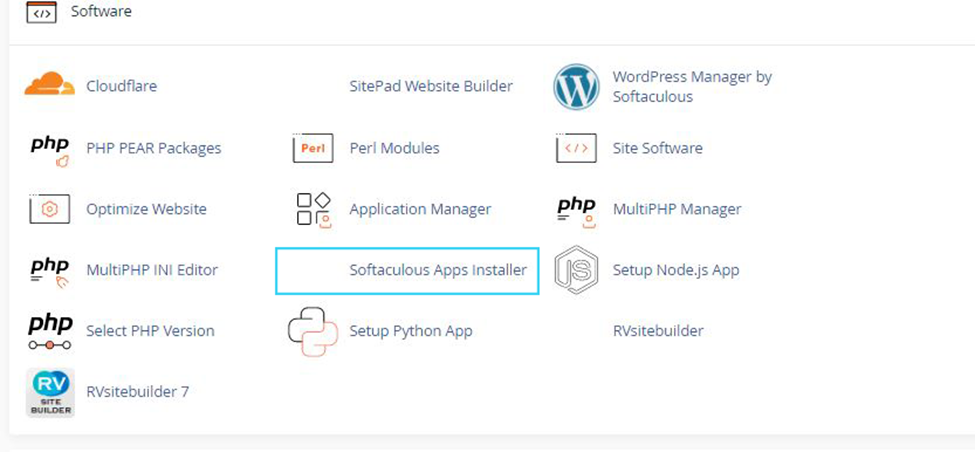
Operate the Softaculous from your control panel.
Select the WordPress
Under Softaculous endure; you’ll see the multiple scripts lists from which you’ve to select the WordPress.
Click on the Install button which will showcase the install form.
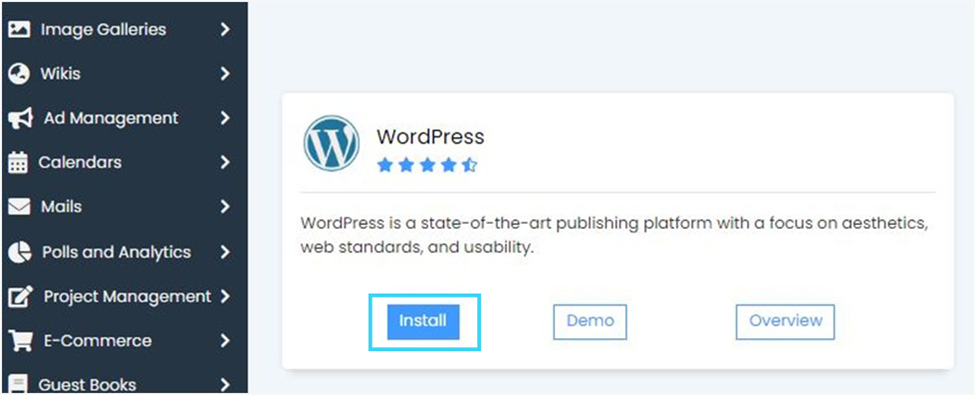
After clicking on the Install button, you’ll be redirected to the install form.
Fill the all necessary details in the install form shown in the screenshot below. The form consists of many details that are prefilled by the default, you can also change it as per your requirement or leave it as it is and continue with the installation with default values.
Select the installation URL
Select the domain and folder in which you want to install of WordPress. Also, select HTTPS to ensure your website is secure by using a SSL Certificate.
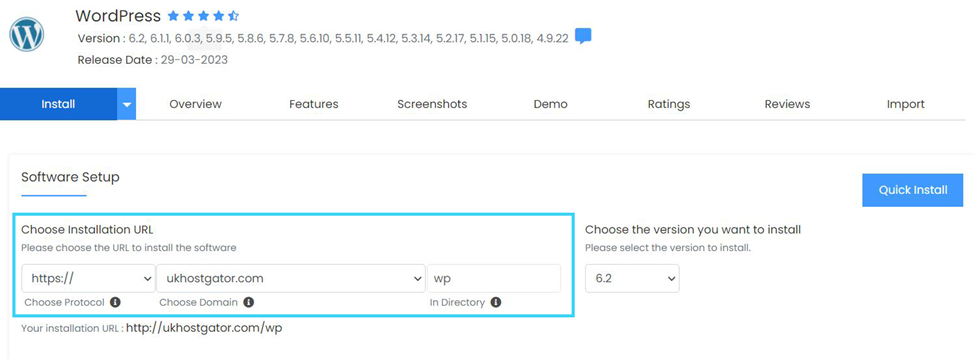
Note: If you want to install WordPress in document root i.e example.com instead of subdirectory i.e. example.com/wp then leaves the In Directory field blank.
Next,
Finish the remaining installation setup. You can select the version of WordPress as per your requirement. We recommend using the most recent release, as it will be secure and compatible with most of themes and plugins.
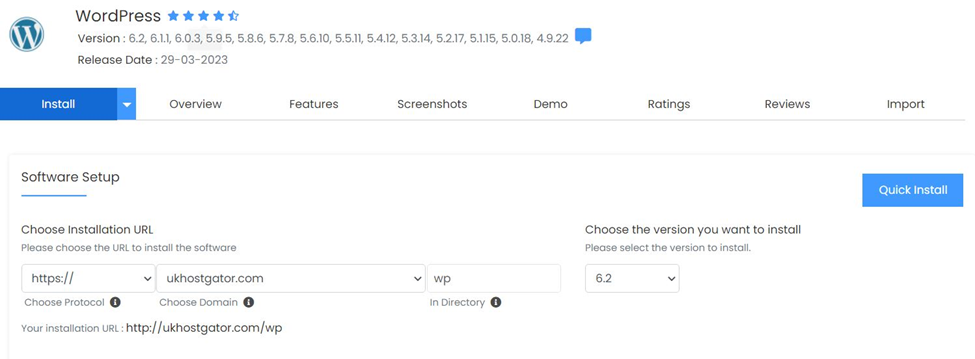
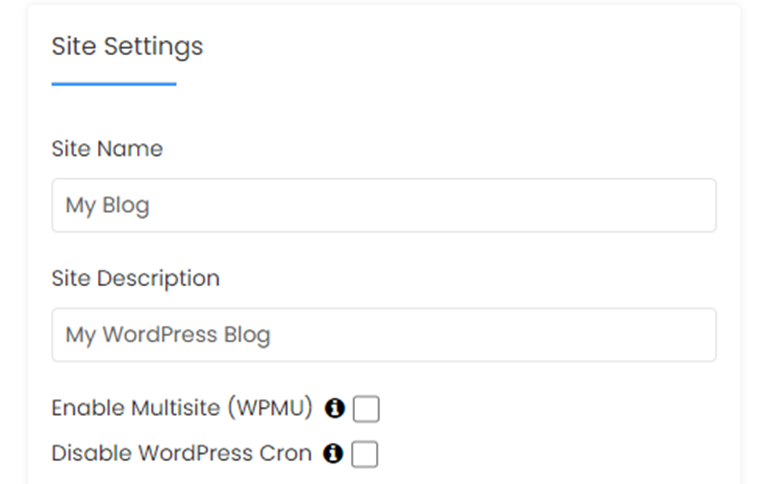
In the Site Setting section, you need to type Website Name and Description. However, you can change this after installation.
Finish the Admin Account section
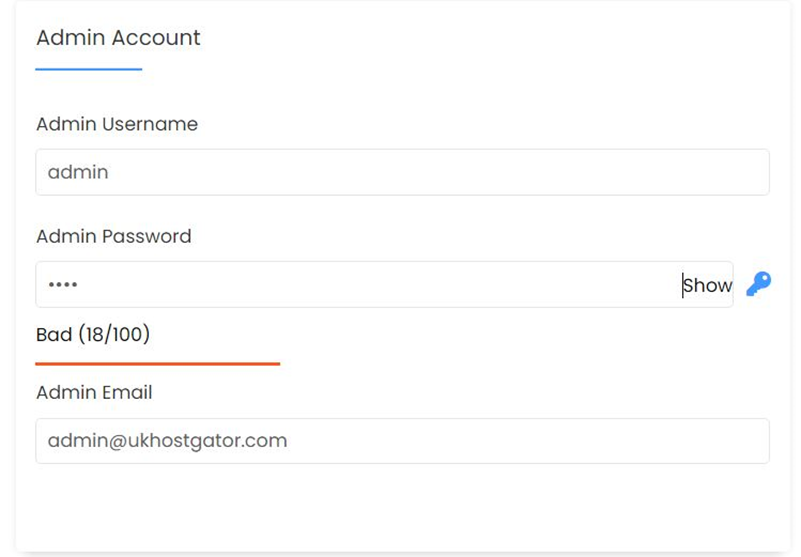
For the admin username, it’s suggested to use something unique than the default ‘admin’ for the username, as this is the default for all WordPress installations and poses a security risk.
For a password, you can create a password or generate one using the key icon.
An email address is needed to get notifications, including the password reset (if you forgot the password)
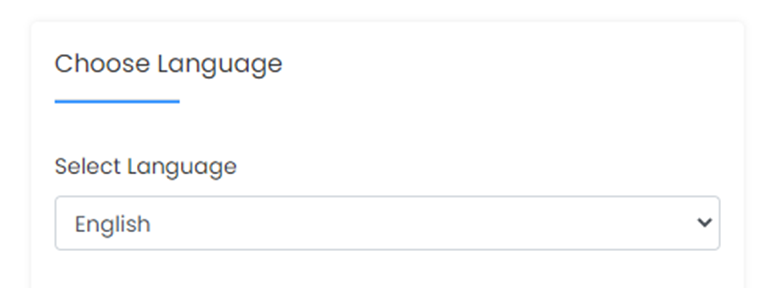
Choose Language helps you to select the default language for your website.
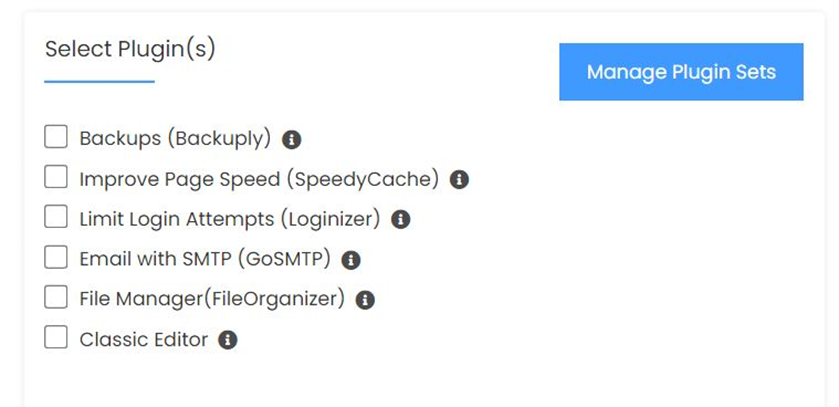
Select Plugin(s) helps you to select plugins as per your business.
In the Advanced Options section, mentioned options don’t need to be changed, but they include the database name, table prefix, disable update notification emails, set auto – upgrade, and more.
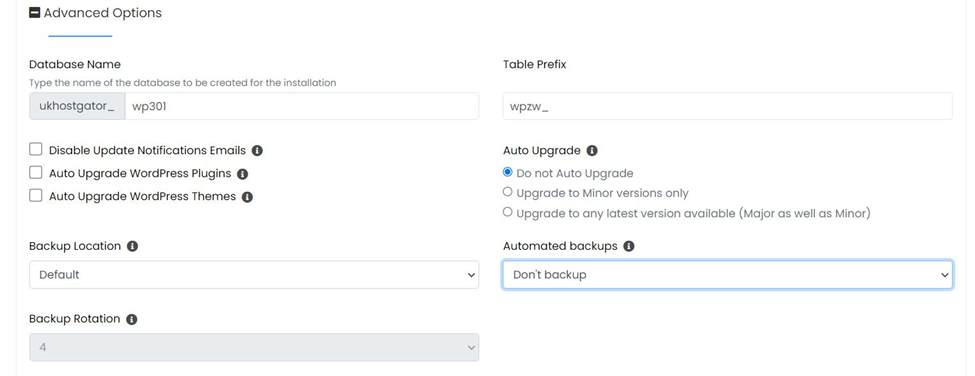
Rest of the options your web hosting provider will help you to mention in the boxes.
The Select Theme helps you to select themes as per your business by default, WordPress uses a theme named after the year, but you can select one that fits the purpose of your website.
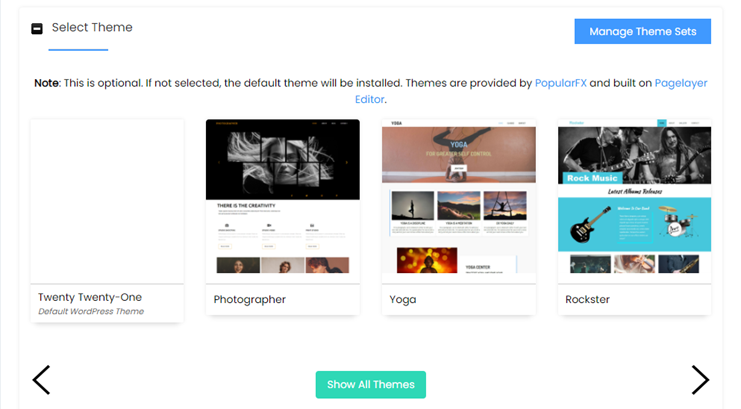
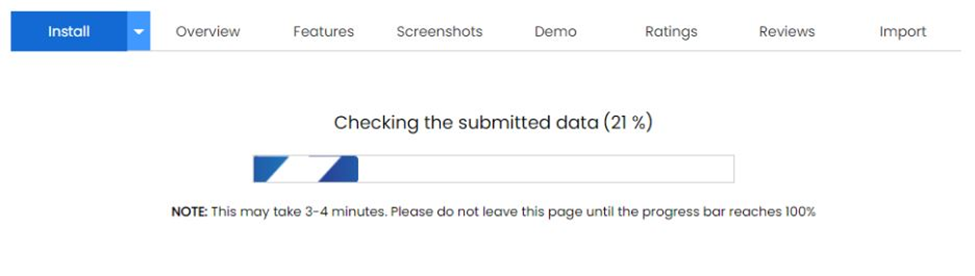
After installing the plugin, the next step is to click on Install. A progress bar will get displayed on your installation status and refresh once the installation is done.
Note: during the going process avoid the closing of the browser as it can interrupt the installation.
Last, you’ll get the notification displaying “Congratulations, the software was installed successfully.
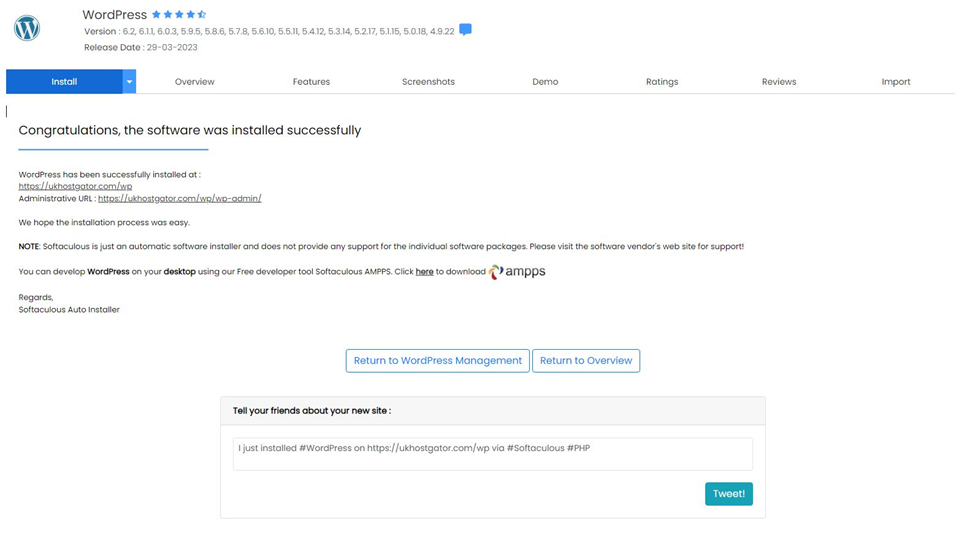
The post Steps to Install WordPress using Softaculous first appeared on Web Hosting Stuff.
]]>