The post How to install PEAR for PHP in Linux first appeared on Web Hosting Stuff.
]]>

PEAR is a structured library of open-source code for users of PHP. When pear is not installed in your server, then install it. You can easily install PEAR for php in Linux.
In this article we will give you how to install PEAR for php in Linux. Follow the steps for Installing PEAR.
Step 1 : Download the installation php file.
Step 2 : Rename to php file by using following command.
cp go-pear go-pear.php
Step 3 : Run the php script.
Then, Windows Command Prompt to start the installation.
Step 4 : You can install php various extensions by using following command.
pear install package
After installing PEAR, you can install modules by going to the PEAR admin at example :-
hostripples.com/pearadmin, where hostripples.com is your domain name.
The post How to install PEAR for PHP in Linux first appeared on Web Hosting Stuff.
]]>The post Unable to establish a PHP session – PHPMyAdmin error first appeared on Web Hosting Stuff.
]]>
PHPMyAdmin error :
Do you ever come across the following error when you access PHPMyAdmin from cPanel.
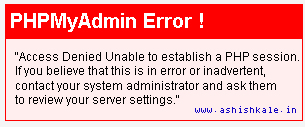
“Access Denied Unable to establish a PHP session. If you believe that this is in error or inadvertent, contact your system administrator and ask them to review your server settings.”
Normally, you will get this error when the permission or ownership of the tmp folder for this user is wrong. That is, make sure the ownership of /home/$username/tmp folder has ownership set to $user and permission as 755. If it is not, you will face the same problem.
Solution :
Step 1 : Login to the server via SSH as root.
Step 2 : Check the permission and ownership of /home/$user/tmp folder.
Step 3 : Set ownership as $user by using following command
# chown $user. /home/$user/tmp
Step 4 : Set permission of the tmp folder to 755 by using following command
#chmod 755 /home/$user/tmp
.
.
.
.
.
.
.
.
That’s it!!!
$user can be replaced with your respective username.
The post Unable to establish a PHP session – PHPMyAdmin error first appeared on Web Hosting Stuff.
]]>The post Installing LAMP On Linux Mint first appeared on Web Hosting Stuff.
]]>LAMP stands for Linux, Apache, MySQL, PHP. How to install Linux the L of LAMP.
Install Apache
To start off we will install Apache.
1) Open up the Terminal
(Applications > Accessories > Terminal)
2) Copy/Paste the following line of code into Terminal and then press enter
sudo apt-get install apache2
3) Type you’re password, and then press enter.
The page should display the words
.
.
.
.
“It works!”
Testing Apache
To make sure everything installed correctly we will now test Apache to ensure it is working properly.
1) Open up any web browser and then enter the following line.
http://localhost/
2) You should see a folder entitled apache2-default/.
3) Open it and you will see a message saying
.
.
.
.
“It works!”, congrats to you!
Install PHP
PHP is an open source web scripting language that is widely use to build dynamic webpages.
To install PHP
1) Open up the Terminal
(Applications > Accessories > Terminal)
2) Type in this command
sudo apt-get install php5 libapache2-mod-php5
After you answer yes to the prompt twice, PHP will install itself.
3) It may also be useful to add php to the directory index, to serve the relevant php index files
sudo nano /etc/apache2/mods-enabled/dir.conf
Test PHP
To ensure there are no issues with PHP let’s give it a quick test run.
1) Open up the Terminal
(Applications > Accessories > Terminal)
2) Type in this command
sudo gedit /var/www/testphp.php
This will open up a file called phptest.php.
3) Copy/Paste this line into the phptest file:
<?php phpinfo(); ?>
4) Save and close the file.
5) Now open you’re web browser and type the following into the web address:
http://localhost/testphp.php
The page should look
.
.
.
Congrats you have now installed both Apache and PHP!
Install MySQL
To finish this guide up we will install MySQL. MySQL is a powerful database management system used for organizing and retrieving data
To install MySQL,
1) Open terminal and type in these commands
sudo apt-get install mysql-server libapache2-mod-auth-mysql php5-mysql
During the installation, MySQL will ask you to set a root password. If you miss the chance to set the password while the program is installing, it is very easy to set the password later from within the MySQL shell.
2) Once you have installed MySQL, we should activate it with this command
sudo mysql_install_db
3) Finish up by running the MySQL set up script
sudo /usr/bin/mysql_secure_installation
4) The prompt will ask you for your current root password.
Type it in.
5) Enter current password for root (enter for none)
OK,
.
.
.
successfully used password, moving on…
The post Installing LAMP On Linux Mint first appeared on Web Hosting Stuff.
]]>The post How enable HTML files to display php code first appeared on Web Hosting Stuff.
]]>
Enable HTML files to display php code
1) Log into your cPanel
2) Using the File Manager, navigate to the root folder for the domain you want to work with
3) Set the Show Hidden Files option as you will be working with the .htaccess file
4) If there is not one for the domain, you will need to create a new one
5) Edit the file by highlighting the file
6) Click on the Edit icon from the toolbar at the top of the page
5) This brings you to the cpanel file editor. You will want to insert the following line of code at the top of the .htaccess file.
AddType application/x-httpd-php5 .html .htm .php
6) Then, Click the Save Changes button in the upper right corner of the screen.
7) You are now able to place php code sections into your html files and have them display.
8) Look at the before and after shot to see how the code affects a page with php in it.
The post How enable HTML files to display php code first appeared on Web Hosting Stuff.
]]>The post What is PHP? first appeared on Web Hosting Stuff.
]]>
PHP (recursive acronym for PHP: Hypertext Preprocessor) is a widely-used open source general-purpose scripting language that is especially suited for web development and can be embedded into HTML. In an HTML document, PHP script (similar syntax to that of Perl or C ) is enclosed within special PHP tags. Because PHP is embedded within tags, the author can jump between HTML and PHP (similar to ASP and Cold Fusion) instead of having to rely on heavy amounts of code to output HTML. And, because PHP is executed on the server, the clientcannot view the PHP code.
PHP can perform any task that any CGI program can do, but its strength lies in its compatibility with many types of databases. Also, PHP can talk across networks using IMAP, SNMP, NNTP, POP3, or HTTP.
How to update PHP version?
1) To update Apache’s instance of PHP, run the /usr/local/cpanel/scripts/phpup script from the command line.
2) To change the version of Apache’s instance of PHP, run EasyApache in WHM (Home >> Software >> EasyApache (Apache Update)) or run the /usr/local/cpanel/scripts/easyapache script on the command line.
How do I update the instance of PHP that cPanel uses?
1) The system uses RPM to update PHP. For more information, read the rpm.versions documentation.
If I install a custom instance of PHP, will it work with cPanel & WHM?
The system uses RPM to update PHP. For more information, read the rpm.versions documentation.
The post What is PHP? first appeared on Web Hosting Stuff.
]]>The post How to install MariaDB Server in cPanel/WHM servers? first appeared on Web Hosting Stuff.
]]>And
What are the advantages of using MariaDB Server ?
Ans:
* Install MariaDB Server in cPanel/WHM servers
1. Backup existing MySQL data
# mysqldump --all-databases --routines --triggers > /home/db_dump/alldb.sql
# service mysql stop
# cp -r /var/lib/mysql/mysql /home/db_dump/
# service mysql start
2. Select MySQL version as MariaDB
# /usr/share/lve/dbgovernor/db-select-mysql --mysql-version=mariadb100
MariaDB versions:
mariadb55 for MariaDB v5.5
mariadb100 for MariaDB v10.0
mariadb101 for MariaDB v10.1
3. Install MariaDB
# /usr/share/lve/dbgovernor/db-select-mysql --install-now
Final step is to recompile PHP and Apache in the server.
# /scripts/easyapache
* Advantages of using MariaDB Server
1) Faster and safer replication.
2) Indexes for the MEMORY(HEAP) engine are faster.
3) CHECKSUM TABLE is faster.
4) MariaDB improved the performance of character set conversions.
5) Pool of Threads in MariaDB 5.1 and even better in MariaDB 5.5.
6) There are some improvements to the DBUG code to make its execution faster when debug is compiled in but not used.
7) Our use of the Aria storage engine enables faster complex queries.
8) The test suite has been extended and now runs much faster than before, even though it tests more things.
The post How to install MariaDB Server in cPanel/WHM servers? first appeared on Web Hosting Stuff.
]]>