The post How to Disable MySQL Strict Mode in Linux and Windows first appeared on Web Hosting Stuff.
]]>When strict mode is enabled in MySQL then invalid or missing data may cause warnings or errors when trying to move the query.
When strict mode is disabled, a similar query would have its invalid or missing values adjusted and produce a simple warning.
This may seem like the preferred result, but though strict mode is disabled, certain actions may lead to unexpected results. For example, when the character limit is exceeded, it will be shortened to fit the limit.
There are plenty of reasons why MySQL’s strict mode may require to be disabled. The frequent reason is when a server is operating WHMCS – a requirement of the tool.
Necessities
- Their guide is specifically for disabling MySQL strict mode on a managed server with cPanel or a Windows server.
- The server should be accessible to MySQL 5.X or MariaDB 10.X and higher.
- Command line and root-level access via SSH will be compulsory to follow this tutorial on Linux servers.
Disable MySQL Strict Mode
Step 1: Backup Your Data
It’s always better to have a backup before modifying server files. You have to revert changes if something goes wrong. Backups are also needed to help track changes.
Linux
When logged into SSH with the root user on Linux, with the following Bash brace expansion command to make a backup copy of the file in its original Linux directory.
cp -a /usr/my.cnf{,.strict.bak}
cp -a /etc/my.cnf{,.strict.bak}
Windows
Windows users must identify and take a backup of the my.ini file. In the start menu, go to Settings > Update & Security > Backup > Add a drive, and then opt for the external drive or network location where you are allowed to store the backups of your machine.
Step 2: Disable MySQL Strict Mode
Based on the server and the current configurations, you may be required to edit one, or both, of the following files on the server. Generally, relevant configuration lines are available. However, it could be in either one without causing issues, so generally, it’s good to go with both.
Linux
In Linux, you can edit the files and open the file with your favorite command line editor. This guide uses Vim:
vim /usr/my.cnf
vim /etc/my.cnf
In vim, you can type a or i to enter text insertion mode; pressing the Esc key on your keyboard will take back you to command mode. For a refresher on editing files with vim, you can check articles on the web.
Within the file, check the following line.sql_mode=NO_ENGINE_SUBSTITUTION,STRICT_TRANS_TABLES
This line is setting the sql_mode variable. Replace it with the following line to disable MySQL strict mode. sql_mode=""
After adjusting or you’ve to confirm the file that doesn’t need an adjustment, save and close the file. Press Esc to enter command mode and type:wq to write and end the file.
Windows
The step is similar for Windows, but don’t forgot to locate and open the my.ini file from File Explorer—the standard location for its C:\ProgramData\MySQL\MySQL Server X.X.
The escape folder is ProgramData. To show a hidden folder, go to the view tab from the menu bar, and click the checkbox next to hidden items in the Show/hide section. Once you identify the my.ini file, open it with Notepad or Notepad ++ and search the following line.
sql-mode = “STRICT_TRANS_TABLES,NO_AUTO_CREATE_USER,NO_ENGINE_SUBSTITUTION”
Change this line in the file to get the mode to blank.
sql-mode = “”
Step 3: Restart the MySQL Service
You have to restart the MySQL service to make these changes, as it will only read the configuration files when it initially loads up.
Linux
For CentOS 7 servers, use this command.
systemctl restart mysql
For CentOS 6 and prior, write this command,
/etc/init.d/mysql restart
After furnishing this command on the server, the MySQL service will restart and load the changes. The MySQL strict mode is now disabled.
You can operate the following command to verify that the process was done properly.
mysql -e “SELECT @@sql_mode;”
Check the example of the output:
+——————————————–+ | @@sql_mode +——————————————–+ | NO_AUTO_CREATE_USER +——————————————–+
Windows
To restart MySQL in Windows, look for and open the Administrative Tools app. Just Double – Click Services. Identify and select MySQL. You are shown the following options on the left:
Stop the service: Stop the selected service.
Pause the service: Pause the selected service.
Restart the service: Restart the selected service.
Click on Restart the service which will redirect to change back to Started.
Conclusion
Disabling Strict Mode in MySQL is a painless task, regardless of why an administrator is required to disable it. Check this article to disable the MySQL Strict Mode for Linux or Windows servers.
The post How to Disable MySQL Strict Mode in Linux and Windows first appeared on Web Hosting Stuff.
]]>The post How to Create a MySQL Database? first appeared on Web Hosting Stuff.
]]>
MySQL is an open-source relational database management system. It is one of the best RDBMS being used for developing web-based software applications. You have access to root user, you can easy create any database using mysql.
In this article will give you how you can easily create a new database from your cPanel. Follow the steps and create a MySQL Database.
Step 1 : Log in your cPanel.
Step 2 : Go to MySQL Databases.
Step 3 : Navigate to the Create New Database box.
Step 4 : Enter the Database Name in the New Database text field.
Step 5 : Click on the Create Database button.
Step 6 : The database name will be preceded by the cPanel username.
Example, if your cPanel user name is user and you want to have a database named test, the actual database name will be user_test.
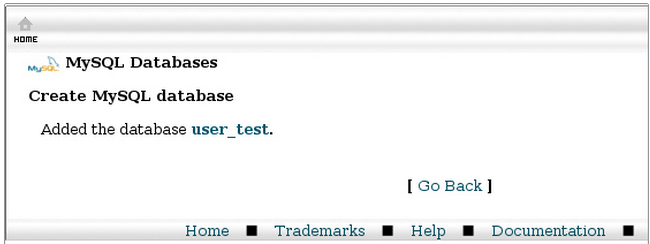
Then, You will get a confirmation message.
The post How to Create a MySQL Database? first appeared on Web Hosting Stuff.
]]>The post How to Uninstall MySQL Governor first appeared on Web Hosting Stuff.
]]>
To uninstall MySQL Governor.
- Run the following command to uninstall MySQL Governor:
/usr/share/lve/dbgovernor/install-mysql.py –delete
yum erase db-governor db-governor-mysql
The post How to Uninstall MySQL Governor first appeared on Web Hosting Stuff.
]]>The post How to Import Database using PHPMyAdmin first appeared on Web Hosting Stuff.
]]>
phpMyAdmin makes the task of managing your MySQL databases easier and more efficient, and it allows you to manage those available databases from anywhere. With phpMyAdmin, you can create, edit, back up, import, export, and delete databases, as well as manage database tables.
Import Database using PHPMyAdmin
1) Login to cPanel
2) Open phpMyAdmin and click the phpMyAdmin icon
3) Select the database that you need to Import
4) Click Import Button
5) Under File to Import, click Browse Button
6) Select the backup file you previously created (it will be either a .sql .zip or .tar.gz file).
7) Click Go Button
8) When the database has been imported successfully, you will see the message to: Import has been successfully finished, ## queries executed.
.
.
.
Congratulations, you have just imported a database!
The post How to Import Database using PHPMyAdmin first appeared on Web Hosting Stuff.
]]>The post Installing LAMP On Linux Mint first appeared on Web Hosting Stuff.
]]>LAMP stands for Linux, Apache, MySQL, PHP. How to install Linux the L of LAMP.

Install Apache
To start off we will install Apache.
1) Open up the Terminal
(Applications > Accessories > Terminal)
2) Copy/Paste the following line of code into Terminal and then press enter
sudo apt-get install apache2
3) Type you’re password, and then press enter.
The page should display the words
.
.
.
.
“It works!”
Testing Apache
To make sure everything installed correctly we will now test Apache to ensure it is working properly.
1) Open up any web browser and then enter the following line.
http://localhost/
2) You should see a folder entitled apache2-default/.
3) Open it and you will see a message saying
.
.
.
.
“It works!”, congrats to you!
Install PHP
PHP is an open source web scripting language that is widely use to build dynamic webpages.
To install PHP
1) Open up the Terminal
(Applications > Accessories > Terminal)
2) Type in this command
sudo apt-get install php5 libapache2-mod-php5
After you answer yes to the prompt twice, PHP will install itself.
3) It may also be useful to add php to the directory index, to serve the relevant php index files
sudo nano /etc/apache2/mods-enabled/dir.conf
Test PHP
To ensure there are no issues with PHP let’s give it a quick test run.
1) Open up the Terminal
(Applications > Accessories > Terminal)
2) Type in this command
sudo gedit /var/www/testphp.php
This will open up a file called phptest.php.
3) Copy/Paste this line into the phptest file:
<?php phpinfo(); ?>
4) Save and close the file.
5) Now open you’re web browser and type the following into the web address:
http://localhost/testphp.php
The page should look
.
.
.
Congrats you have now installed both Apache and PHP!
Install MySQL
To finish this guide up we will install MySQL. MySQL is a powerful database management system used for organizing and retrieving data
To install MySQL,
1) Open terminal and type in these commands
sudo apt-get install mysql-server libapache2-mod-auth-mysql php5-mysql
During the installation, MySQL will ask you to set a root password. If you miss the chance to set the password while the program is installing, it is very easy to set the password later from within the MySQL shell.
2) Once you have installed MySQL, we should activate it with this command
sudo mysql_install_db
3) Finish up by running the MySQL set up script
sudo /usr/bin/mysql_secure_installation
4) The prompt will ask you for your current root password.
Type it in.
5) Enter current password for root (enter for none)
OK,
.
.
.
successfully used password, moving on…
The post Installing LAMP On Linux Mint first appeared on Web Hosting Stuff.
]]>