The post How to Install Webuzo V3 first appeared on Web Hosting Stuff.
]]>Requirements:
- Newly installed OS from the following list :
– CentOS 7.x / 8.x
– AlmaLinux 8.x / 9.x
– Ubuntu LTS 18.04 / 20.04 / 22.04
– Red Hat Enterprise Linux 7.x / 8.x
– Scientific Linux 7.x / 8.x
– Rocky Linux 8.x
- YUM / apt-get / tar / wget packages installed
- RAM – Minimum 1 GB (Recommended 2 GB for best performance)
- Disk Space – Minimum 5 GB (Recommended 10 GB for best performance)
- Open Ports – 2002, 2003, 2004, 2005, 21, 22, 25, 53, 80, 110,143, 443, 465, 993, 995, 587, and 3306 (It is recommended to keep these ports open on your server)
- SELinux should be disabled
Note: There should be no PHP, Apache, or MySQL installed on the server.
Installation:
Open a Shell Terminal (e.g. PuTTY) and SSH to your server. Run the following commands:

Default Apps
The “install parameter is optional and if in case it’s not then Webuzo will install the app by default:
Apache 2.4, MySQL 8.0, PHP 7.3, Pure-FTPd, Bind, Exim, Dovecot, GIT, Web Disk
For allowing Webuzo to install any apps please use the following command:
./install.sh
No Apps
In case, you don’t want Webuzo to install any apps you can use the following value to install the parameter:
./install.sh --install=none
Later you can install apps from Webuzo Admin Panel > Apps > Install an App page.
Selected Apps
To allow Webuzo to install selected apps then you can enter the app names comma-separated to the install parameter:
E.g. ./install.sh --install=apache2, mariadb108,bind,exim,dovecot,php81,php80,php74
Below mentioned are the popular apps for
Web Servers
- apache2
- openlitespeed
- lsws
- nginx
- nodejs
- nodejs14
- nodejs16
- nodejs17
- nodejs18
- nodejs19
Database Servers
- mysql80
- mysql57
- mariadb109
- mariadb108
- mariadb107
- mongodb
- pgsql
- sqlite
Scripting Languages
- php82
- php81
- php80
- php74
- php73
- php72
- php71
- perl
- python2
- python3
Utilities
- exim
- dovecot
- bind
- pureftpd
- sa (SpamAssasin)
- jailshell
- webdisk
- varnish
- django
- passenger
Security
- csf
- clamav
- cxs
- ImunifyAV
- ImunifyAV+
- Imunify360
Find below the list of softnames of all available apps here:
https://api.webuzo.com/apps.php?in=json
Utilize the softname values from above mentioned list.
Hence, the installation will start immediately. If your network is running slow then you might experience that the installation has stopped.
In such cases, it’s suggested to continue with the process, once the installation is completed then you’ll see the notification:
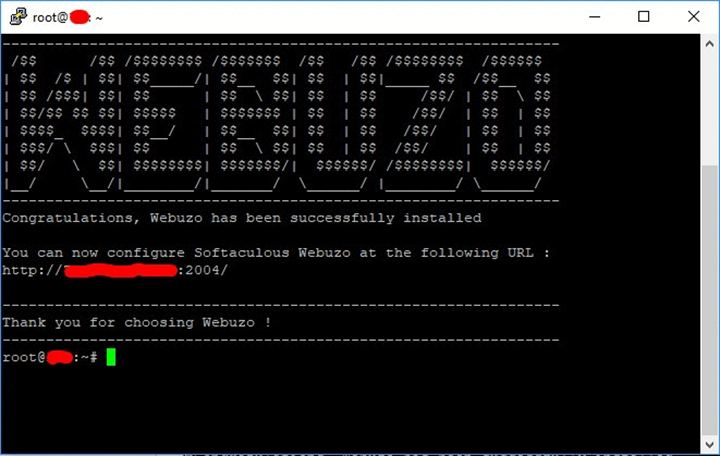
The required Web Server and other important configurations are set up.
Note: A log file of the installation process will be created – /root/webuzo-install.log
Login to The Admin Panel
To login to the Webuzo Admin Panel, use this Url:
OR
You have to use the root credentials details of your server for username and password.
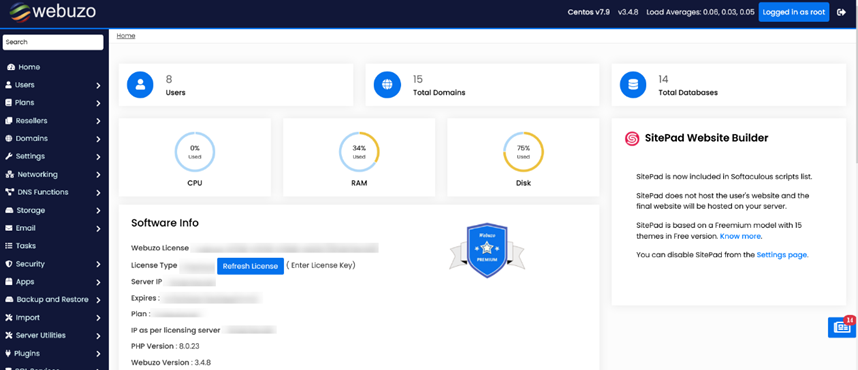
Panel Configuration
After installing we suggest checking the panel configuration. It is located at the Admin Panel > Settings > Panel Config.
Please monitor the options there and correct anything as per your requirement on the server.
Server IP, Hostname, and Nameservers
Please enter the valid IP of the server and a hostname so that any user can’t use the same.
You need to point your nameserver to the server’s IP where you want to install Webuzo. Webuzo will ask you to enter a Primary Nameserver to the server’s IP where you want to install Webuzo. It will also ask you for a primary Nameserver (e.g. ns1 example.com and a secondary Nameserver (ns2.example.com).
Create A User
Once the panel is configured then you’ve to create endusers / shared hosting users. You have to click on Users >> Add users on the admin panel. Over there, you’ve to enter the user’s domain, username, password and email. After that, you’ve to select the hosting plan if you have created any or manually assign the resources to the user. You can also automate the process and link WHMCS, Blesta, etc.
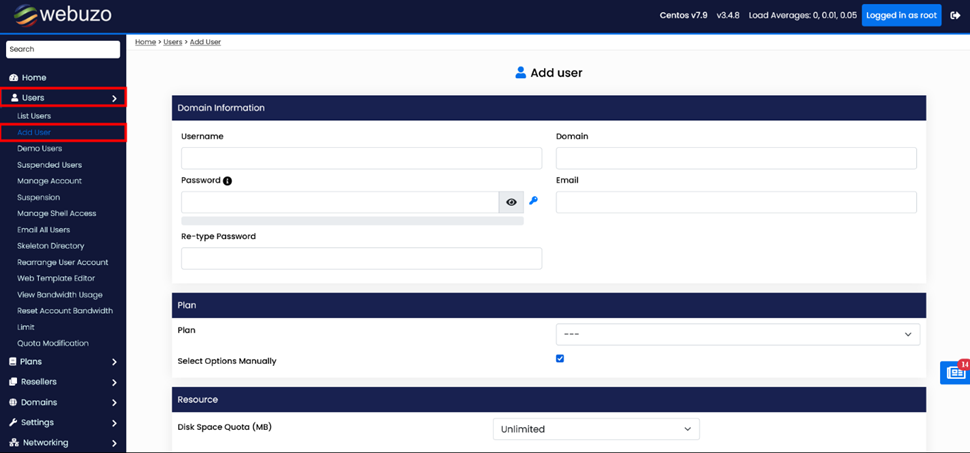
Add User Wizard
It also allows to creation of resellers who then can create their sub-users.
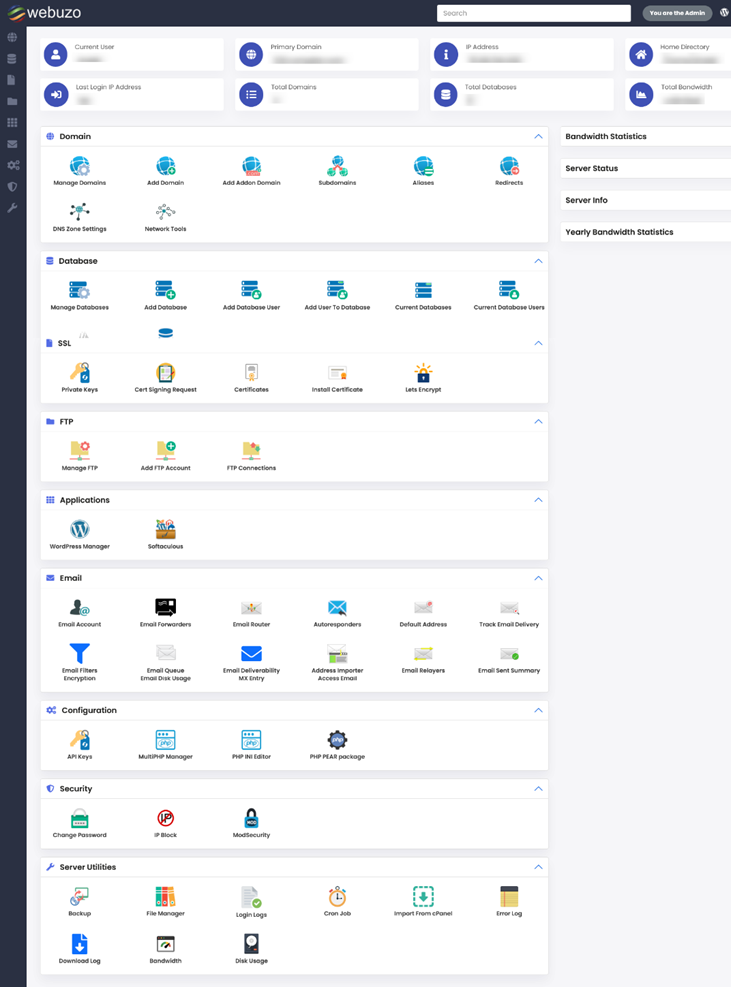
Access the Enduser Panel
The Webuzo Enduser Panel is located at ports 2002 and 2003:
Or
Users can log in from the Admin Panel, visit the UZsers >> Lists Users Wizard, and click on the icon in the Login column.
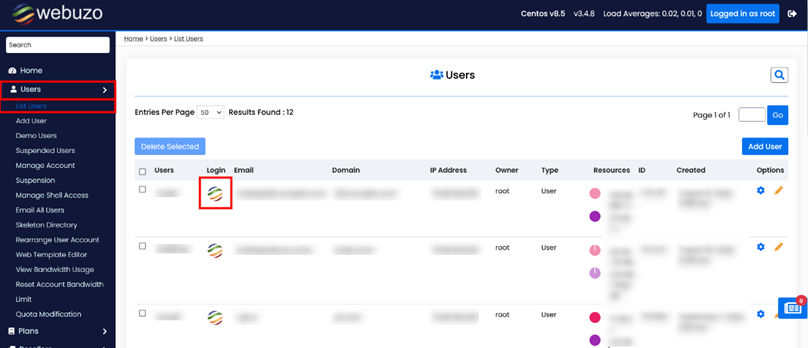
Enduser Panel Screenshot
The post How to Install Webuzo V3 first appeared on Web Hosting Stuff.
]]>