The post How to transfer website from cPanel server to CWP (CentOS Web Panel server)? first appeared on Web Hosting Stuff.
]]> First Install CWP on your VPS or Dedicated server : Installation Process
Configuration of CentosWebPanel
– Setup nameservers (CWP *- > DNS Functions -*> Edit Nameservers IPs)
– Setup shared ip (CWP –> WebPanel Settings – -> WebPanel Settings)
– Setup at least one hosting package (CWP –> Accounts –> Add a Package)
– Setup root email (CWP –> WebPanel Settings – -> WebPanel Settings)
How to Setup NameServers?
You can setup your own nameserver but then you need to have at least two IPs or you can use FreeDNS:
You can use one of the Free DNS server providers like:
http://freedns.centos-webpanel.com/
http://freedns.afraid.org/
When you register on Free DNS providers site there you will get Nameservers that you can use for yours domains.
Nameservers you need to add in: CWP – > DNS Functions -> Edit Nameservers IPs
* This nameservers you enter here will be used in all configs and account setups
If you are using FreeDNS service than you will need to point yours domain to nameservers that you get on FreeDNS website.
On FreeDNS Website you need to point domain to your server IP address.
This changes will need up to 24 hours to be visible for you.
Create New Account
– Accounts –> New Account
– SQL Services –> MySQL Manager (New Database & User)
Download Data from cPanel server
– Download all files from yours cPanel servers /home/username/public_html folder
– Download MySQL Database with phpMyAdmin from cPanel server
Upload Data to CWP server and import MySQL database
– with FTP or SSH uplaod all files to your CWP server in /home/username/public_html folder you created before with new account
– with phpMyAdmin on CWP import database you downloaded (with logins details of mysql user)
* You can zip .sql file and import it much faster
Edit yours config files that connects to MySQL database on CWP
eg. for wordpress /home/public_html/wp-config.php (check: host, username, database and password)
and that is it, test your website.
If you use mod rewrite and .htaccess for your website than you will need to add this in your vhost file (change USERNAME)
/etc/httpd/conf/httpd_webpanel_vhosts.conf
<Directory "/home/USERNAME/public_html">
AllowOverride All
</Directory>
add this config beffore </VirtualHost> for your domain
The post How to transfer website from cPanel server to CWP (CentOS Web Panel server)? first appeared on Web Hosting Stuff.
]]>The post How to install CentOS Web Panel on Dedicated & VPS Server. first appeared on Web Hosting Stuff.
]]>
CentOS Web Panel – Free Web Hosting control panel is designed for quick and easy management of (Dedicated & VPS) servers without of need to use ssh console for every little thing. There is lot’s of options and features for server management in this control panel.
CWP is really considered feature-rich. Some of notable features including:
– Apache Web Server (Mod Security + OWASP rules optional)
– PHP 5.4 (suPHP, SuExec + PHP version switcher)
– MySQL + phpMyAdmin
– Postfix + Dovecot + roundcube webmail (Antivirus, Spamassassin optional)
– CSF Firewall
– File System Lock (no more website hacking, all your files are locked from changes)
– Backups (optional)
– AutoFixer for server configuration
– Varnish Cache server (improve your server performances by 3x)
– Compiles Apache from source (improves up to 15% on performances)
– Apache reCompiler + Additional modules install with one click
– Apache server status, configuration
– Edit apache vhosts, vhosts templates, include configuration
– Rebuild all apache Virtual hosts with one click
– suPHP & suExec (improved security)
– Mod Security + OWASP rules (one click install, easy management)
– Tomcat 8 server management & install in one click
– DoS protection from the Slow-Loris attacks
– Compiles PHP from source (improves up to 20% on performances)
– PHP switcher (switch between PHP versions like: 5.2, 5.3, 5.4, 5.5)
– Simple php editor
– PHP addons with one click
– PHP.ini editor & PHP info & List modules
– php.ini per user account (you can add changes in /home/USER/php.ini)
– postfix & dovecot
– MailBoxes, Alias
– Roundcube webmail
– Postfix Mail queue
– rDNS Checker Module (check you rDNS records)
– AntiSPAM (Spamhaus cronjob)
– Re-Build Postfix/Dovecot Mail server with (AntiVirus, AntiSpam Protection)
– Email Auto Responder
– MySQL Database Managment
– Add local or remote access user
– Live Monitor MySQL process list
Requirements
A server / VPS running CentOS 6 (at the time of writing it still does not support CentOS 7). Clean minimal install is recommended. Need recommendation? try Hostripples or Hostdens.
Basic knowledge about most common Unix command to manage a Linux VPS.
Any favorite SSH client like Putty or simply Terminal if you’re using Linux or Mac.
Make sure your VPS is running CentOS 6 with no LAMP component installed (Apache, MySQL, PHP)
How to Install CWP
Follow steps below to setup CentOS Web Panel on your VPS:
Step 1 – Login to your server as root

Step 2 – Go to /usr/local/src directory and download CWP installer package
cd/usr/local/srcwget http://centos-webpanel.com/cwp-latest

Step 3 – Start Installation using below command in screen :
screen-i
sh cwp-latest
If screen is not install then you can install it using
yum install screen
Just wait for some time till get get install .
The CWP will take some times for installation as several software will be compiled from source for improved performance, security and flexibility.Once its completed you can see below screen :

Make sure you copy all the details mention on the scree.
Step 4 – Now hit Enter and your server should reboot automatically. Next time you login to your server via SSH, you will now see CWP welcome message.
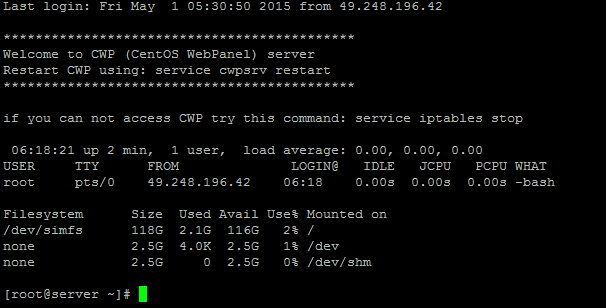
Step 5 – Open up your web browser (Firefox, Chrome,Safari,Opera etc) and open your newly installed CWP admin GUI at one of these URLs:
http://your-ip-address:2030 or https://your-ip-address:2031

CWP uses the same login details you used to SSH your server .
CentOS Web Panel GUI: Dashboard.
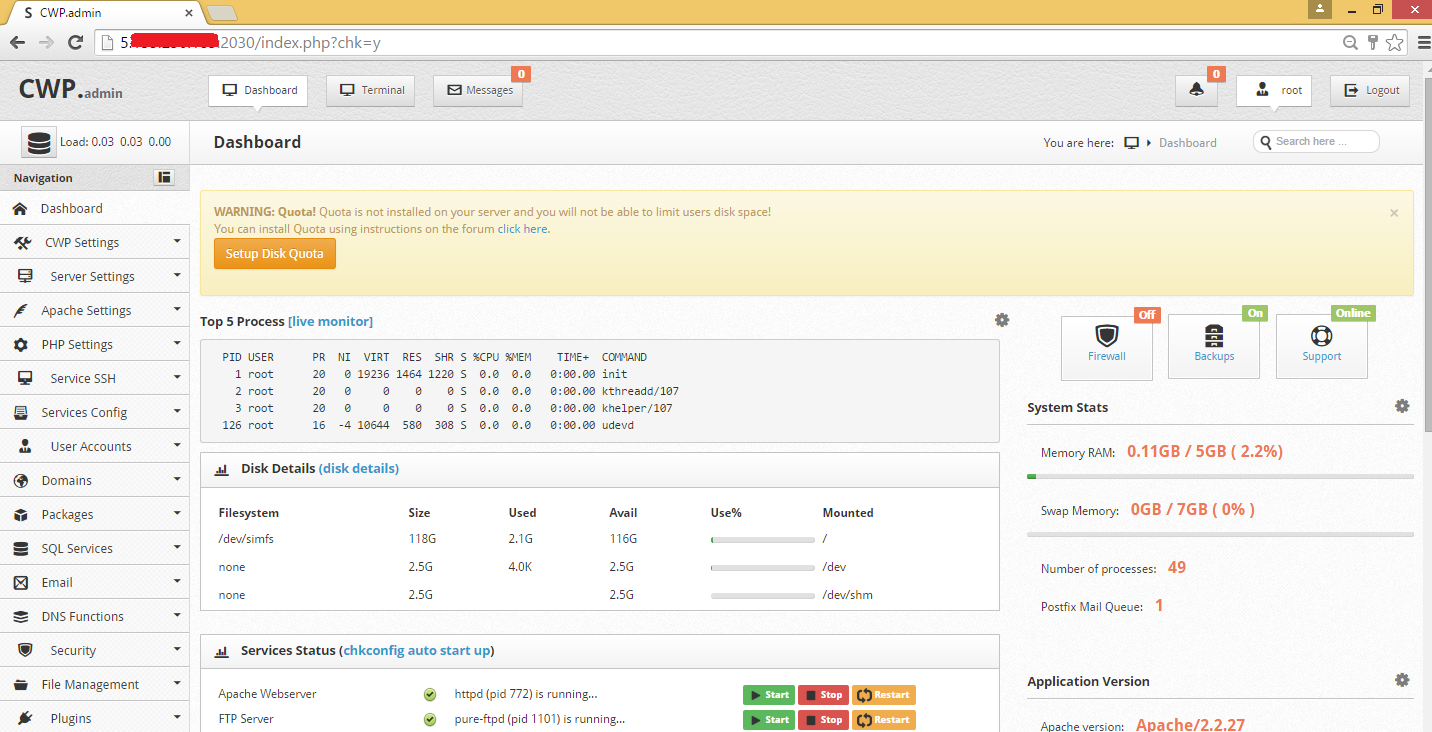
The post How to install CentOS Web Panel on Dedicated & VPS Server. first appeared on Web Hosting Stuff.
]]>