The post Basic Configuration for CentOS Web Panel (CWP) first appeared on Web Hosting Stuff.
]]>
Make sure you have install CWP on your server and login to CWP dashboard as root or a user with root privilege via
http://your-ip:2030
1. Setup Nameservers
A nameserver is a computer that is permanently connected to the Internet and translates domain names into IP addresses (or vice versa), enabling you to enter www.ashishkale.in instead of 198.27.103.128. When registering a domain name, you will need (at least) two nameservers configured to handle requests for the domain name in question. You will need to register your private nameserver at your domain registrar panel.
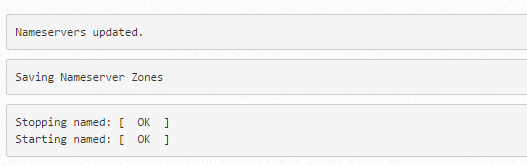
In CentOS Web Panel (CWP) you can define your default NS by going to DNS Functions >> Edit Nameservers IPs. Enter your desired Nameservers and put your server’s IP next to each followed by clicking Save Changes button.
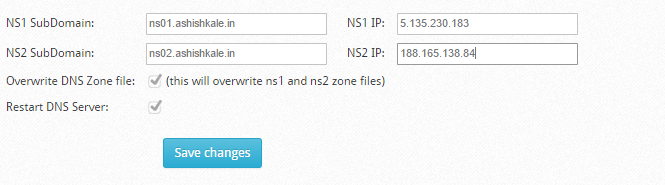
Click on Save Changes .
2. Setup Shared IP for websites
Go to CWP Settings then Edit Settings.
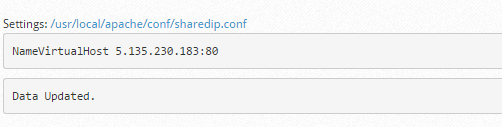
Enter your current server IP or free unused IP. Leave Apache port to 80 by default if Varnish is not yest activated. Do not forget to enter your valid email address in the Root Email field.

Click on Save Changes .
3. Setup A Hosting Package
Go to Packages and Add a Package. Next, give that package a name and define several limitations followed by clicking the Create button.:
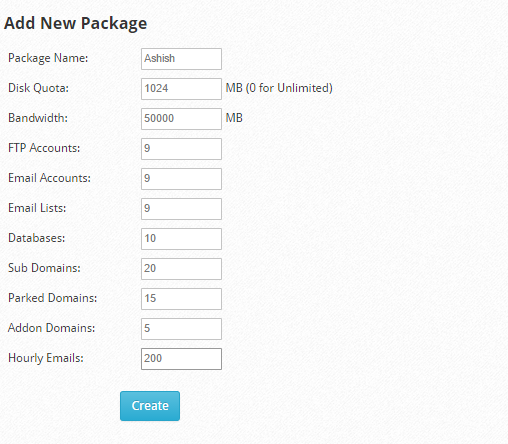
Once done, you’ll just see a message saying Data Updated!
You can verify the Package from List Package :

4. Create a User Account
Go to User Accounts menu then click New Account. Fill up all the information needed .
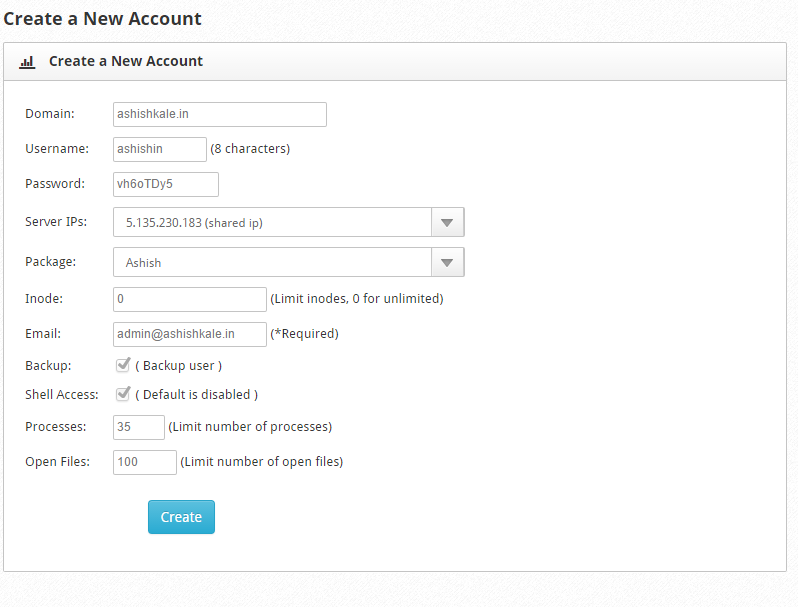
Click on Create .

You can verify the Account creation for Lists Accounts :

5. Install Softaculous :
Go to Script Installer > Script Manager > then click the Install Softaculous button.

Click on Install Softaculous .
You’ll then see this message:

Once the Installation is complated you can see an option of Softaculous listed in Script Manager :
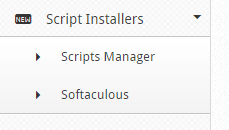
That’s all. If you have any suggestion? Do not hesitate to comment.
The post Basic Configuration for CentOS Web Panel (CWP) first appeared on Web Hosting Stuff.
]]>The post How to install Gibbon on a CentOS VPS ? first appeared on Web Hosting Stuff.
]]>
Gibbon is an open source, free and highly flexible education management system. It helps teachers and students to address and solve daily problems. This tool alone caters the needs for all four pillars of educational system (administration, teachers, parents, and students). It provides refreshing and intuitive web interface to teachers, and students where they can engage in their activities and tasks, Parents use this tool to track the progress, upcoming deadlines and activities of their children. The administration department of the educational institutes can use this tool to complete their administrative responsibilities.Gibbon is a flexible application with many features, such as planner, external assessment, online application forms, messenger etc.
Gibbon Installation requires following thing install on your VPS server :
- Apache 2
- PHP 5 (with PDO, gettext, CURL. Turn dispaly_errors off!)
- MySQL 5 (collation set to utf8_general_ci)
Download the latest stable version of Gibbon at https://gibbonedu.org/download to the ‘/opt’ directory on the server. Then, extract it and move the Gibbon core files and directories to the ‘/var/www/html/gibbon’ directory on your server. If you would like to run the very latest version of Gibbon, you can get it from the GitHub repo at https://github.com/GibbonEdu/core
cd /opt/
wget https://github.com/GibbonEdu/core/archive/v9.1.00.zip
unzip v9.1.00.zip
mv core-9.1.00 /var/www/html/gibbon
You will need to change the ownership of the ‘/var/www/html/gibbon’ directory to Apache.
chown apache:apache -R /var/www/html/gibbon
Create a new MySQL database for Gibbon on your server:
mysql -u root -p
mysql> CREATE DATABASE gibbondb;
mysql> GRANT ALL PRIVILEGES ON gibbondb.* TO 'gibbon'@'localhost' IDENTIFIED BY 'your-password' WITH GRANT OPTION;
mysql> FLUSH PRIVILEGES;
mysql> exit
Find php configuration file (php.ini) using below command :
#php -i | grep php.ini
Configuration File (php.ini) Path => /etc
Loaded Configuration File => /etc/php.ini
Now edit the php.ini file using any editor and add the following lines in it:
file_uploads = On
allow_url_fopen = On
register_globals = off
magic_quotes_gpc = Off
set max_input_vars = 5000
dispaly_errors = Off
error_reporting = E_ALL & ~E_NOTICE
Now create an new virtual host directive in Apache :
vi /etc/httpd/conf/httpd.conf
Add following lines :
<VirtualHost *:80>
   ServerAdmin admin@ashishkale.in
   DocumentRoot /var/www/html/gibbon/
   ServerName ashishkale.in
   ServerAlias www.ashishkale.in
   <Directory /var/www/html/gibbon/>
      Options FollowSymLinks
      AllowOverride All
   </Directory>
   ErrorLog /var/log/apache2/ashishkale.in-error_log
   CustomLog /var/log/apache2/ashishkale.in-access_log common
</VirtualHost>
Do not forget to change ‘ashishkale.in’ with your domain name .
Restart the Apache web server
service apache2 restart
Open http://your-domain.com in your favorite web browser and follow the easy instructions: enter the system language, database information, create a new administrator account, enter server settings, organisation settings and click ‘submit’ once you have filled out all of the fields.
That is it. The Gibbon installation is now complete.
The post How to install Gibbon on a CentOS VPS ? first appeared on Web Hosting Stuff.
]]>