The post How to Solve Application Error in Windows vzpp first appeared on Web Hosting Stuff.
]]>“Application Error
The server encountered an internal error or misconfiguration.”

Solution :
This is usually caused by VPS hitting its memory parameters , the QOS alerts can be checked from vzmc/pmc to confirm this.
A temporary solution would be restart the the vps to release the memory resource. You want to fix it permanent solution make sure to check how frequent the QOS parameters are hitting their limit and what is causing this high usage and resolve that accordingly.
After restarting virtual private servers , make sure to check it in new browser window about the Plesk login information.
The post How to Solve Application Error in Windows vzpp first appeared on Web Hosting Stuff.
]]>The post “ffmpeg: error while loading shared libraries: libavdevice.so.52:” first appeared on Web Hosting Stuff.
]]>After installing FFMPEG on one of my client server, the above error apears whenrunning ffmpeg for the first time.
Error :
“ffmpegffmpeg: error while loading shared libraries: libavdevice.so.52: cannot open shared object file: No such file or directory”

Solution :
It is very simple step to solve your error.
Change your library path by running following command :
root@hostripples[~]# export LD_LIBRARY_PATH=/usr/local/lib/
.
.
.
.
Its done!
The post “ffmpeg: error while loading shared libraries: libavdevice.so.52:” first appeared on Web Hosting Stuff.
]]>The post Error : Fix the WHM CSF Security Test first appeared on Web Hosting Stuff.
]]>
As a part of ensuring security, Hostripples perform a CSF security scan from WHM. We may get the following error after the scan.
“Check csf LF_SCRIPT_ALERT option WARNING This option will notify you when a large amount of email is sent from a particular script on the server, helping track down spam scripts”
To fix this error :
1) SSH into the
href=”https://hostripples.com/dedicated-servers/ssh-server-hosting”>server
.
2) Edit the csf configuration file by using following command:
vi /etc/csf/csf.conf
3) Search for LF_SCRIPT_ALERT = “0″
4) Change the value from “0″ to “1″ to fix the issue.
5) Restart the CSF.
You may also get the following error :
“Check exim for extended logging (log_selector) WARNING You should enable extended exim logging to enable easier tracking potential outgoing spam issues. Add:log_selector = +arguments +subject +received_recipients”
FIX:
1) Edit the exim configuration file by using following command :
/etc/exim.conf
2) Change the value from “log_selector = +all” to the following :
log_selector = +arguments +subject +received_recipients
3) Save changes.
4) Restart the CSF.
.
.
.
.
This should resolve the error
The post Error : Fix the WHM CSF Security Test first appeared on Web Hosting Stuff.
]]>The post Unable to establish a PHP session – PHPMyAdmin error first appeared on Web Hosting Stuff.
]]>
PHPMyAdmin error :
Do you ever come across the following error when you access PHPMyAdmin from cPanel.
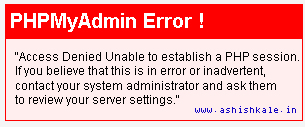
“Access Denied Unable to establish a PHP session. If you believe that this is in error or inadvertent, contact your system administrator and ask them to review your server settings.”
Normally, you will get this error when the permission or ownership of the tmp folder for this user is wrong. That is, make sure the ownership of /home/$username/tmp folder has ownership set to $user and permission as 755. If it is not, you will face the same problem.
Solution :
Step 1 : Login to the server via SSH as root.
Step 2 : Check the permission and ownership of /home/$user/tmp folder.
Step 3 : Set ownership as $user by using following command
# chown $user. /home/$user/tmp
Step 4 : Set permission of the tmp folder to 755 by using following command
#chmod 755 /home/$user/tmp
.
.
.
.
.
.
.
.
That’s it!!!
$user can be replaced with your respective username.
The post Unable to establish a PHP session – PHPMyAdmin error first appeared on Web Hosting Stuff.
]]>The post How to fix ftp connection time out error! first appeared on Web Hosting Stuff.
]]>Common errors when using FTP
When testing an FTP connection you may received of the following errors:
1) Socket Error # 11001, Host not found
2) Socket Error # 11004, Unable to connect
3) Socket Error # 10061, Connection refused
4) Socket Error # 10093
5) Socket Error # 10038
6) Socket Error # 10039
7) Socket Error # 10052
8) Unable to connect: Connection time out
9) Unable to connect. Not logged in
10) Unable to connect. Error connecting with SSL
11) Scan failed (-1): Read Timeout

How to resolve the error?
If you receive an “FTP connection timed out error while trying to access your account”, there are several reasons for that. Please, take a look at the Script :
!connection failed xx.xx.xxx.xxx – connection timed out
!connectio:error 0
PORT xxx,xxx,x,x,x,xxx
500 Illegal PORT command
!Failed “port”
!Retrieve of folder listing failed (0)
Solution:
1 : Login to the WHM==> FTP Server Selection
2 : Change the FTP server to Pure-FTPD ==> Save
3 : Now ssh into the server as root
4 : Open the pure-ftp conf file /etc/pure-ftpd.conf
5 : Find the FTP port no: used
6 : And find the “PassivePortRange”
7 : Add the port range
for eg :
[bash][/bash]PassivePortRange 30000 40000[bash][/bash]
8 : Save and Quit
9 : Go to csf(firewall) config file
10 : Add the ftp port along with the passive port range
eg :
[bash][/bash]# Allow incoming TCP ports TCP_IN = “20,22,25,53,80,110,143,443,465,587,993,995,2001,2077,2078,2082,2083,2086,2087, 2095,2096,30000:40000″[bash][/bash]
11 : Restart csf & Pure-ftpd
The post How to fix ftp connection time out error! first appeared on Web Hosting Stuff.
]]>The post Linux Mint : Error : “Greeter Application Crashes” first appeared on Web Hosting Stuff.
]]>
Error :
In Mint 15 Cinnamon, on systems with nVidia chipsets, the login screen fails to “Enable accessible login” under the “Accessibility” tab, Big mistake, on the next reboot I got the following error :
” The greeter application appears to be crashing. Attempting to use a different one ”.
I was not able to login into Linux as the greeter kept crashing repeatedly.
Solution:
The nVidia driver must be upgraded, by adding the xorg-edgers ppa, and installing an updated MDM and themes. Follow the instructions below and solved your error
Step 1. Install the updated nVidia drivers from the edgers ppa :
Use the following commands
sudo apt-add-repository ppa:xorg-edgers/ppa
sudo apt-get update && sudo apt-get dist-upgrade
Step 2. Add the updated MDM and themes:
Use the following commands
sudo add-apt-repository ppa:nilarimogard/webupd8
sudo apt-get update
sudo apt-get install mdm ubuntu-mdm-themes
Step 3. Reboot the system and
.
.
.
The problem should be completely resolved.
The post Linux Mint : Error : “Greeter Application Crashes” first appeared on Web Hosting Stuff.
]]>