The post How to install R1soft cdp agent on the Linux server first appeared on Web Hosting Stuff.
]]>R1Soft is an affordable, easy-to-use, high performance backup, restore, and disaster recovery software. Its a software application which is used to backup the data in a client (R1Soft agent) which is assigned to R1Soft server based upon the configurations which we define. R1soft can also be used to restore files and databases. You can install the Latest R1soft cdp agent on Linux server by using following steps.

Step No. 1 : Create the yum repository for the r1soft by using the following command
/etc/yum.repos.d/r1soft.repo
[r1soft]
name=R1Soft Repository Server
baseurl=http://repo.r1soft.com/yum/stable/\$basearch/
enabled=1
gpgcheck=0
Step No. 2 : Install the cdp agent by using following command line
yum install r1soft-cdp-enterprise-agent
Step No. 3 : Then, install the header kernels by using following command line
yum install kernel-devel
Step No. 4 : Obtain the kernel module from R1Soft by using following command line
r1soft-setup –get-module
Step No. 5 : To Setup the authentication key for the Agent on client server
serverbackup-setup –get-key http://cdpserverip
Kernel module is now installed.
Now, Use the following command line and load the new driver.
/etc/init.d/cdp-agent restart
That’s it!
The post How to install R1soft cdp agent on the Linux server first appeared on Web Hosting Stuff.
]]>The post How to Uploading Files using Unzip in Linux first appeared on Web Hosting Stuff.
]]>When you want to upload large number of files in your web server, you can easy to uploading large number of files by using unzip in Linux. Please follow the steps and quickly upload the necessary files in your linux os.

Step 1 : To Upload the zipped file to your SSH server.
Step 2 : To Unzip the zipped file to the destination folder.
Step 3 : To test the zipped file by using following command.
unzip -t zip_file_name

Step 4 : To extract the zipped file, use the following command.
unzip zip_file_name -d destination_folder

Note: Don’t forget to use the -d parameter as otherwise you will have nasty errors. Be careful with permissions as well.
That’s it !
The post How to Uploading Files using Unzip in Linux first appeared on Web Hosting Stuff.
]]>The post How to install PEAR for PHP in Linux first appeared on Web Hosting Stuff.
]]>

PEAR is a structured library of open-source code for users of PHP. When pear is not installed in your server, then install it. You can easily install PEAR for php in Linux.
In this article we will give you how to install PEAR for php in Linux. Follow the steps for Installing PEAR.
Step 1 : Download the installation php file.
Step 2 : Rename to php file by using following command.
cp go-pear go-pear.php
Step 3 : Run the php script.
Then, Windows Command Prompt to start the installation.
Step 4 : You can install php various extensions by using following command.
pear install package
After installing PEAR, you can install modules by going to the PEAR admin at example :-
hostripples.com/pearadmin, where hostripples.com is your domain name.
The post How to install PEAR for PHP in Linux first appeared on Web Hosting Stuff.
]]>The post How to disable core dumps on Linux Servers first appeared on Web Hosting Stuff.
]]>Core dump is a memory or a storage dump which records the memory state of a computer program when it was terminated by the operating system due to various error behavior. In this article Hostripples will give you how to disable core dumps on Linux Servers.

Please follow the steps to disable core dumps for all users :
Step 1 : Edit /etc/security/limits.conf and use the following command.
vi /etc/security/limits.conf
Step 2: Make sure the following config directive exists by using following command.
hard core 0
Step 3 : Disable core dumps for setuid programs by using following command.
echo ‘fs.suid_dumpable = 0’ >> /etc/sysctl.conf
sysctl -p
Step 4 : Now, Set a soft limit to stop core dumps being created by using following command.
echo ‘ulimit -S -c 0 > /dev/null 2>&1’ >> /etc/profile
That’s it!
The post How to disable core dumps on Linux Servers first appeared on Web Hosting Stuff.
]]>The post How to install Zend Optimizer in Cpanel Linux Server first appeared on Web Hosting Stuff.
]]>
Introduction :
Zend Server is the most complete PHP distribution with a continuously updated set of advanced value-add features designed to optimize productivity, performance, scalability and reliability. It is a free PHP extension to enable the web server to execute files encoded by Zend Guard/Encoder so it’s executed the same as any regular PHP files. Zend Encoder also is useful for encoding PHP files to protect source code. Zend Server supports any and all PHP code and provides deep insights into that code including the most popular PHP applications and frameworks like WordPress, Magento, Drupal, Zend Framework, Symfony, and Laravel. Any code you have in PHP will run on Zend Server. You will need to install Zend Optimizer in your server running Linux.
Installing zend in cPanel Linux Server follow this Steps:
Step 1 : Log in to your server via SSH with root user.
Step 2 : Run the following command.
/scripts/installzendopt
Step 3 : Follow the instructions on the screen to install Zend Optimizer.
Step 4 : Then, Restart the apache.
service httpd restart
Step 5 : To check whether zend optimizer is running and vserion.
php -v
It would show ioncube or zend optimizer version.
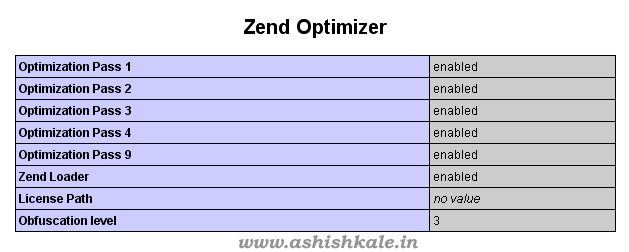
OR
Follow the on-screen instructions.
When you want to install Zend Optimizer on a Non-cPanel server please follow the steps:
Step 1 : Download Zend Optimizer.
http://www.zend.com/en/products/guard/optimizer/
Step 2 : Upload the .tar.gz into your web server.
/home/temp
Step 3 : Extract the archive by using the following command.
tar -zxvf filename_here.tar.gz
Step 4 : Now a new directory should appear.
Step 5 : Execute the following command.
./install.sh
Step 6 : Follow the instructions on-screen.
Step 7 : Restart HTTPD (Apache) by using following command.
service httpd restart
That it !
The post How to install Zend Optimizer in Cpanel Linux Server first appeared on Web Hosting Stuff.
]]>The post How to Install Softaculous in Plesk Linux first appeared on Web Hosting Stuff.
]]>
It’s similar process as both for DirectAdmin and cPanel, the installation process for Plesk is similar. The following article will show you
How to install Softaculous on Plesk Linux
Step 1 : Before starting the installation make sure ionCube Loaders are enabled.
Step 2 : Login to your Plesk server as root via SSH.
Step 3 : Enter the following commands:
cd /usr/local &&
wget -N http://www.softaculous.com/pl/install_softaculous.php &&
chmod 755 install_softaculous.php &&
/usr/bin/php -d open_basedir=/ -d safe_mode=0 -d disable_functions=”” /usr/local/install_softaculous.php
The installation of Softaculous is completed
You will see following Screen
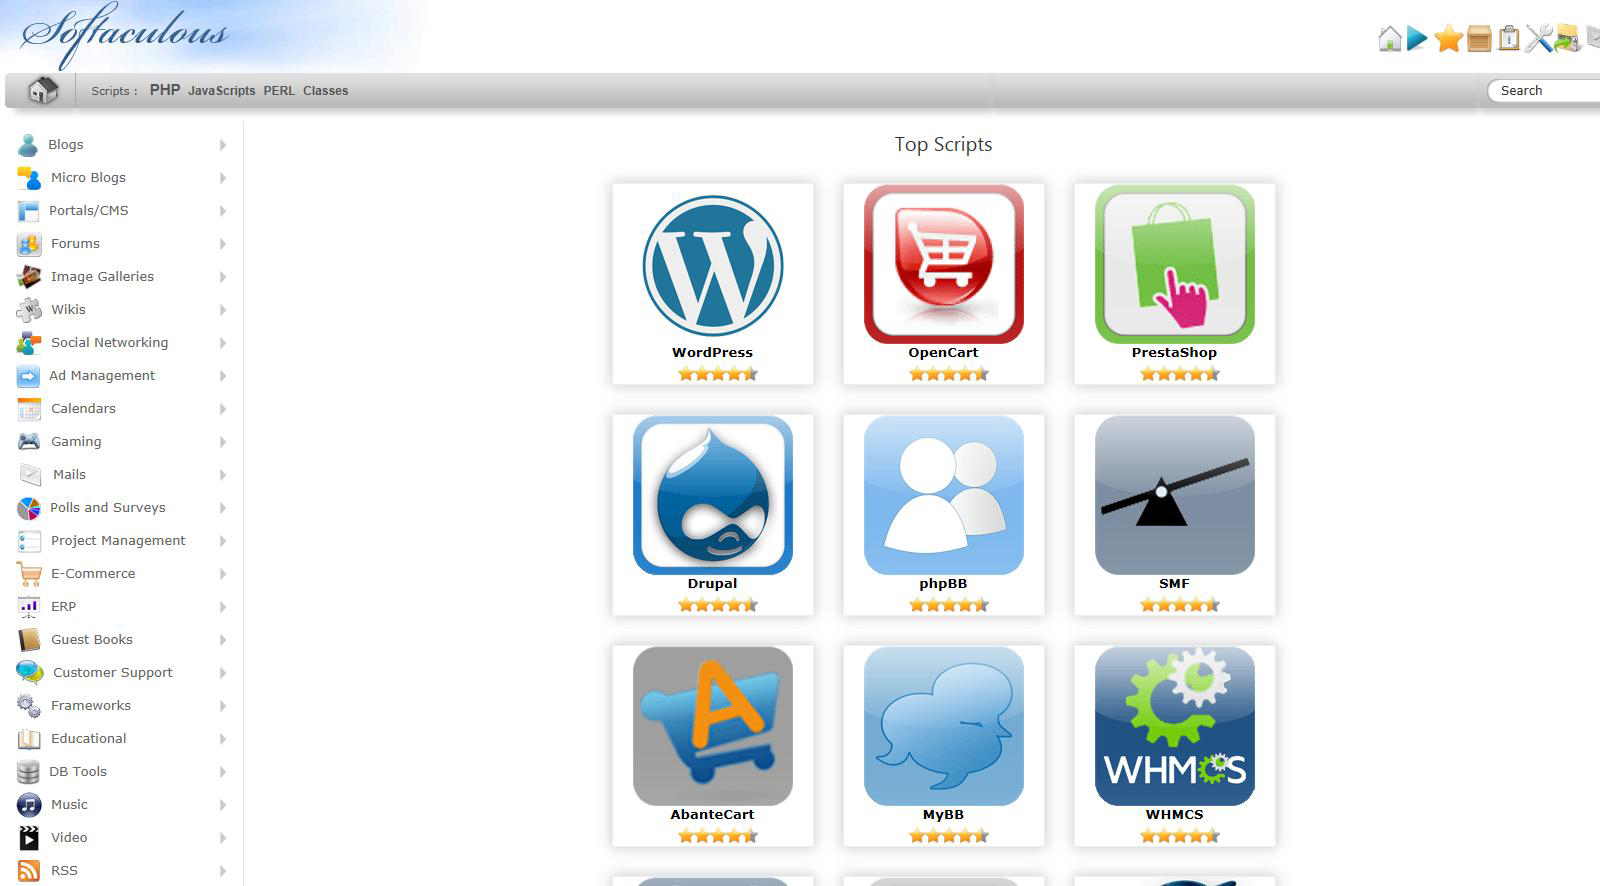
If you wish to finish the installation quickly then,
Download the script packages in the background by using the following method.
wget -N http://files.softaculous.com/install.sh
chmod 755 install.sh
./install.sh –quick

Upon completion,
Step 1 : Login to your Plesk server as the administrator.
Step 2 : you’ll notice a new text link appear, clearly labeled as: Softaculous Auto Installer.
The post How to Install Softaculous in Plesk Linux first appeared on Web Hosting Stuff.
]]>The post Change Linux Root Password Temporarily first appeared on Web Hosting Stuff.
]]>If you are logged in as root and you don’t know the root password then you can follow the steps. You can easy to change your root password.
Step 1. Back-up your current shadow file.
[root@hostripples ~]# cp /etc/shadow /etc/shadowbkup
Step 2. Change the current root password
[root@hostripples ~]# passwd root
Changing password for user root.
New UNIX password:
BAD PASSWORD: it is based on a dictionary word
Retype new UNIX password:
passwd: all authentication tokens updated successfully.
Step 3. Switch to a local user to test whether ‘your’ root password is working or not.
[root@hostripples ~]# su – localuser
[localuser@hostripples ~]$ su – root
Password:
[root@hostripples ~]#
Yes, you are now logged in as root with ‘your’ password.
Step 4. Restore the previous root password
[root@hostripples ~]# mv /etc/shadowbkup /etc/shadow
mv: overwrite `/etc/shadow’? y
[root@hostripples ~]#
.
.
.
.
This trick is meant for students and kindly do not misuse.
The post Change Linux Root Password Temporarily first appeared on Web Hosting Stuff.
]]>The post Linux Mint : Error : “Greeter Application Crashes” first appeared on Web Hosting Stuff.
]]>
Error :
In Mint 15 Cinnamon, on systems with nVidia chipsets, the login screen fails to “Enable accessible login” under the “Accessibility” tab, Big mistake, on the next reboot I got the following error :
” The greeter application appears to be crashing. Attempting to use a different one ”.
I was not able to login into Linux as the greeter kept crashing repeatedly.
Solution:
The nVidia driver must be upgraded, by adding the xorg-edgers ppa, and installing an updated MDM and themes. Follow the instructions below and solved your error
Step 1. Install the updated nVidia drivers from the edgers ppa :
Use the following commands
sudo apt-add-repository ppa:xorg-edgers/ppa
sudo apt-get update && sudo apt-get dist-upgrade
Step 2. Add the updated MDM and themes:
Use the following commands
sudo add-apt-repository ppa:nilarimogard/webupd8
sudo apt-get update
sudo apt-get install mdm ubuntu-mdm-themes
Step 3. Reboot the system and
.
.
.
The problem should be completely resolved.
The post Linux Mint : Error : “Greeter Application Crashes” first appeared on Web Hosting Stuff.
]]>The post How to Disable Clamav and Amavis for Postfix first appeared on Web Hosting Stuff.
]]>
If you want to run postfix but not run the antivirus (Clam, Amavis), there is a way to disable those services while allowing postfix to run as normal.
Follow the instructions you can easily to disable Clamav and Amavis for postfix.
1) Edit the file/etc/postfix/main.cf
And use the following commands :
content_filter = amavis:[127.0.0.1]:10024
receive_override_options = no_address_mappings
2) Edit the file /etc/postfix/master.cf
And use the following commend :
amavis unix – – – – 2 smtp
-o smtp_data_done_timeout=1200
-o smtp_send_xforward_command=yes
127.0.0.1:10025 inet n – – – – smtpd
-o content_filter=
-o local_recipient_maps=
-o relay_recipient_maps=
-o smtpd_restriction_classes=
-o smtpd_client_restrictions=
-o smtpd_helo_restrictions=
-o smtpd_sender_restrictions=
-o smtpd_recipient_restrictions=permit_mynetworks,rej ect
-o mynetworks=127.0.0.0/8
-o strict_rfc821_envelopes=yes
-o receive_override_options=no_unknown_recipient_chec ks,no_header_body_checks
-o smtpd_bind_address=127.0.0.1
3) To stop the services :
/etc/init.d/amavisd stop
/etc/init.d/clamav-daemon stop
/etc/init.d/clamav-freshclam stop
/etc/init.d/clamd.amavisd stop
4) Disable the services from start-up :
chkconfig –levels 235 amavisd off
chkconfig –levels 235 clamav-daemon off
chkconfig –levels 235 clamav-freshclam off
chkconfig –levels 235 clamd.amavisd off
5) Reboot your server, and restart postfix by entering :
/etc/init.d/postfix restart
The post How to Disable Clamav and Amavis for Postfix first appeared on Web Hosting Stuff.
]]>The post Install Mytop in Linux and Cpanel first appeared on Web Hosting Stuff.
]]>
MySQL is one of the most important programs on a server, unfortunately it is also pretty resource intensive. One a server it is not uncommon for a single user or even a query to take up the bulk of the servers CPU cycles. Mytop is a very useful program to see what queries a server is currently processing as well as which user is executing them. Think of mytop as top for mysql. If you see a lot from a user that means they are probably the hog. Mytop can also be useful for figuring out exactly which queries are causing the problem in the case of a self-designed website.

The following commands use how to install mytop on the server and run it.
1) To Install Term Read Key:
cd /usr/local/src
wget http://search.cpan.org/CPAN/authors/id/J/JS/JSTOWE/TermReadKey-2.30.tar.gz
tar -zxf TermReadKey-2.30.tar.gz
cd TermRead*
perl Makefile.PL
make test
make
make install
cd ..
2) Now,To Install DBI:
wget http://search.cpan.org/CPAN/authors/id/T/TI/TIMB/DBI-1.48.tar.gz
tar -zxf DBI-1.48.tar.gz
cd DBI*
perl Makefile.PL
make test
make
make install
cd ..
3) Finally To Install MYTOP:
wget http://jeremy.zawodny.com/mysql/mytop/mytop-1.4.tar.gz
tar -zxf mytop-1.4.tar.gz
cd mytop*
perl Makefile.PL
make test
make
make install
NOTE: You may get following error in CentOS 5.3
Error in option spec: “long|!”
Search for the line in Makefile.PL
“long|!” => \$config{long_nums},
Change it to by commenting using #
#”long|!” => \$config{long_nums},
The post Install Mytop in Linux and Cpanel first appeared on Web Hosting Stuff.
]]>