How to Install Softaculous in CentOS Web Panel


Cheap reseller Hosting


How to Install Softaculous in CentOS Web Panel

Softaculous is very easy to install in CentOS Web Panel.  The following article will show you how to install Softaculous on CentOS Web Panel. 

Install-Softaculous-in-CentOS-Web-Panel

Step 1 : Login to CentOS Web Panel.

Step 2 : Go to : Script Installers > Scripts Manager

Step 3 : Click on the Install Softaculous button.

The Installation of Softaculous is completed!
CWP

* When logged in as a USER

User logs in to the CentOS Web Panel they can access Softaculous Enduser Panel under the File Management and Script Installers section.


Cheap web Hosting


How to Install Softaculous in XAMPP


Cheap reseller Hosting


Installing Softaculous in XAMPP

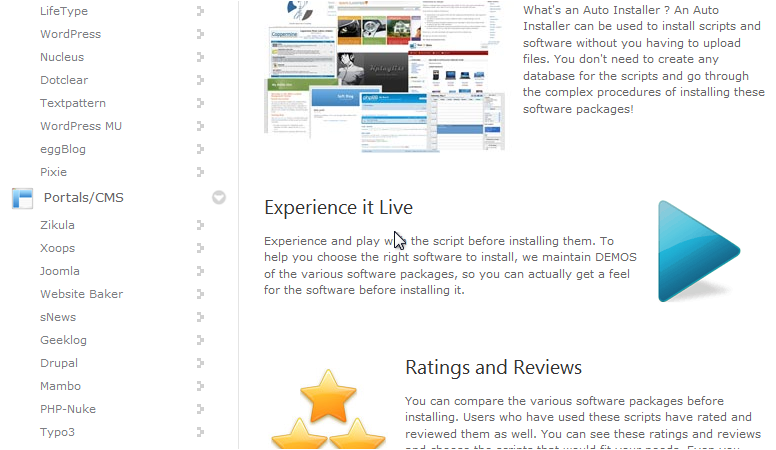
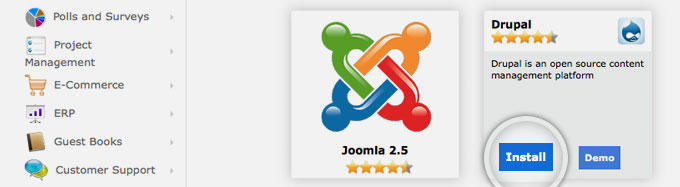
Hostripples are using Softaculous to provide one click script auto-installer. You can install almost 330+ popular CMS like WordPress, Drupal, Joomla with a single button click by using Softaculous . After install Softaculous on XAMPP server you can start developing forums, blog, e-commerce sites within minutes on your local machine. It is really easy steps to install Softaculous on XAMPP server.


Install Softaculous in XAMPP


The following article will help you on how to install Softaculous on XAMPP for Windows.

Step 1 : Download the Softaculous Package.

    • If you are using PHP version 5.2 then, Click Here and download a zip archive.
    • If you are using PHP version 5.3 and above then, Click Here and download a zip archive.

Step 2 : After downloading compressed files, Extract the package under XAMPP’s htdocs.

Step 3 : Access install file which is located inside our extracted folder. It could be http://localhost/softaculous/install.php normally.

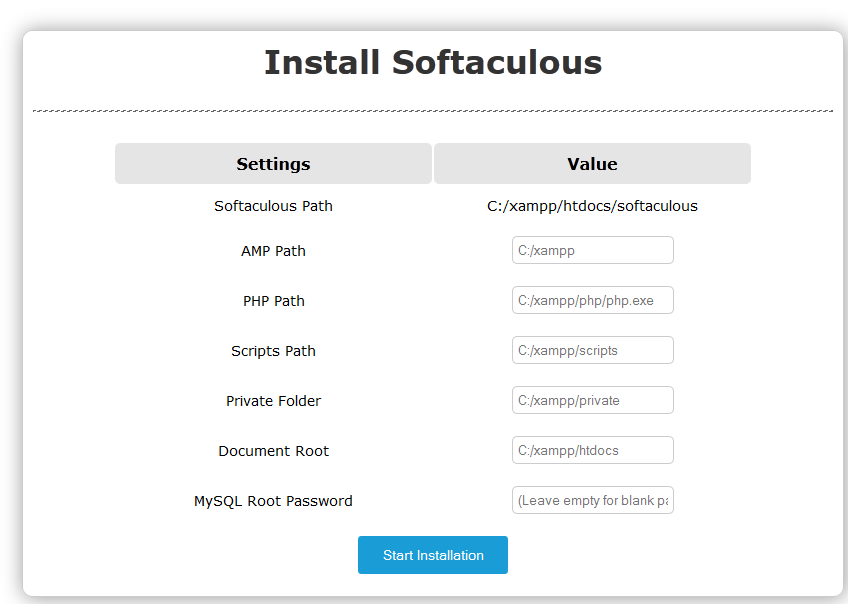
Then, You will get a form like below to fill after this step. 

Step 4 : Fill following the details: 

1.  AMP Path : Location of the XAMPP.

2. PHP Path : Path to PHP Binary e.g C:/xampp/php/php.exe

3. Scripts Path : Softaculous will download the scripts like WordPress, Drupal, Joomla, etc here.

4. Private Folder : All the installation details, backups, data directory of few scripts will be stored here. It should not be web accessible.

5. Document Root : Folder where scripts web directory will reside, generally C:/xampp/htdocs

6. MySQL Root Password : MySQL Root Password. XAMPP’s default MySQL root password is (blank)

See the following screenshot 

Install Softaculous on XAMPP

Step 4 : Please check the check which shows at last to ensure that if the required ionCube is not detected install it automatically.

Step 5 : Click on Start Installation button.

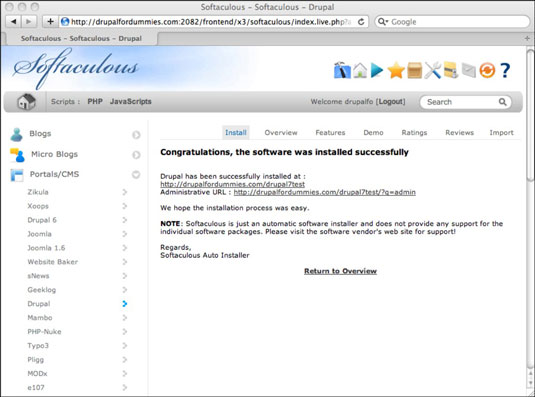
Now, you will displayed a success message with a link to access your Softaculous !

Step 6 : Click on the link which is given on the success message, you can start installing scripts now.


softaculous logo


Softaculous Updates and Cron

1) Upon installation Softaculous will make a new action on your Windows Task Scheduler.

2) This will run a cron job on every 24 hours to check if a new version is available.

This Softaculous Cron is to keep your Softaculous and Scripts updated, you can update your existing installations of WordPress, Joomla, etc scripts to latest version. This will keep all your Scripts on latest versions.


Cheap web Hosting


How to Install Softaculous in ISPConfig


Cheap reseller Hosting


To Install Softaculous in ISPConfig

Install-Softaculous-in-ISPConfig

Please follow the steps to install Softaculous in ISPConfig.

Step 1 : Before starting the installation make sure ionCube Loaders are enabled.

Note : The ionCube Loaders can be downloaded at the ionCube Downloads Page. Softaculous will not work if suHOSIN is enabled in your PHP.

Step 2 : Login to SSH to your server.

Step 3 : Enter following commands:

wget -N http://files.softaculous.com/install.sh
chmod 755 install.sh
./install.sh

Step 4 : ./install.sh should be executed as root.

Step 5 : Add sudo before ./install.sh for Ubuntu users.

The Installer will start showing the Installation Processes.


Note : Scripts will be downloaded during this process. The Download Activity will also be shown on the screen.

ispconfig

Thats it the installation of Softaculous is completed!


You can visit the Softaculous panel after logging into the ISPConfig panel.

ispconfig 1


Cheap web Hosting


How to Install Softaculous on ISPmanager


Cheap reseller Hosting


To Install Softaculous on ISPmanager

Install Softaculous on ISPmanager

Softaculous is the best solution for installing third party web-applications and scripts for cloud, virtual, or dedicated servers. ISPmanager 5 Lite is a flexible web hosting control panel with the perfect balance of functionality, usability and price. The following article will show you how to install Softaculous on ISPmanager. If you are using ISPmanager 5.33+ then Softaculous should be enabled by default on your server. Please follow the steps. 

Step 1 : Before starting the installation make sure ionCube extension is installed and SSL support is enabled for the domain.

Step 2 : Log into your ISPmanager control panel.

Step 3 : Go to the Modules in Integration section.

Step 4 : Click Install button in softaculous tab.

Step 5 : Wait for Softaculous to be installed on your server.

Step 6 : The installer will start a message will be displayed asking you to confirm that Softaculous should be configured on the server.

Step 7 : Click Ok button 

Step 8 : Wait for the installation to finish.

Softaculous is now installed on your server and ready for use!

ISp System


You can access it from the External applications and go to Softaculous section of the panel’s left side menu.

That’s it the installation of Softaculous is completed !


Cheap web Hosting


How to Install Softaculous in H-Sphere


Cheap reseller Hosting


-install-Softaculous-in-H-Sphere

H-Sphere is a Clustered Shared Hosting Management Software. Softaculous for H-Sphere is very simple to install. Please follow the steps to install Softaculous in H-Sphere.

To  Install Softaculous in H-Sphere

Step 1 : Before starting the installation make sure ionCube Loaders are enabled.

Step 2 : Login to your SSH server.

Step 3 : Execute the following commands:

wget -N http://files.softaculous.com/install.sh
chmod 755 install.sh
./install.sh


The Installer will start showing the Installation Processes.

Note : Scripts will be downloaded during this process. The Download Activity will also be shown on the screen.

Thats it the installation of Softaculous is completed on the Slave!

hsphereicon

You will have to reload / restart apache for the changes to take effect.

root> /etc/init.d/httpd reload


If you wish to finish the installation quickly then,

Download the script packages in background use the following scripts.


wget -N http://files.softaculous.com/install.sh
chmod 755 install.sh
./install.sh –quick


Cheap web Hosting


How to Install Softaculous on InterWorx


Cheap reseller Hosting


Installing Softaculous on InterWorx

Softaculous can also easily be integrated into your Interworx Server.  Softaculous is tightly integrated with Interworx. The following article will show you how to install Softaculous on Interworx.


Installing Softaculous on InterWorx


Step 1 : Before starting the installation make sure ionCube Loaders are enabled.

Step 2 : Login to your InterWorx server as root via SSH.

Step 3 : Execute the following commands:

cd /usr/local &&
wget -N http://www.softaculous.com/iwx/install_softaculous.php &&
chmod 755 install_softaculous.php &&
/home/interworx/bin/php /usr/local/install_softaculous.php

The installer will start, and provide you with an on screen updates as they come in. 

Thats it the installation of Softaculous is completed!

Interworx


Cheap web Hosting


How to Install Softaculous on Directadmin


Cheap reseller Hosting


Install-Softaculous-on-Directadmin


Softaculous is integrated into DirectAdmin and can be installed into DirectAdmin in just minutes. Softaculous takes care of the complete lifecycle of the application from install to backup to update. It’s really easy to install Softaculous on DirectAdmin. Please follow the steps to install Softaculous on Directadmin.


Installing Softaculous on Directadmin:

Step 1 . Before starting the installation make sure ionCube Loaders are enabled.

Step 2 . Login into Direct Admin with your root account via SSH.

Step 3 . Execute the following commands:


cd /usr/local/directadmin/plugins
wget -n http://www.softaculous.com/da/install_softaculous.php
chmod 755 install_softaculous.php
/usr/local/bin/php -d open_basedir=/ -d safe_mode=0 -d disable_functions=”” /usr/local/directadmin/plugins/install_softaculous.php


The Installer will start showing the Installation Processes and when done will indicate the same.

Note: Scripts will be downloaded during this process. The Download Activity will also be shown on the screen.


Thats it the installation of Softaculous is completed!


Directadmin

How to Check Installation: 

Step 1 . Login to your Directadmin server.

Step 2 . Click on Softaculous Auto Installer link.

Step 3 . Find the Softaculous icon in Software Services.

cpanelScreenshot
The following screen will appear if the Softaculous is installed successfully.


Then, 


Installing IonCube Loaders:


The Ioncube loaders will be enabled by Softaculous itself for CentOS but if you are using any other OS then please follow these three steps to enable Ioncube:

Step 1 . Download the required Ioncube file.

Step 2 . Rename the file to ioncube.so

Step 3 . Place the file in the following directory

/usr/local/directadmin/plugins/softaculous/ioncube.so


Note : If you get the error Unable to execute your request please execute the following command :

root> chmod -R 0755 /usr/local/directadmin/plugins/softaculous


Cheap web Hosting


How to Install Drupal Using Softaculous


Cheap reseller Hosting


Install Drupal Using Softaculous

Hostripples offer super-easy Drupal installation using programs is called Softaculous. Softaculous is ideal for Web Hosting companies. It is used by diverse organizations, from local businesses to global corporations.

In this artical we will show you how to install Drupal with Softaculous. Please, follow these steps:

1) Log into your Cpanel.

2) You will see a page of options for your new site.

3) Click the Softaculous icon. 

See Following Screenshot : 

Softaculous

4) On the left hand side, you will see a list of all the programs that Softaculous has the ability to manage.

5) Scroll down the list until, you find the name Drupal in the Portals/CMS section of the menu.

6) Click the Drupal link.

See Following Screenshot : 

Drupal link-Portals-CMS

7) Click the Install tab near the top of the page.

See Following Screenshot : 

Install Drupal

8) Enter a directory where you want Drupal to appear on your website in the In Directory text box.

9) Enter a Username and Password.

Note : The username and password allow you to administer and customize your site. Choose a strong password; otherwise, you risk someone hacking your site.

10) Enter your e-mail address

11) Click the Install Drupal button.

12) Click the Finish Installation button.

You will see a confirmation screen when the installation finishes, and you will be e-mailed a confirmation that your site has been installed.

See Following Screenshot : 

Drupal-Finish Installation

13) Click the link to your site.

.
.
.
.

“Drupal has been successfully installed”

See Following Screenshot : 

my Drupalscreenshot1


Cheap web Hosting


How to Install Minecraft Server on CentOS VPS


Cheap reseller Hosting


How to Install Minecraft Server on CentOS VPS


Install Minecraft_ashishkale.in copy


  • First, Installing Java-JDK by using following command: 

yum install java-1.6.0-openjdk

  • If have check Java was installed then you can use following command:

which java

  • The following command will be displayed if it was properly installed:

/usr/bin/java

  • Switch to the root directory by using following command:

cd

  • Create a Minecraft directory, using following command:

mkdir Minecraft

  • Now, Enter the directory:

cd Minecraft

  • Download Minecraft:

wget http://minecraft.net/download/minecraft_server.jar

.
.
.
.
Minecraft is now installed.


  • You’ll now need to install “screen” to keep the Minecraft server running after the SSH session is closed, you can use following command.

yum install screen

  • Use the screen and run Minecraft. Enter screen:

screen

  • Start up Minecraft

java -Xmx1024M -Xms1024M -jar minecraft_server.jar nogui


===========================================


  • To get back to the normal screen, press these keys:

Control+A+D

  • To get back to the screen where Minecraft is running:

screen -r


Cheap web Hosting


How to Install mod_cloudflare on cPanel


Cheap reseller Hosting


cloudflare

Installing mod_cloudflare on cPanel

CloudFlare is a performance and security service. The CloudFlare cPanel plugin makes it easy to integrate into your hosting control panel. The CloudFlare module automatically translates visitor IP addresses to reflect the visitor’s original IP address rather than the IP address of the CloudFlare proxy servers.

Installing mod_cloudflare on a cPanel server is very easy. Just follow 8 steps as below. 


Step 1 :

Download core file by using the following command : 

wget https://raw.githubusercontent.com/cloudflare/mod_cloudflare/master/mod_cloudflare.c


Step 2 :

Connect to your server through SSH and log in as root.


Step 3 :

Change directory to /usr/local/src by using the following command : 

cd /usr/local/src


Step 4 :

Get the source code for mod_cloudflare by using the following command :

wget –no-check-certificate https://raw.github.com/cloudflare/mod_cloudflare/master/mod_cloudflare.c CloudFlare-Tools/master/mod_cloudflare.c


Step 5 :

Build and install mod_cloudflare by using Apache Extension Tool by using the following command : 

apxs -a -i -c mod_cloudflare.c


Step 6 :

Restart the Apache Server daemon by using the following command : 

service httpd restart


Step 7 :

Update the Apache configuration data by using the following command : 

/usr/local/cpanel/bin/apache_conf_distiller –update


Step 8 :

Confirm the module is loaded properly by using the following command : 

httpd -M | grep cloud

cloudflare
.
.
.
.
.

Now,

Apache will log the visitors’ IP addresses instead of the CloudFlare IP’s.


Cheap web Hosting


1 2 3 4