
Activate Varnish Cache Server on Centos Web Panel.
- First, install CWP on your server.
- Do some basic configuration tasks.
- Login to CWP admin page as root or as user with root privilege via:
http://ip-address:2030
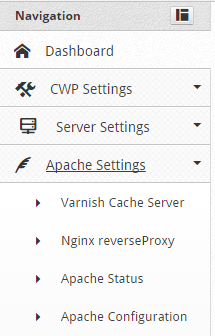
Step 1 – Go to Apache Settings then Varnish Cache Server.

Step 2 – You’ll then see a message saying that ***Varnish not installed. Now click on the blue Install Varnish button.

Once you Click on Install Varnish you can see all the Install Process :
Preparing...                ##################################################
varnish-release             ##################################################
Loaded plugins: fastestmirror
Loading mirror speeds from cached hostfile
 * base: mirror1.babylon.network
 * extras: mirror1.babylon.network
 * rpmforge: www.mirrorservice.org
 * updates: mirror1.babylon.network
Setting up Install Process
Resolving Dependencies
--> Running transaction check
---> Package varnish.x86_64 0:3.0.7-1.el6 will be installed
--> Processing Dependency: varnish-libs = 3.0.7-1.el6 for package: varnish-3.0.7-1.el6.x86_64
--> Processing Dependency: libvarnishapi.so.1(LIBVARNISHAPI_1.0)(64bit) for package: varnish-3.0.7-1.el6.x86_64
--> Processing Dependency: libvarnishapi.so.1()(64bit) for package: varnish-3.0.7-1.el6.x86_64
--> Running transaction check
---> Package varnish-libs.x86_64 0:3.0.7-1.el6 will be installed
--> Finished Dependency Resolution

Dependencies Resolved

================================================================================
 Package             Arch          Version             Repository          Size
================================================================================
Installing:
 varnish             x86_64        3.0.7-1.el6         varnish-3.0        445 k
Installing for dependencies:
 varnish-libs        x86_64        3.0.7-1.el6         varnish-3.0         42 k

Transaction Summary
================================================================================
Install       2 Package(s)

Total download size: 487 k
Installed size: 1.2 M
Downloading Packages:
--------------------------------------------------------------------------------
Total                                           1.1 MB/s | 487 kB     00:00
Running rpm_check_debug
Running Transaction Test
Transaction Test Succeeded
Running Transaction

  Installing : varnish-libs-3.0.7-1.el6.x86_64                              1/2

  Installing : varnish-3.0.7-1.el6.x86_64                                   2/2

  Verifying  : varnish-libs-3.0.7-1.el6.x86_64                              1/2

  Verifying  : varnish-3.0.7-1.el6.x86_64                                   2/2

Installed:
  varnish.x86_64 0:3.0.7-1.el6

Dependency Installed:
  varnish-libs.x86_64 0:3.0.7-1.el6

Complete!
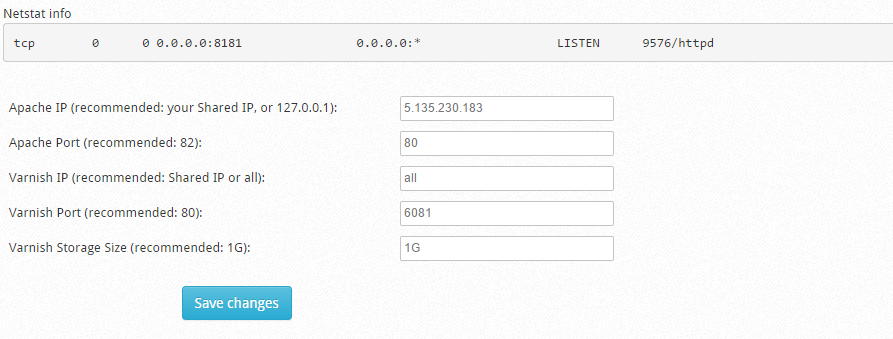
Step 3 – Make few changes in configuration so Varnish can run properly. By default, the configuration is set as following:

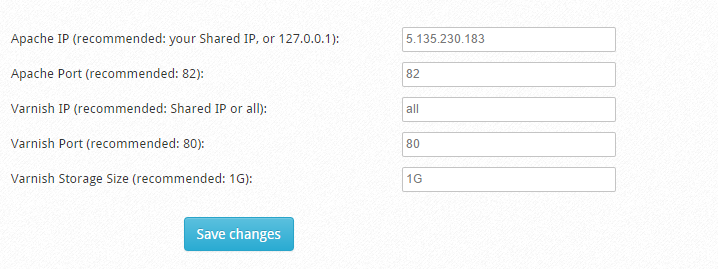
Now scroll down and you can see the options to Adjust the values :

Edit all the values as recommended . Also you can see that Varnish Storage Size recommendation is 1 GB . Make sure you have more than 1 GB RAM on your Server. If you have 1 GB RAM then you can set it to 256MB or 512 MB. In my case I will set it as 1GB as i have 5 GB ram on the server.

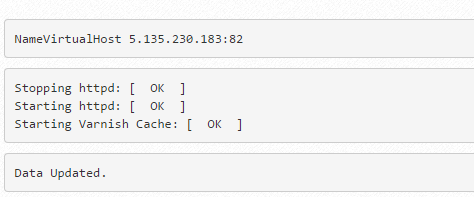
Click on Save Changes . You can see the message Data Updated.

This means CentOs Web Panel has updated all Virtual Host entries adjusting its port to 82 (Apache).


